/filters:background_color(white)/2023-12/BD-SL-iMX6_New.png)
/filters:background_color(white)/2024-10/Nitrogen6_MAX-e1550281424511.png)
/filters:background_color(white)/2024-10/Nitrogen6_SoloX-e1550281599325.png)
/filters:background_color(white)/2024-10/Nitrogen6X-e1550281048735-2.png)
So it's about time we posted a Fido image. For the impatient, here are two image files:
- For Nitrogen6X, BD-SL-i.MX6 (SABRE Lite), and Nitrogen6_Max boards: core-image-sato-dev-nitrogen6x.sdcard.gz
- For Nitrogen6_Lite boards: core-image-sato-dev-nitrogen6x-lite.sdcard.gz
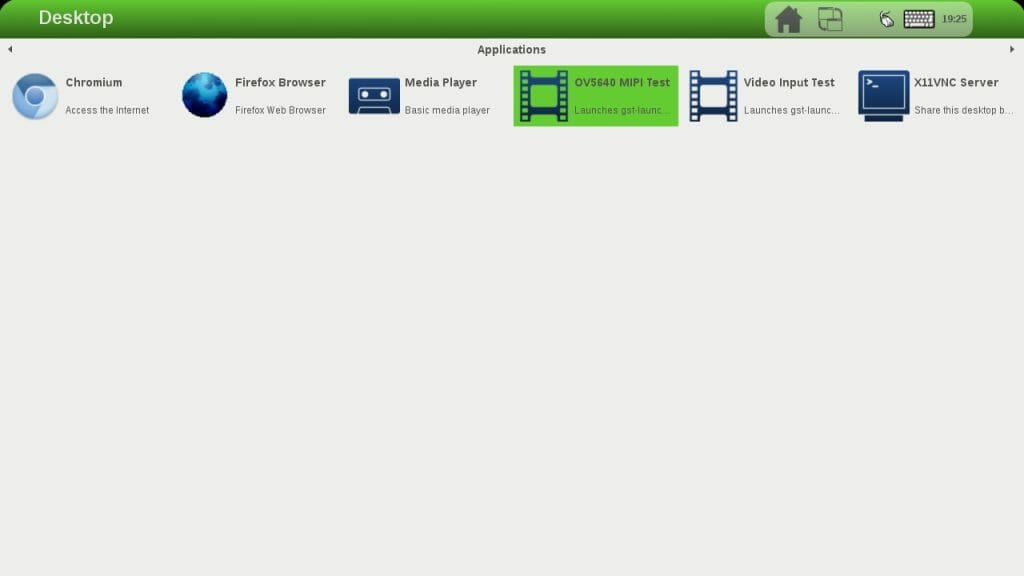
These images are core-image-sato-dev with gstreamer, gpu tools, and gstreamer plugins. Also added in is a simple desktop icon launcher to test video input from cameras or our HDMI input daughterboard. To burn the image file to a sdcard, run this command assuming your sdcard is mounted on /dev/sdc
sudo umount /dev/sdc*
zcat core-image-sato-dev-nitrogen6x.sdcard.gz | sudo dd of=/dev/sdc bs=1M~$ mkdir ~/bd-yocto
~$ cd ~/bd-yocto
~/bd-yocto$ repo init -u https://www.github.com/Freescale/fsl-community-bsp-platform -b fido
~/bd-yocto$ repo sync
~/bd-yocto$ tar xf ~/Downloads/meta-boundary-example.tgz -C sources/
~/bd-yocto$ tar xf ~/Downloads/meta-browser.tgz -C sources/
~/bd-yocto$ MACHINE=nitrogen6x . setup-environment sato-dev
~/bd-yocto/sato-dev$ cp ~/Downloads/fido-nitrogen6x-local.conf conf/local.conf
~/bd-yocto/sato-dev$ cp ~/Downloads/fido-bblayers.conf conf/bblayers.conf
~/bd-yocto/sato-dev$ bitbake core-image-sato-devHit any key to stop autoboot: 0
U-Boot > setenv dtbname imx6q-nitrogen6x-hdmi-input.dtb
U-Boot > saveenv
Saving Environment to SPI Flash...
SF: Detected SST25VF016B with page size 256 Bytes, erase size 4 KiB, total 2 MiB
Erasing SPI flash...Writing to SPI flash...done
U-Boot > reset