/filters:background_color(white)/2023-12/BD-SL-iMX6_New.png)
/filters:background_color(white)/2024-10/Nitrogen6_MAX-e1550281424511.png)
/filters:background_color(white)/2024-10/Nitrogen6X-e1550281048735-2.png)
![]() Since our Linaro Raring release in December of last year, we've been publicly quiet about updated images, but working hard in the background to make the next release(s) more full-featured and more maintainable. As the first public release of these efforts, we just uploaded an Ubuntu-based LXDE image for our BD-SL-i.MX6, Nitrogen6x, and for the first time, our new Nitrogen6 Max board.
Since our Linaro Raring release in December of last year, we've been publicly quiet about updated images, but working hard in the background to make the next release(s) more full-featured and more maintainable. As the first public release of these efforts, we just uploaded an Ubuntu-based LXDE image for our BD-SL-i.MX6, Nitrogen6x, and for the first time, our new Nitrogen6 Max board.
For the impatient
This image contains Freescale-licensed content, so you will need to register on our web-site and log in before you can accept the license agreement and download the image from here:
2014-07-30: N.B.: We updated this image from the original 20140727 version.
See this comment below for details.
Programming the image
The image is a slightly-less-than-4GiB image file containing the partition table, so you can copy it to an SD card or SATA drive on /dev/sdc using zcat and dd like so:
~/Downloads$ sudo umount /dev/sdc*
~/Downloads$ zcat 20140729-nitrogen*.img.gz | sudo dd of=/dev/sdc bs=1M
~/Downloads$ syncSource code access
The kernel image is based on the boundary-imx_3.10.17_1.0.0_ga branch of our Github kernel repository using nitrogen6x_defconfig. Sources for other components are available using apt-get-source on the running machine.
Highlights
- Based on Ubuntu 14.04.1 (Trusty Tahr) release, which is a long-term-support version, so it will have a three year life span.
- Based on LXDE - The "Lightweight X11 Desktop Environment" (as was the previous Raring image).
- Has a fully GPU-accelerated X-Windows stack.
- Includes accelerated gstreamer plugins for video encode and decode.
- Includes support for simultaneous access to both our 5 mega-pixel OV5640 MIPI and OV5642 parallel (CSI) cameras in the same kernel image.
- Includes a packaged kernel, so you can use
apt-getto upgrade without worries about breaking things. - Boots to a RAM disk (
/initrd.img) instead of directly to the rootfs. - Boots to a
zImagein normal Ubuntu fashion. - Includes all components needed for Wi-Fi, Bluetooth, and CAN bus access (including
can-utils). - Includes the Onboard on screen keyboard to allow use without a physical keyboard (i.e. with just a touch screen).
In short, this is simply a better version of Ubuntu for our boards than previous releases. Please try it out when you get a chance and provide some feedback. We will be following this release with additional images to include Wayland support, and support for the Unity Desktop (among other things).
Having the kernel and other components properly packaged will make it much easier for us to manage, and for you to work with this operating system.
The following sections will provide some details about the features of the image, and especially how they can be used to test the functionality of our boards.
Display setup
The boot script in this image is very close to the reference boot script in our U-Boot tree, except that it loads vmlinuz instead of uImage and also loads a RAM disk (/initrd.img) as the first-level root filesystem.
It supports automatic detection of all of our displays except the 1280x800 panels (discussed in this post).
The Nitrogen6 Max board has two LVDS channels, and the connector on the bottom of the board is the primary. Refer to this section of our post about Android Jellybean for details. In short, you will need a customized boot script in order to support multiple LVDS panels.
To support a dual-channel LVDS panel at 1080P (a high-resolution display), you can set the panel variable in U-Boot:
U-Boot > setenv panel 1080P
U-Boot > saveenv && reset
Usernames and passwords
Two users are defined for use on the system: ubuntu and root. The password for each is Boundary (with a Capital B).
An ssh server is configured on the system, though it does not allow password-based authentication for user root.
User ubuntu has sudo privileges, so you can place your ssh public key (normally $HOME/.ssh/id_rsa.pub) to the system like so:
ubuntu@nitrogen:~$ sudo mkdir /root/.ssh
[sudo] password for ubuntu:
ubuntu@nitrogen:~$ sudo nano /root/.ssh/authorized_keys
... paste content of $HOME/.ssh/id_rsa.pub here
ubuntu@nitrogen:~$ sudo chmod 600 /root/.ssh/auth*
ubuntu@nitrogen:~$ sudo chmod 600 /root/.ssh/
Desktop shortcuts
Once you've connected your displays and boot the image, you'll see four icons on the desktop:
- A link to the Ezurio (formerly Boundary Devices) web-site,
- The
glmark2OpenGL benchmark program, - One of the Vivante GPU demonstration programs, and
- A video link that will play Tears of Steel at full 1080P resolution over the Internet
These are provided to make it easy for you (and us) to validate operation of the GPU and VPU components. The details of what they run can be found in /home/ubuntu/Desktop/*.desktop.
Programming the eMMC on Nitrogen6 Max
In an earlier post, we provided a customized kernel and RAM disk that turned our BD-SL-i.MX6 or Nitrogen6X boards into a very expensive SD card reader by using the g_mass_storage gadget.
This release extends that to support the Nitrogen6 Max board, and also updates the boot script to invoke this automatically if the Volume Down key on our Android button board is pressed during boot.
If you don't have an Android button board, you can short pins 7 and 8 of J14 with a paper clip (these pins are Volume down and Ground respectively).
Note that this feature is not specific to eMMC or to the Nitrogen6 Max board. It is also very handy for loading SATA drives or even SD cards.
The /init script in the RAM disk walks through and exposes each block device found on the system, making it available over the USB OTG port.
The two files involved (uImage-recovery and uramdisk-recovery.img) can also be copied to a TFTP server and loaded by U-Boot using the usbrecover command as described in the release notes for U-Boot 2014.04.
If you're just getting started, we placed an updated USB writer image with support for Nitrogen6 Max here:
If you extract it to a single-partition SD card (FAT or ext2/3/4), you can quickly get access to the eMMC drive through the USB OTG port.
USB On-the-go (OTG) port
The kernel image in this release includes support for the g_ether device driver, and is configured with the mac and IP addresses described in the U-Boot usbrecover notes, so if you configure a PC with a static IP address of 10.0.0.1/255.255.255.0, you'll have very simple access to the board without involving a router or DHCP server.
WiFi setup
 The
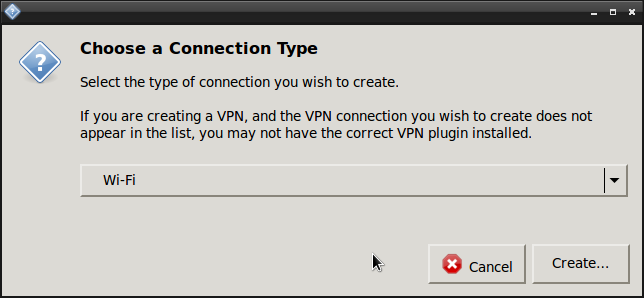
The LXDE image contains support for WiFi, though it isn't the most user-friendly interface.
In particular, you will need to add a WiFi connection using Preferences|Network Connections.
Bluetooth testing
Bluetooth support is also present in this image, but it is very rudimentary. We've only tested with command-line utilities as follows:
root@nitrogen:~# rfkill block bluetooth
root@nitrogen:~# rfkill unblock bluetooth
root@nitrogen:~# hciattach -t 30 /dev/ttymxc2 texas 115200 flow
root@nitrogen:~# hciconfig  hci0 up
root@nitrogen:~# hcitool scan
... nearby devices listed here
CAN bus testing
With the included can-utils programs, you can configure and test the CAN bus by looping back two of our devices and using cansend and candump like so:
root@nitrogen:~# ip link set can0 up type can bitrate 125000
root@nitrogen:~# candump can0 &
root@nitrogen:~# cansend can0 5A1#11.22.33.44.55.66.77.88
  can0  5A1   [8]  11 22 33 44 55 66 77 88
RS-232/RS-485
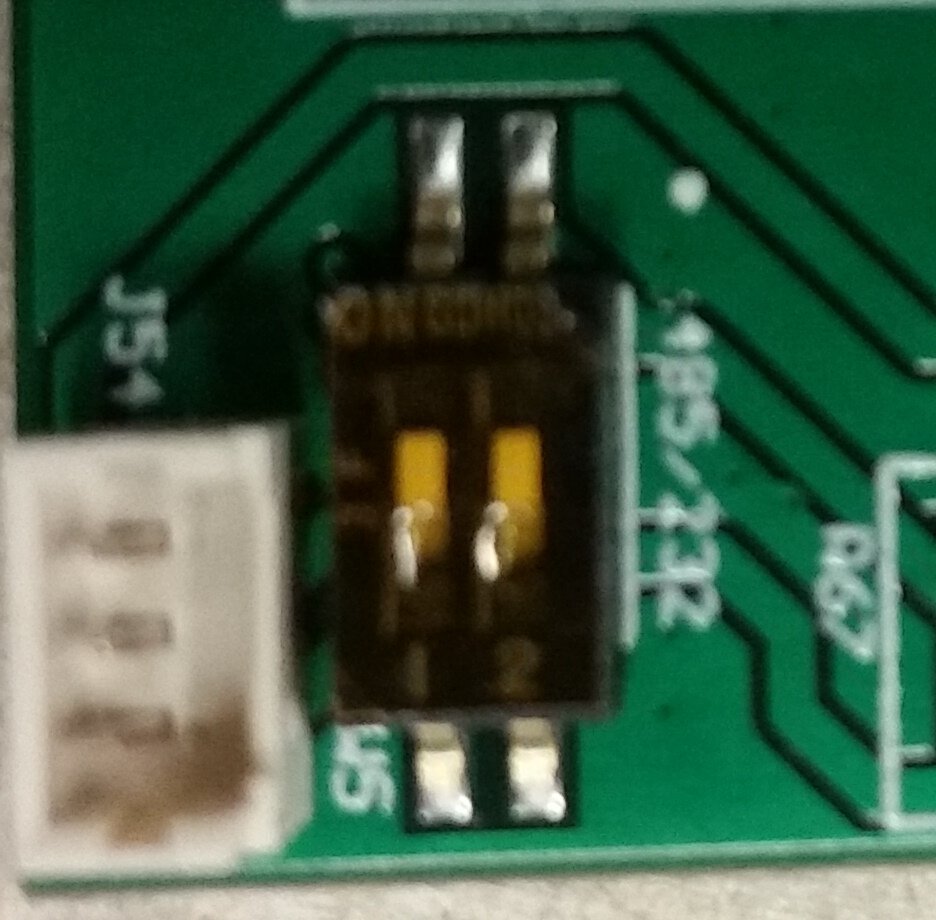 The Nitrogen6 Max board has a third serial port, which is software-selectable to support either RS-232 or RS-485 signalling. It is connected to
 UART5 on the processor, and exposed as /dev/ttymxc4 under Linux.By default, the port is configured for RS-232. In order to configure it for RS-485, you can write to an entry in sysfs:
root@nitrogen:/ # echo 1 > /sys/devices/platform/imx-uart.4/rs485_enSW5 to enable a termination resistor. There are silk screen labels showing the positions, and RS-485 means terminated as shown in the photo.Note that this image does not include a terminal emulator, but since it's Ubuntu, you're only one command-line away:
root@nitrogen:~# apt-get install microcom
Reading package lists... Done
Building dependency tree
Reading state information... Done
The following NEW packages will be installed:
  microcom
0 upgraded, 1 newly installed, 0 to remove and 0 not upgraded.
Need to get 13.9 kB of archives.
After this operation, 64.5 kB of additional disk space will be used.
Get:1 https://ports.ubuntu.com/ubuntu-ports/ trusty/universe microcom armhf 2012.06.0-3ubuntu1 [13.9 kB]
Fetched 13.9 kB in 0s (28.7 kB/s)
Selecting previously unselected package microcom.
(Reading database ... 104564 files and directories currently installed.)
Preparing to unpack .../microcom_2012.06.0-3ubuntu1_armhf.deb ...
Unpacking microcom (2012.06.0-3ubuntu1) ...
Processing triggers for man-db (2.6.7.1-1) ...
Setting up microcom (2012.06.0-3ubuntu1) ...
root@nitrogen:~# microcom -s 115200 -p /dev/ttymxc4
Camera testing
Because this image contains support for multiple cameras you'll need to pass the device=/dev/video# command-parameter to mfw_v4lsrc. Use /dev/video0 to refer to the OV5642 (parallel CSI) camera:
root@nitrogen: ~/$ gst-launch mfw_v4lsrc device=/dev/video0
! mfw_v4lsink disp-width=640 disp-height=480/dev/video2 to refer to the OV5640 (MIPI) camera: root@nitrogen: ~/$ gst-launch mfw_v4lsrc device=/dev/video2
! mfw_v4lsink disp-width=640 disp-height=480Onboard on screen keyboard
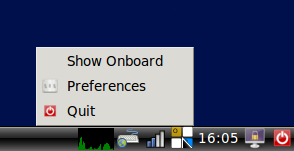
An icon on the task-bar can be used to enable and configure the on screen keyboard.