/filters:background_color(white)/2025-08/Vela%20IF310-MHF4%20%28453-00391%29%20front.584.png)
Introduction
This document covers development on the Vela IF310 using the HCI UART transport. It includes setup, firmware flashing, and basic BlueZ bring-up on Linux.
The hardware used for this example is the Vela IF310 DVK, available in the following variants:
- 453-00390-K1 — Integrated Ignion antenna
- 453-00391-K1 — MHF4 connector for external antenna
Requirements / Demo Environment
Vela IF310 DVK
- 453-00390-K1 — integrated Ignion antenna, or
- 453-00391-K1 — MHF4 connector for external antenna
Linux OS
- Example with Ubuntu 24.04.4 LTS
BlueZ
- Example used in this document: BlueZ 5.72
Vela IF310 HCI UART firmware (download)
- HCD: Loaded by the host during bring-up, stored in RAM, and must be reloaded after each reset or power cycle
- HEX: Programmed into external flash and retained across reset or power cycle.
HEX Firmware option ONLY works on the DVK or a system that includes external flash. External flash is NOT included on the module.
- Python 3 and pip installed
Verify Linux Environment and Requirements
Before flashing firmware or attempting bring-up of the Vela IF310, verify that the host system environment is correctly configured. This helps avoid common issues related to permissions, tooling, and device access.
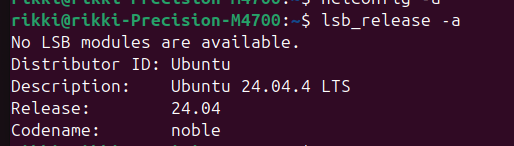
Verify Linux Distribution and Version
Run the following command:
lsb_release -aExample output:
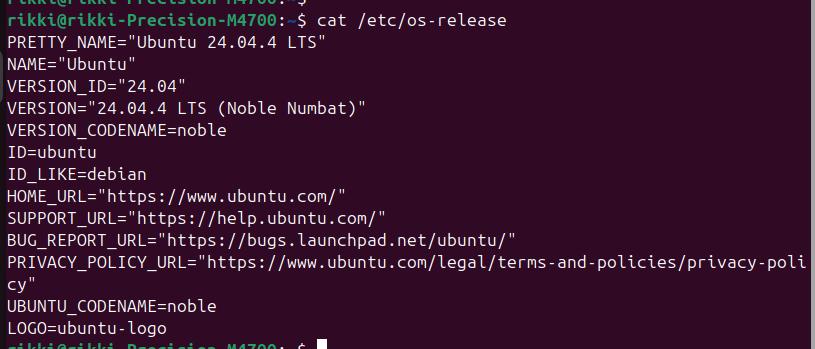
As an alternative, the Linux OS version can also be checked with:
cat /etc/os-releaseExample output:
Verify the BlueZ Version
Run the following command:
bluetoothctl --versionExample output:

Notes:
- BlueZ 5.6x or newer is recommended
- The test system used in this document was Ubuntu 24.04.4 LTS with BlueZ 5.72
hciconfigis deprecated in newer BlueZ versions- Use
btmgmtandbluetoothctlfor Bluetooth management and validation
Install Python 3, pip and Virtual Environment Support
Run the following command to install Python 3, pip, and virtual environment support.
sudo apt update
sudo apt install -y python3 Python 3-pip python3-venv
Install IFX Flasher Tool & Python Dependencies
The IFX Flasher tool is used to program HCD and HEX firmware images to the Vela IF310.
Run the following command to clone the ifx_flasher repository
git clone --recurse-submodules https://github.com/Ezurio/ifx_flasher.git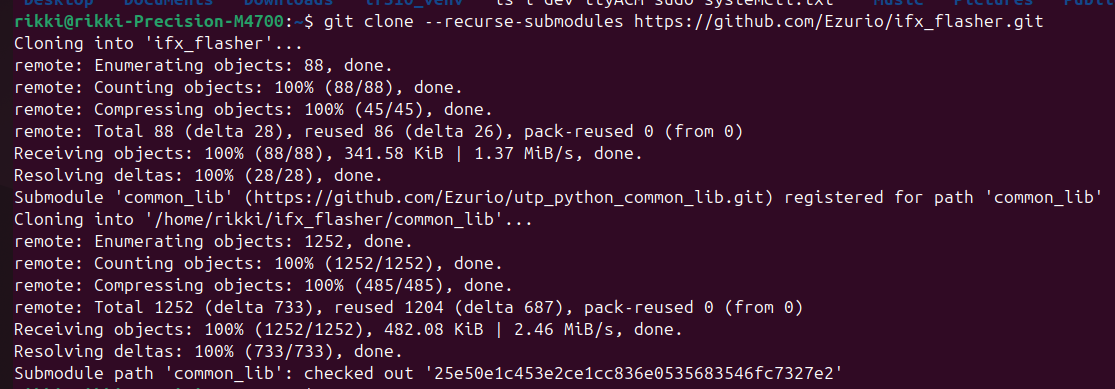
Change to the ifx_flasher directory
cd ifx_flasherCreate & Activate the Virtual Environment
python3 -m venv .venv
source .venv/bin/activate(.venv).Example Output:

Verify that Python is coming from the Virtual Environment
Run the following commands to verify that Python is coming from the virtual environment:
which python3
which pip
python3 --versionifx_flasher/.venv/bin/):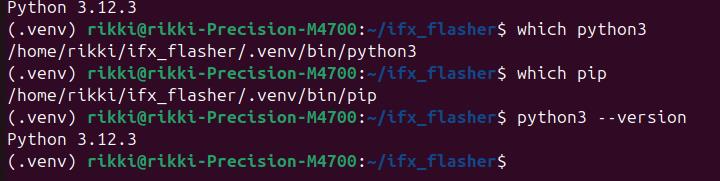
Install the dependencies
Run the following command in the virtual environment to install the dependencies:
pip install -r requirements.txtThis installs the Python dependencies required by the IFX Flasher tool, including pyOCD.
Expected Output (trimmed content):
Collecting pyocd==0.42.0
Collecting pyinstaller==6.18.0
Installing collected packages: intelhex, hci, pyinstaller-hooks-contrib, pyinstaller, pyocd
Successfully installed hci-0.0.8 intelhex-2.3.0 pyinstaller-6.18.0 pyinstaller-hooks-contrib-2026.4 pyocd-0.42.0
Attach the Vela IF310 DVK and Verify the Debug Probe is Detected
Ensure the Vela IF310 DVK has the board configured with the default settings as shown below:
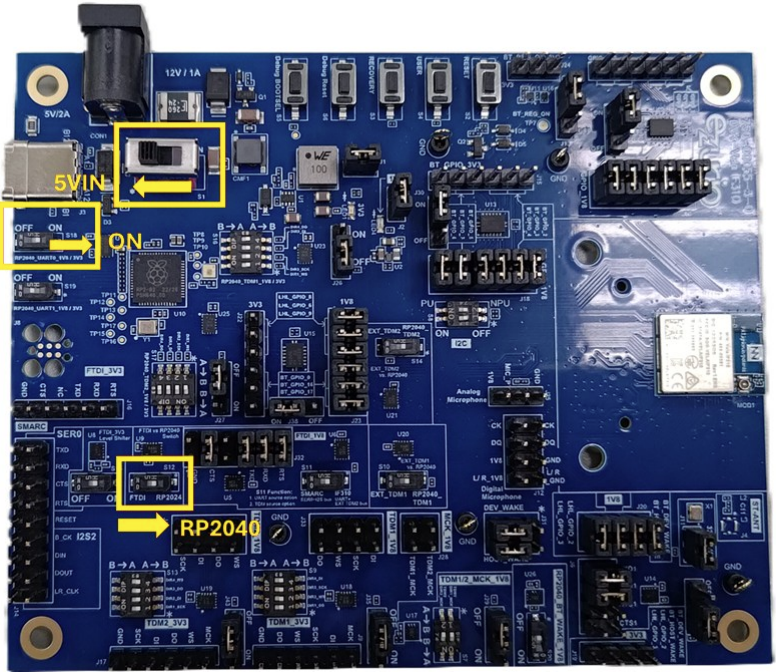
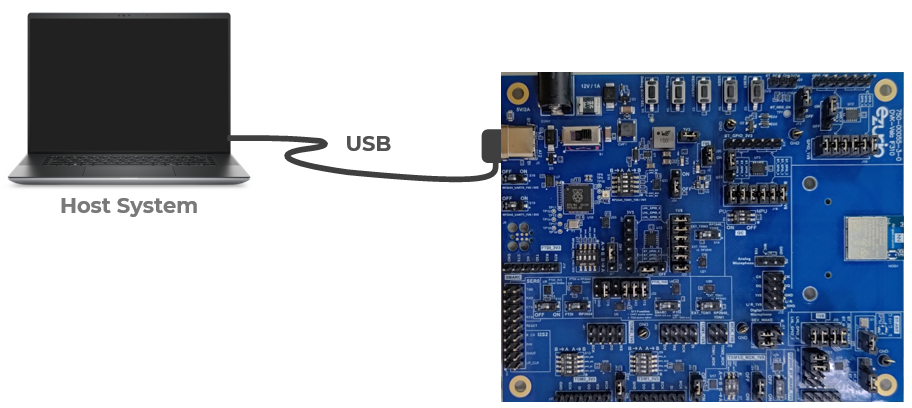
Attach the Vela IF310 DVK to a USB port on the host system
Verify the HCI UART Interface
After connecting the Vela IF310 DVK to the host system, verify that the HCI UART interface is present by running the following command:
ls /dev/ttyACM*/dev/ttyACM0)/dev/ttyACM0 /devttyACM1This confirms that the IF310 DVK has enumerated as a serial device that can be used for HCI UART operation.
/dev/ttyACM0 (HCI-UART) and /dev/ttyACM1(P-UART). Verify the Debug Probe is Connected and Accessible
Run the following command to verify that the debug probe is connected
pyocd listExample output:

pyocd command does not work, refer to the Troubleshooting section. Flashing the Vela IF310 HCI UART Firmware
The Vela IF310 firmware can be programmed over the HCI UART using the Ezurio IFX Flasher tool.
-f parameter must include the correct path to the selected firmware image. In the cloned ifx_flasher repository, the Vela IF310 firmware files are located in files/if310/firmware/. Example: Flashing the HCD File
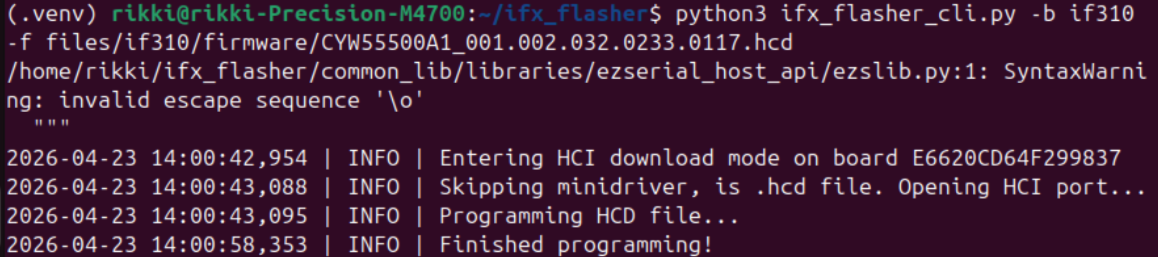
The HCD file is downloaded to the device at runtime and stored in RAM. It must be reloaded after each reset or power cycle.
python3 ifx_flasher_cli.py -b if310 -f files/if310/firmware/CYW55500A1_001.002.032.0233.0117.hcdExample Output:
Example: Flashing the HEX File
The HEX file is programmed into external flash and retained after reset or power cycle.
python3 ifx_flasher_cli.py -b if310 -f files/if310/firmware/CYW55500A1_001.002.032.0233.0117.hexExample Output:

Attaching the Vela IF310 Controller
After the HCD or HEX firmware has been loaded, attach the Vela IF310 to the Linux Bluetooth stack usingbtattach.Run the following command:
sudo btattach -B /dev/ttyACM0 -P h4 -S 115200Command Parameters
-B— attaches the device as a primary Bluetooth controller-P h4— selects the HCI H4 UART transport protocol-S 115200— sets the UART baud rate to 115200
Important Notes
- The
btattachprocess must remain running for the controller to stay attached. - If the process is stopped, the controller will be detached from the system.
- This command should be run after the firmware has been loaded and the device is available at
/dev/ttyACM0. - To continue with
btattachstill running, open another terminal window or use the optional steps below to movebtattachto the background.
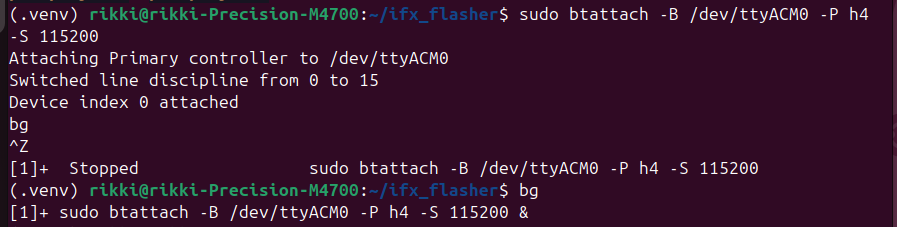
Move btattach to the Background (Optional)
If desired, after the controller is successfully attached, the process can be moved to the background so the terminal can be reused.
Press Ctrl+Z, rhen run:
bgbtattach to continue running in the background while freeing the terminal for the next steps.btattach directly in the background using & when invoking it with sudo. If sudo needs to prompt for a password, the prompt cannot be handled correctly while the command is running in the background. Run it in the foreground first, then move it to the background using Ctrl+Z and bg if needed, or open a second terminal window. Example output:
 At this point, the Vela IF310 should be attached to the Linux Bluetooth stack and exposed as an HCI device (
hci0).Verifying Controller Attachment
Run the following command to verify that the controller is attached:
btmgmt infoExpected output:
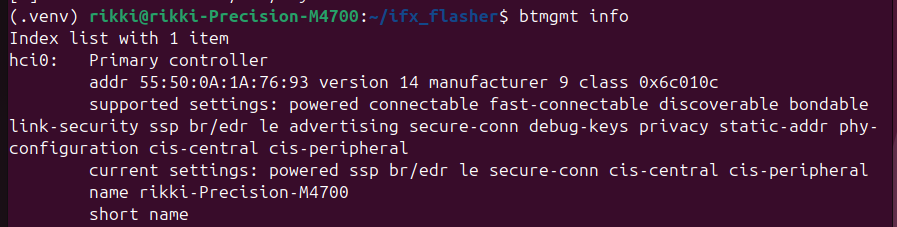 The presence of
 hci0 confirms that the controller has been successfully attached and is available to the Linux Bluetooth stack.Scanning for Nearby Bluetooth Devices
After the Vela IF310 controller is attached, usebluetoothctl to scan for nearby Bluetooth devices.Start bluetoothctl
bluetoothctlEnable the Controller (if required)
At the prompt, run:
power onStart Scanning
scan onNearby Bluetooth Classic (BR/EDR) and Bluetooth Low Energy (LE) devices should begin appearing in the terminal.
Stop Scanning
scan offExit bluetoothctl:
exitExample output (scan output will vary depending on nearby devices):

Detaching the Vela IF310 Controller
Before unplugging the Vela IF310 DVK, the controller should be detached cleanly from the Linux Bluetooth stack.
The Vela IF310 remains attached as long as thebtattach process is running.Stop the btattach Process
Ifbtattach is running in the foreground, press:Ctrl+Cbtattach was moved to the background, bring it back to the foreground:fgThen stop it:
Ctrl+CAlternatively, the process can be stopped from any terminal:
sudo pkill btattachRun the following command to verify the Controller is Detached
btmgmt infoExpected output:

This confirms that:
- the HCI device has been removed
- the UART interface is released
- the controller is no longer attached
Safe to Unplug
Once no controllers are present, it is safe to unplug the Vela IF310 DVK.
btattach process before unplugging the Vela IF310 DVK to ensure a clean shutdown. Troubleshooting
pyocd command returns “No such file or directory”
Ifpyocd installs successfully but the pyocd command returns “No such file or directory”:Example:
 This issue may occur if a previous
 pyocd installation existed in a different location and the shell is still referencing the old path.Run the following commands to clear the command cache and verify the installation:
hash -r
python3 -m pyocd --version
pyocd command returns “command not found”
Ifpyocd command returns “command not found” after installation: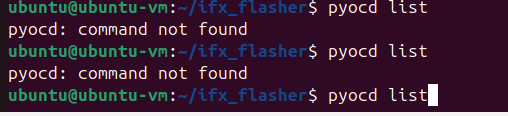
This issue is more common on virtual machines or fresh Linux installations where the user’s local bin directory is not included in the default PATH.
Verify that the installation completed successfully and that the executable is available in the system path by running the following:
python3 -m pyocd --versionpyocd is installed correctly but not available in the shell path.Check that ~/.local/bin is included in the PATH:echo $PATHIf it is not present, add it temporarily:
export PATH="$HOME/.local/bin:$PATH"Then run:
pyocd listAdditional BlueZ Information
For more information on available BlueZ commands and options, use the built-in help features or refer to the official BlueZ documentation.
View Command Help
btattach --help
btmgmt --help
bluetoothctl --help
Interactive Help (bluetoothctl)
Withinbluetoothctl, type:helpThis will display available commands and options.
BlueZ Documentation
For more detailed information, refer to the official BlueZ resources: