/filters:background_color(white)/2024-06/BL54L10-Group.png)
/filters:background_color(white)/2024-01/BL54L15-Group.png)
/filters:background_color(white)/2024-06/BL54L15ug_SA%20and%20ST-right11.363.png)
Introduction
This guide is intended for developers who want to develop BL54 Series applications using tools freely available from Nordic and VS Code. Note that the steps and utilities used in this Guide are subject to change. Please reference Nordic’s Documentation on nRF Connect for Visual Studio Code or Nordic’s Dev Academy - nRF Connect SDK Fundamentals online tutorials for updates and changes.
In this exercise, we will program a simple application based on the blinky sample to toggle an LED on the BL54 series DVK.
Requirements
BL54Lxx Series Development Kit
| Product | Part |
|---|---|
| BL54L15 (Trace Antenna) | 453-00001-K1 |
| BL54L15 (MHF4 Connector for Ext Antenna) | 453-00044-K1 |
| BL54L15u (Chip Antenna) | 453-00223-K1 |
| BL54L15u (RF Trace Pin for Ext Antenna) | 453-00224-K1 |
Note: There is not a DVK for the BL54L10 - for development purposes use the BL54L15 DVK.
SEGGER J-Link (v8.42 or newer)
Visual Studio Code (VS Code) w/nRF Connect Extension Pack(v1.103.0 or newer)
Development Environment Setup - Install the tools
Install SEGGER J-Link v8.42
Download the installer for your platform from SEGGER J-Link Software.
Run the installer; when you reach the ‘Choose Optional Components’ window during installation, be sure to select ‘Install Legacy USB Driver for J-Link’
Note: This driver is necessary for some supported Development Kits
Install nRF Util and the nrfutil device command
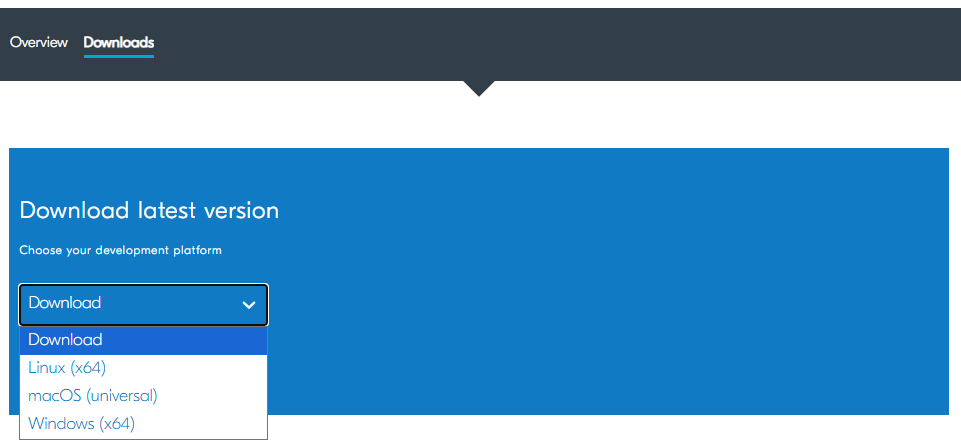
Navigate to nRF Util
Select the Downloads tab.
Download the the binary compatible with your OS platform and store it in a known location on your disk drive for example C:\ncs\nrfutil.exe
Note: If you are running on macOS or Linux, you can store it in a folder that is already added in the system’s PATH (E.g.
/usr/bin/), so that you can skip step 4.
(Windows) Update your system’s
PATHto include the location wherenrfutilis stored. Open Edit environment variable for your account and add the path where you stored thenrfutilbinary.The nrfutil binary does not come with any pre-installed commands. In this step, we will upgrade the core nrfutil and download the nrfutil device command.
Open a cmd prompt or PowerShell Terminal (Run as Administrator) and run the following command. It doesn’t matter which terminal since
nrfutilhas been added to they System’s PATH.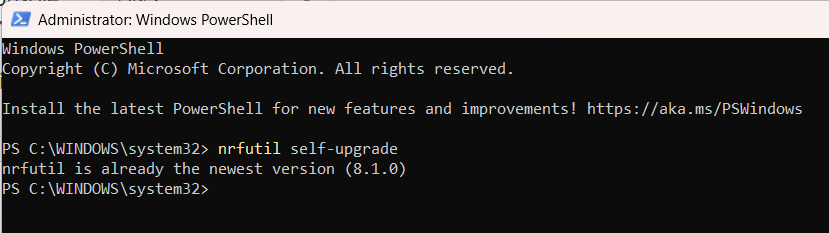
The nrfutil device command is used to flash binaries to Development Kits, so it must be installed. To install nrfutil device command run
nrfutil install devicein the same CMD prompt or PowerShell Terminal. (In the example shown below the nrfutil-device command had already been installed as seen in the output.)
Install Visual Studio Code (VS Code)
Navigate to https://code.visualstudio.com/download.
Install the version of VS Code that matches your OS (operating system) as per the installation wizard.
Install nRF Connect Extension Pack in VS Code
The nRF Connect for VS Code Extension Pack consists of the following components which will be installed when nRF Connect for VS Code Extension Pack is installed:
nRF Connect for VS Code: The main extension contains an interface to the build system and nRF Connect SDK. It also provides an interface to manage nRF Connect SDK versions and toolchains.
nRF DeviceTree: Provides Devicetree language support and the Devicetree Visual Editor.
nRF Kconfig: Provides Kconfig language support.
nRF Terminal: A serial and RTT terminal.
C/C++ from Microsoft: Adds language support for C/C++, including features such as IntelliSense.
CMake: CMake language support.
GNU Linker Map Files: Linker map files support.
To Install:
Open VS Code and click on the Extensions Icon in the Activity Bar.
Type “nRF” in the search field to reduce the number of extensions displayed. Then locate the nRF Connect for VS Code Extension Packand click Install to Install the Extensions Pack.

Install the Toolchain
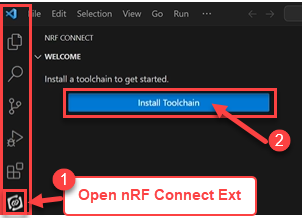
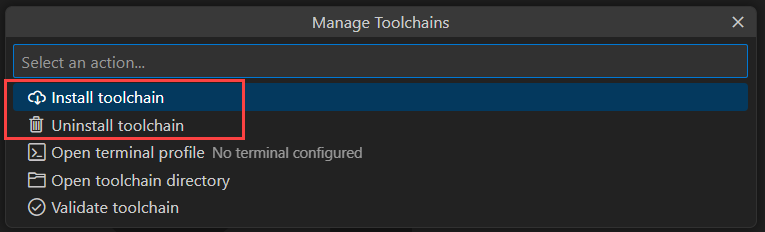
The toolchain can be managed (installed/uninstalled) using the nRF Connect Extension in VS Code. The first time you open the nRF for VS Code extension it will prompt you to install a toolchain (this happens when the extension does not find any installed toolchains on your machine.
Open the nRF Connect for VS Code Extension and when prompted, click Install Toolchain to install this dependency - this may take some time to install.
If you already have a toolchain installed you can manage the installed toolchains from the Welcome menu in the nRF Connect Extension Pack.
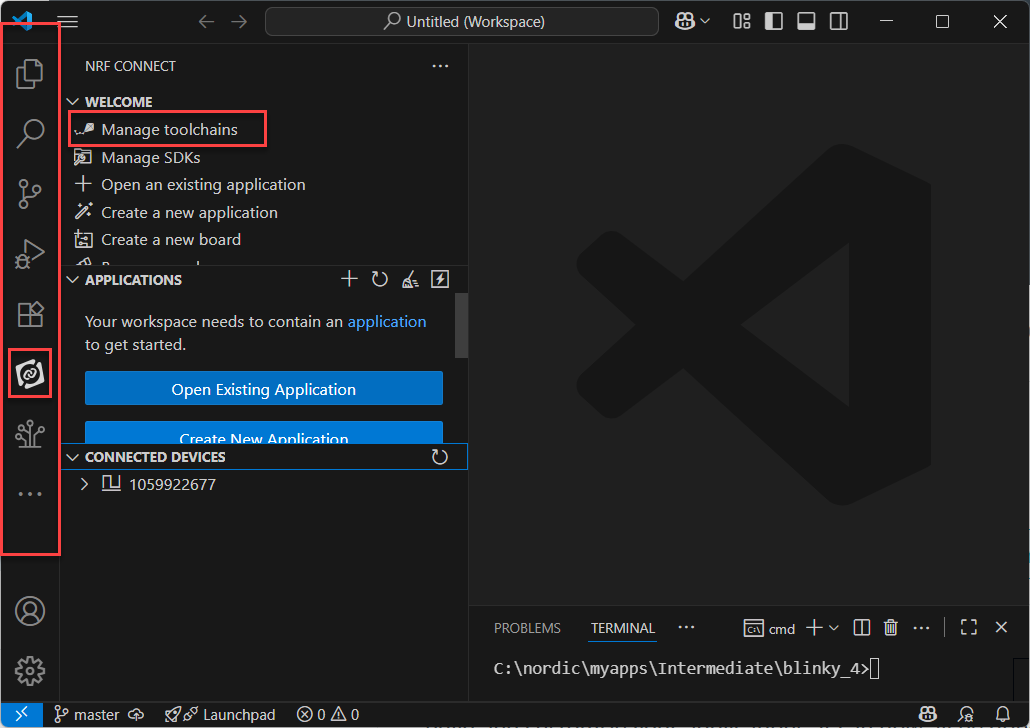
Note: By default, nRF Connect for VS Code displays only released tags (also known as stable versions) of toolchains. If you are evaluating new features and want to use a preview tag or a different type of tag (for example, customer sampling
-cs), click Show All Toolchain Versions.
Install nRF Connect SDK
In the Welcome menu click on Manage SDKs.
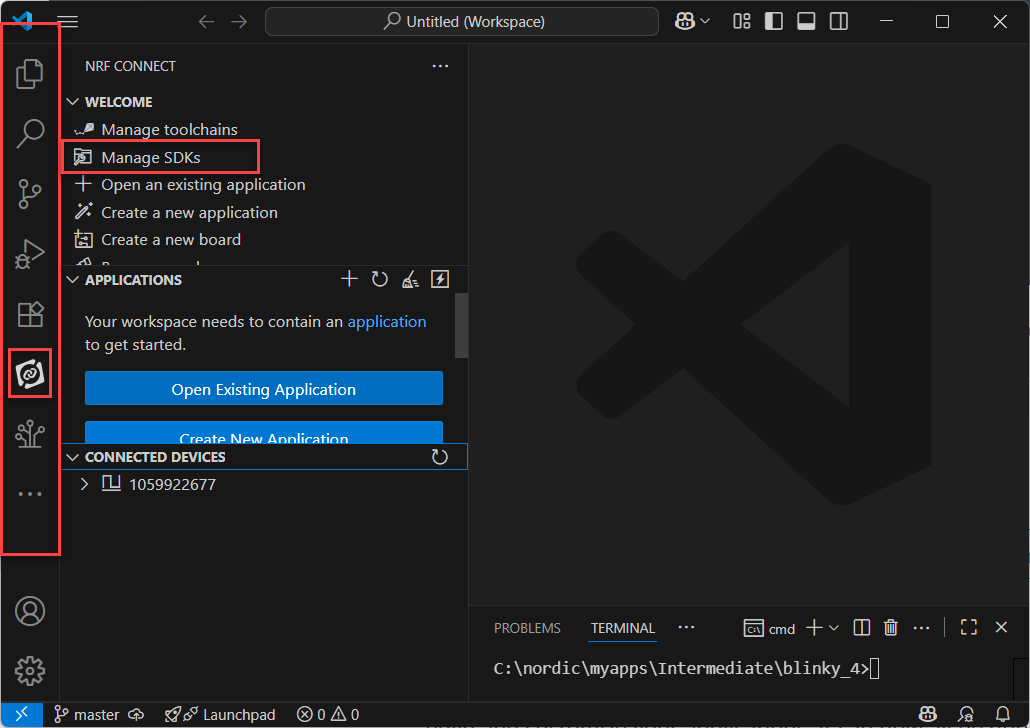
In the Manage SDKs menu, different nRF connect SDKs versions can be installed and uninstalled.
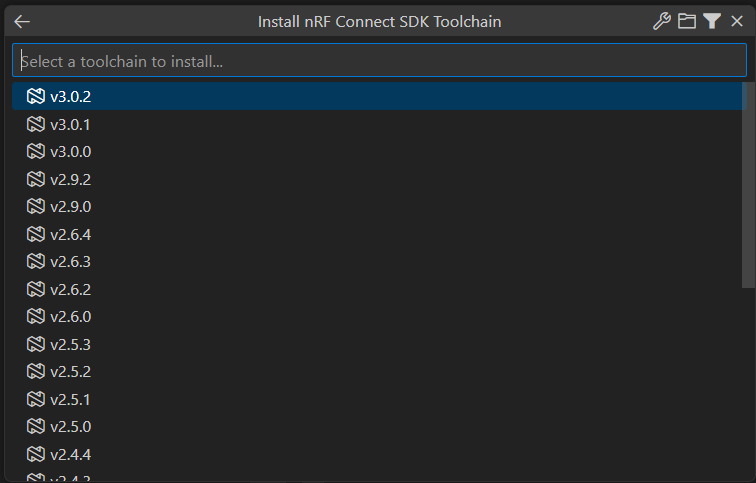
Click Install SDK to view a list of available SDK versions that can be installed.
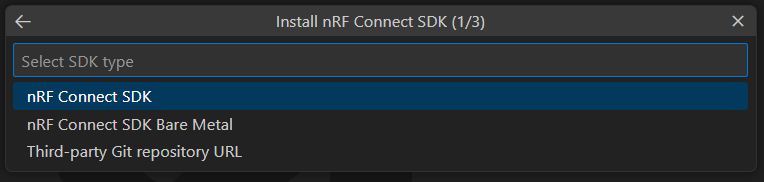
Select nRF Connect SDK from the next menu.
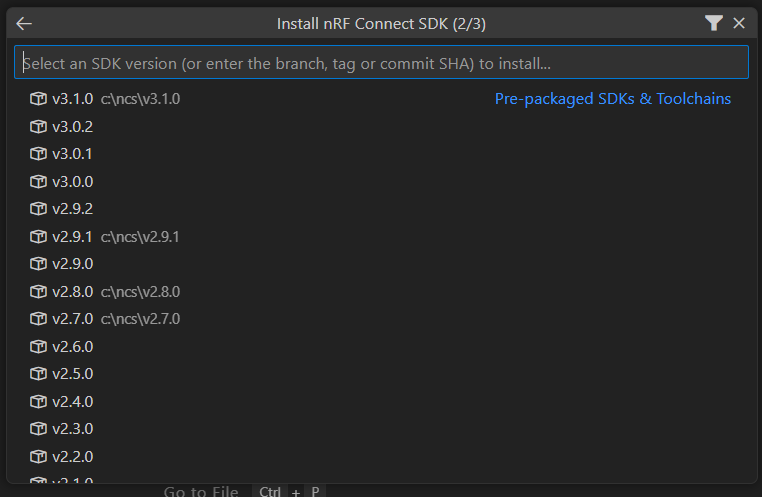
Select the version number for the nRF Connect SDK you want to install. We recommend always working with the most current release to get all the latest features and patches, which at the time of this writing was v3.1.0
Hardware Setup
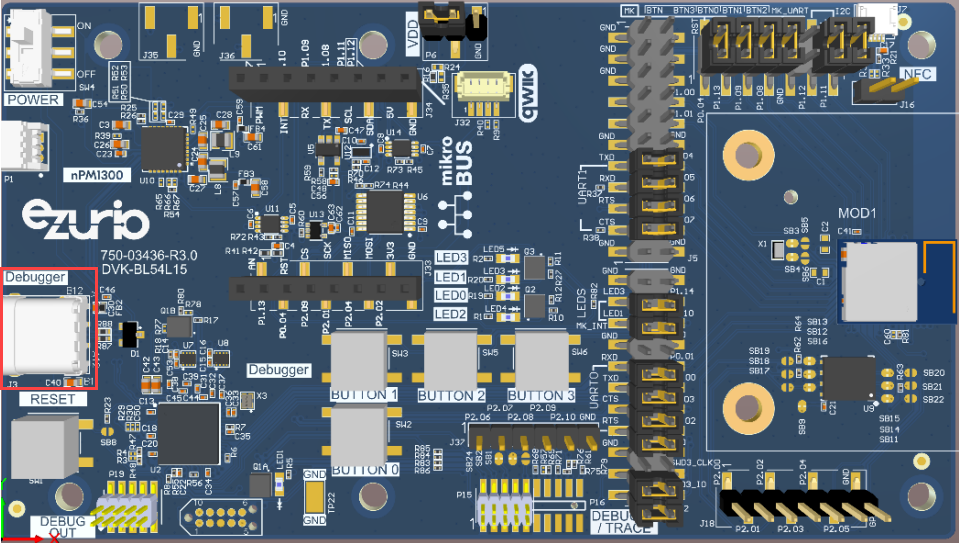
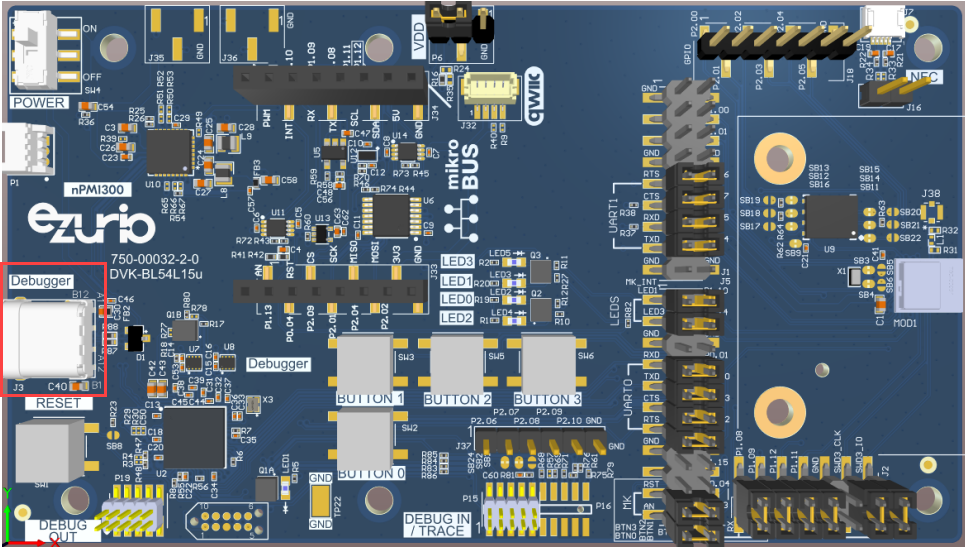
Configure DVK board to Default jumper and switch settings and Connect to PC using USB cable via J3 Debugger interface.
Verify the BL54L15/BL54L15u DVK board has all the jumpers in the default positions as per the DVK User Guide for the variant being used.
User Guide - BL54L15 Development Kit (BL54L10 and BL54L15)
User Guide - BL54L15u Development Kit (BL54L15u)
Build & Flash the Blinky sample application
In this exercise, we will program a simple application based on the blinky sample to toggle an LED on our board. To do this we will walk through how to do the following:
Create a new application based on a template (sample).
Build an application.
Flash an application to a board.
Create a folder in your root directory to hold applications
Create a folder close to your root directory. For example C:\nordic\myapps.
Note: Avoid storing applications in locations with long paths as this may result in the build system failing on some operating systems, especially Windows.
Note: Avoid using whitespaces and special characters in the path.
Create a new application based on a template (sample)
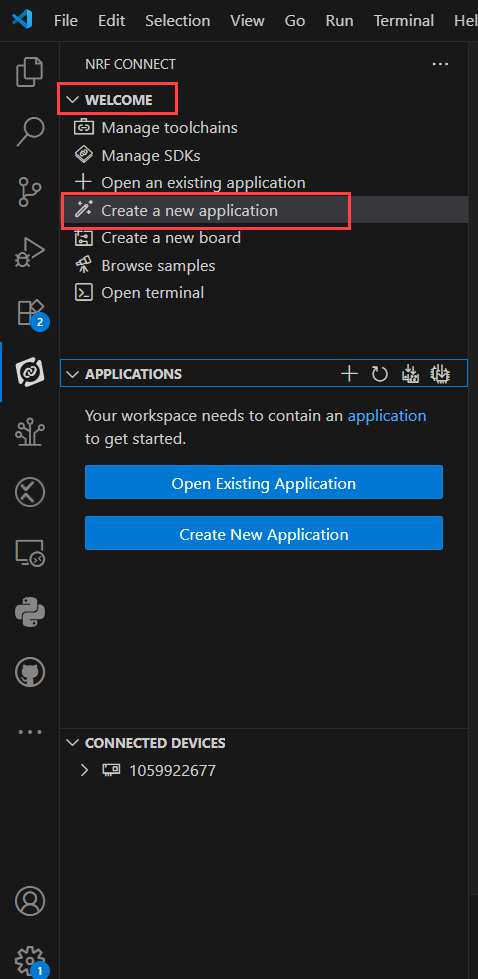
In nRF Connect Ext in VS Code, in the Welcome view, click Create a new application.
In the Create a New Application menu select Copy a sample
Note: If the Copy a sample option doesn’t appear, there may be an issue with your environment. Create a Support ticket to get this resolved.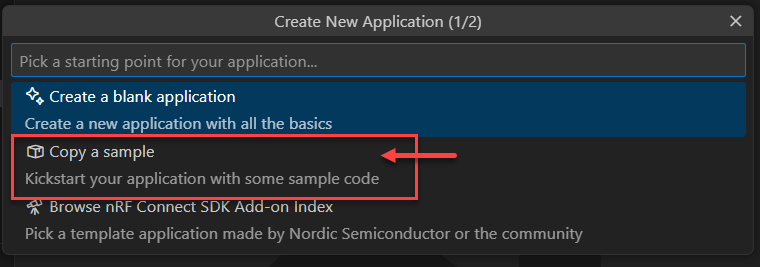
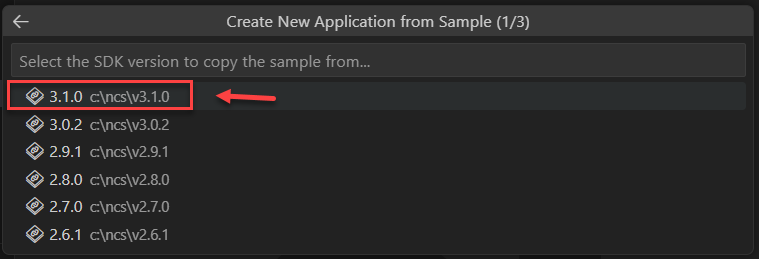
Select the SDK Version to copy the sample from the list of installed SDKs. Always select the most current release which was v3.1.0 at the time of this writing.
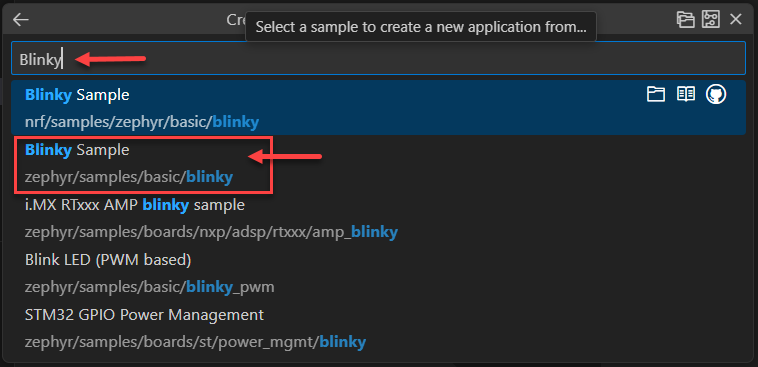
VS Code will then populate a list of available samples for that SDK version. To locate the Blinky sample, type Blinky in the search bar at the top of the list. For this demonstration, select the zephyr/samples/basic/blinky sample application.
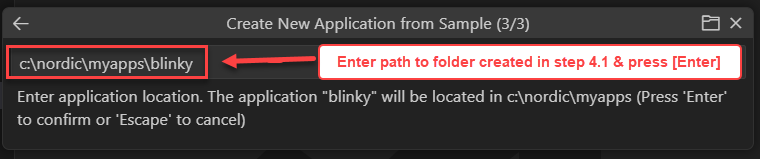
Enter the path to the file created in step 1, and give the file a name, such as “blinky” (i.e.: c:\nordic\myapps\blinky) This will give the file the name “blinky and store the application in the c:\nordic\myapps folder created previously. Press ENTER to confirm the location and file name.
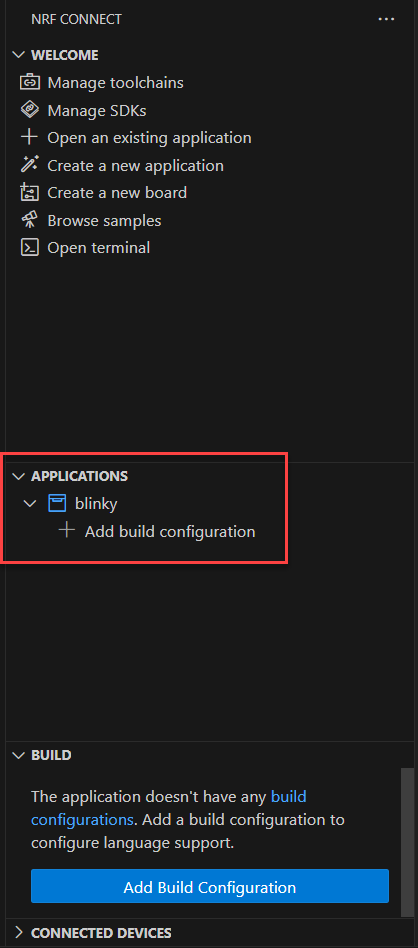
VS Code will ask you what you want to do with the new application, select Open to open the Application in VS Code. This will make a copy of the template selected (Blinky sample), store it in the application directory you specified, and add an unbuilt application to VS Code as shown below:
Build the application
nRF Connect SDK has the advantage of being able to decouple between the application source code and the software configuration/hardware description. This makes it easy to switch the build for different hardware or software configurations.
The Build Configuration specifies which development board or custom board (hardware) to build the application for. This will also select the software configuration (*.conf and possible devicetree overlays) to be used in the build.
What you set in the Add Build configuration controls what is passed to the underlying command-line tool, west.
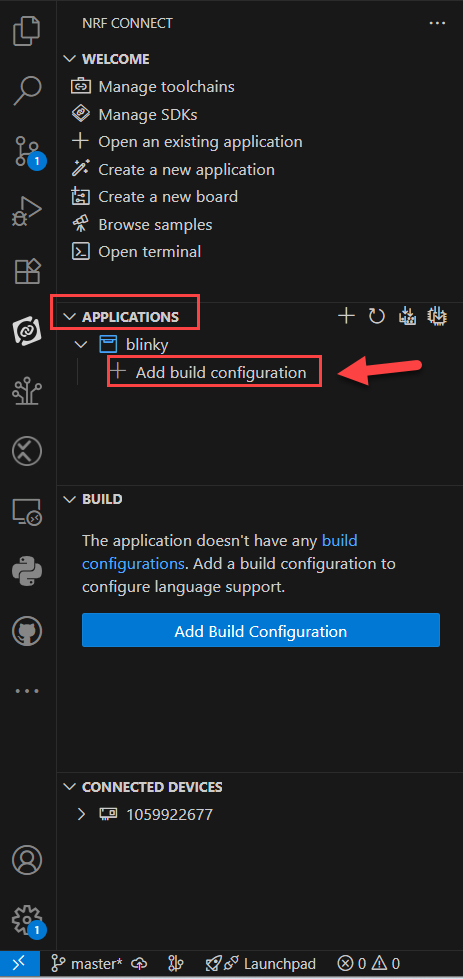
In the Applications view click on Add Build Configuration under the application name.
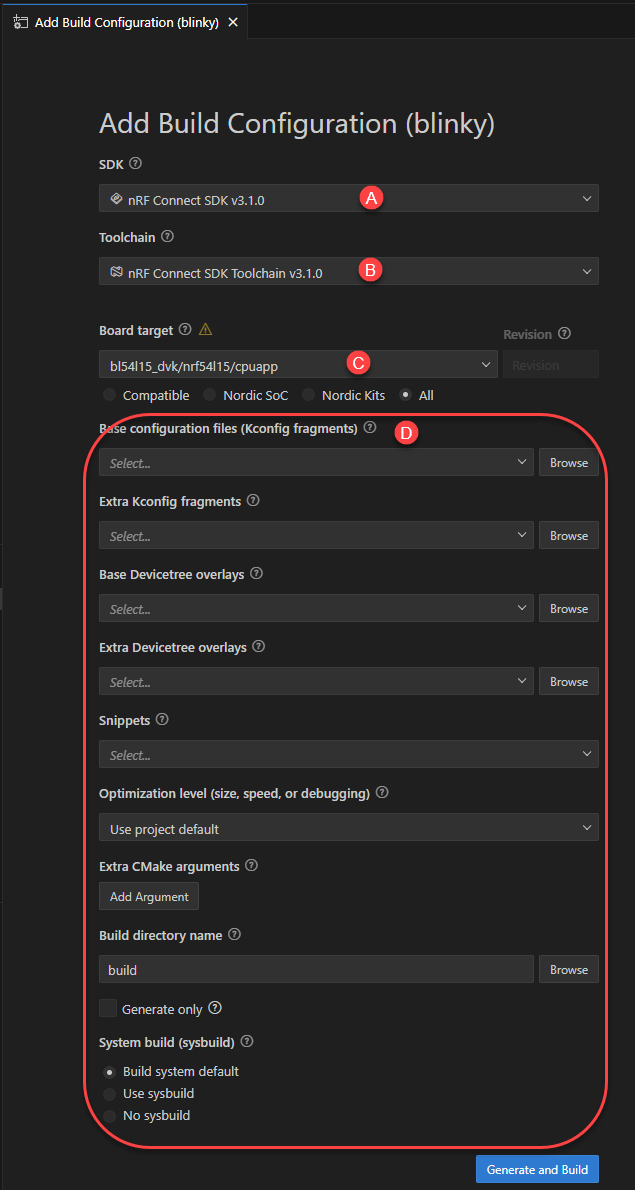
In the Add Build Configuration window where you need to make the following selections:
a. SDK: Select the SDK you wish to use for the build, the most recent SDK is strongly recommended.
b. Toolchain: Select the corresponding Toolchain which is matched to the selected SDK.
c. Select the target board: When working with Ezurio DVKs select the board as listed below:
| Product Name | DVK Part Number | Board target |
|---|---|---|
| BL54L15 | 453-00001-K1 (trace ant) 453-00044-K1 (MHF4 ant conn) | bl54l15_dvk/nrf54l15/cpuapp |
| BL54L15u | 453-00223-K1 (chip ant) 453-00224-K1 (trace pin for ext ant) | bl54l15_dvk/nrf54l15/cpuapp |
| BL54L10 (module only) Use BL54L15-DVK for SW development | 453-00001-K1 (chip antenna) 453-00044-K1 (MHF4 ant conn) | bl54l15_dvk/nrf54l10/cpuapp Enforces the reduced memory constraints that apply when developing for the BL54L10. |
Note: See the FAQ: When building an application with nRF Connect for VS Code, which Board Target should I select for my Ezurio BL54Lxx DVK? for an explanation of the other Target Board variants listed for BL54 series.
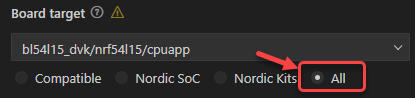
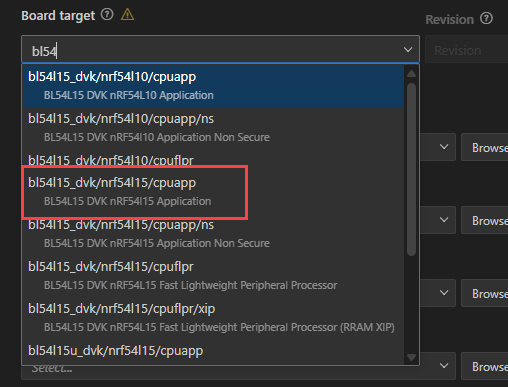
To filter for BL54 series boards make sure to select the radio button next to All then type BL54 in the search field as shown below:
d. Keep the default build configuration for the rest as shown below and click Generate and Build.
In the lower terminal window you will see debug output as VS Code builds the application based on the selected configuration.
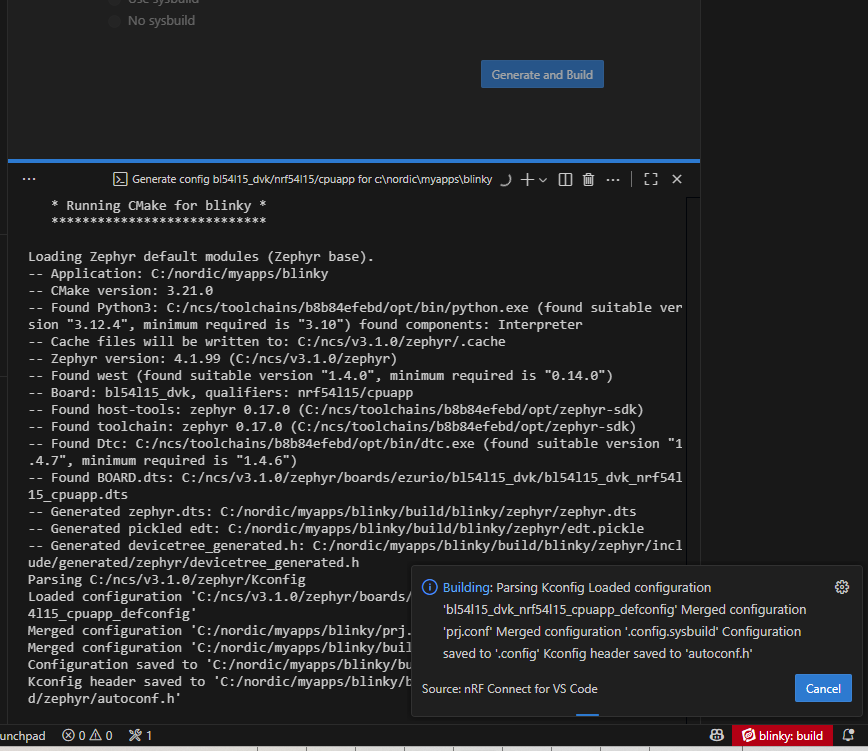
Once completed you will see the following output:

And in the nRF Connect Ext for VS Code an Actions section will have been created for this build.

Flash the Application to the DVK
Make sure that your DVK is connected to your computer and that it is switched on. It should be listed in the Connected Devices view in the nRF Connect for VS Code extension.
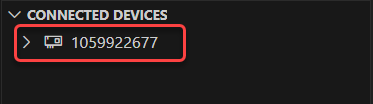
If you don’t see your board listed, press the Refresh Connected Devices icon in the Connected Devices view.

From the Actions view, click Flash to flash the application to the board. You can open the Terminal Panel to see the progress of the flashing, as shown below.
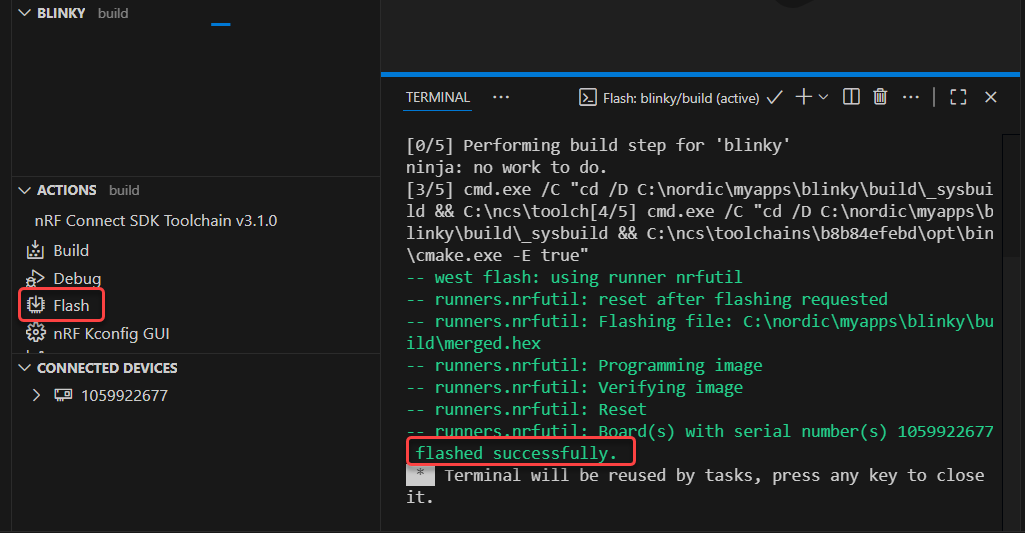
The Blinky application should now be running on the DVK board and you should see LED0 in the middle of the DVK board blinking. You have successfully created, built and flashed an application to your BL54 Series board!
Additional Information
For more information and documentation for the BL54 series modules, please see the following product pages: