/filters:background_color(white)/2025-07/IF9121.png)
/filters:background_color(white)/2025-07/IF913.png)
Overview
This guide describes how to:
- Flash the
.heximage for WLAN and BT RF test to IF91x DVK - Run automated powershell scrip to validate WLAN radio performance.
Note: This guide is current as of April 2026.
Prepare Flashing Tools
Download and extract [Veda IF91x] Firmware_Script_Log_TestCmd.7z from our website: https://connectivity-staging.s3.amazonaws.com/files/Veda IF91x_Firmware_Script_Log_TestCmd.7z
Confirm thatwifi-unified-tester_download.hex file exist in <Extracted Folder>\Files.Identify UART Ports
Connect the IF91x DVK via USB.
Open device manager. You will see two COM ports.
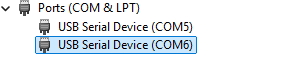
To identify them:
- Right-click each COM port → Properties
- Go to Details
Select Hardware Ids
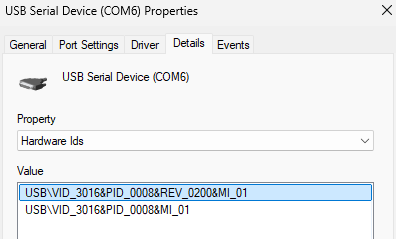
Look for:
| Interface | Identifier | Purpose |
|---|---|---|
| HCI UART | MI_01 | Used for flashing |
| WLAN UART | MI_03 | Used for Wi-Fi scan output |
Example:
- MI_01 → COM6 (HCI UART)
- MI_03 → COM5 (WLAN UART)
Flash the Firmware
The below sequence puts the IF91x DVK into HCI download mode for flashing.
- Press and hold the RECOVERY button (labeled c below)
- While holding RECOVERY, press and hold the RESET button (labeled d below)
- Continue holding both buttons for about 1 second
- Release the RESET
- Wait for 1 second
- Finally, release the RECOVERY
 Open Command Prompt in the extracted
 Files directory.Run:
ifx_flasher_cli.exe -b if91x -c <HCI_COM_PORT> -f wifi-unified-tester_download.hex -ceExample with the above setup:
ifx_flasher_cli.exe -b if91x -c COM6 -f wifi-unified-tester_download.hex -ceExpected output:
IFX Flasher CLI v1.0.0
2026-02-11 15:26:48,966 | INFO | Entering HCI download mode on board E664A836A33A412A
2026-02-11 15:26:49,175 | INFO | Loading minidriver...
2026-02-11 15:26:50,906 | INFO | Performing chip erase...
2026-02-11 15:26:53,686 | INFO | Chip erase finished
2026-02-11 15:26:53,686 | INFO | Changing baud to 3000000
2026-02-11 15:26:53,860 | INFO | Programming firmware... (512190 bytes)
2026-02-11 15:27:27,599 | INFO | Finished programming!
Post-Flash Setup
Pull RTS Low (Required)
After flashing the firmware, the WLAN UART RTS line must be pulled low before WL tool commands will work.
Identify the WLAN UART port in Device Manager:
- MI_03 → WLAN UART (use this COM port)
- Open a command prompt in the
Filesfolder and run: (ReplaceCOM5with your COM port)
python .\set_rts.py COM5Expected output:
COM5: RTS pull low.Reset the Board
Press RESET once after pulling RTS low.
Verify WL Tool Communication
From the sameFiles folder, run: (Replace 5 with your WLAN UART port).\wl_rc1.exe --serial 5 verCOM prefix in the --serial argument. For example, use 5, not COM5. Expected output (example):
18.15 RC1.0
wl0: Mar  6 2025 05:05:12 version 28.10.400.1 (9de5969 WLTEST) FWID 01-913760f7
Run Automated WLAN Test Scripts
To run Ezurio automated PowerShell validation scripts:
- Change directory to the
Appsfolder:
cd ..\Apps- Run the desired script using the following format:
powershell.exe -ExecutionPolicy Bypass -File .\<ScriptName>.ps1 <CountryDomain> <Channel> <MCS> <TargetPower> <Bandwidth>(Parameters depend on the specific script and test case.)
The below is list of example scripts:
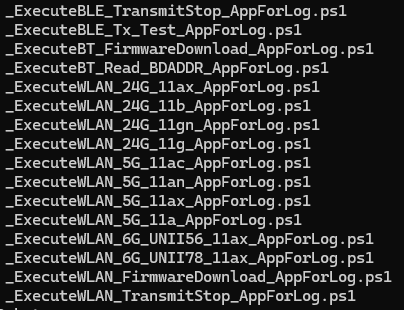
Reference
For more information, see the Veda IF91x Setup and Test Tool User Guide:
https://www.ezurio.com/documentation/user-guide-veda-if91x-dvk-test-tool-setup