/filters:background_color(white)/2024-10/BL654-Series.png)
Introduction
The goals of this document include the following:
- To detail the setup procedure for interfacing with the DVK-BL654, Part # 455-00001 & 455-00002
- To explain the method of upgrading the BL654 firmware over the JTAG interface.
Requirements
- Ezurio DVK-BL654, Part # 455-00001 & 455-00002 or equivalent (with USB to JTAG connection to the BL654 Module, Part # 451-00001 & 451-00002)
- 1X USB-A to USB-Micro cable
- UwTerminalX, provided by Ezurio at https://github.com/ezurio/UwTerminalX/releases
- Desired firmware package, found in the Software Downloads tab of the BL654 Product Page
For verification, you will need:
- Ezurio DVK-BL654 (or equivalent RS-232 to serial connection between the PC and the BL654 Module)
- FTDI USB to Serial drivers for DVK-BL654 (found at http://www.ftdichip.com/FTDrivers.htm)
Overview
To upgrade the module, you must use Ezurio’s development board or your own equivalent implementation to provide a JTAG access to the module.
Initial Setup using BL654 Development kit
To set up, complete the following steps.
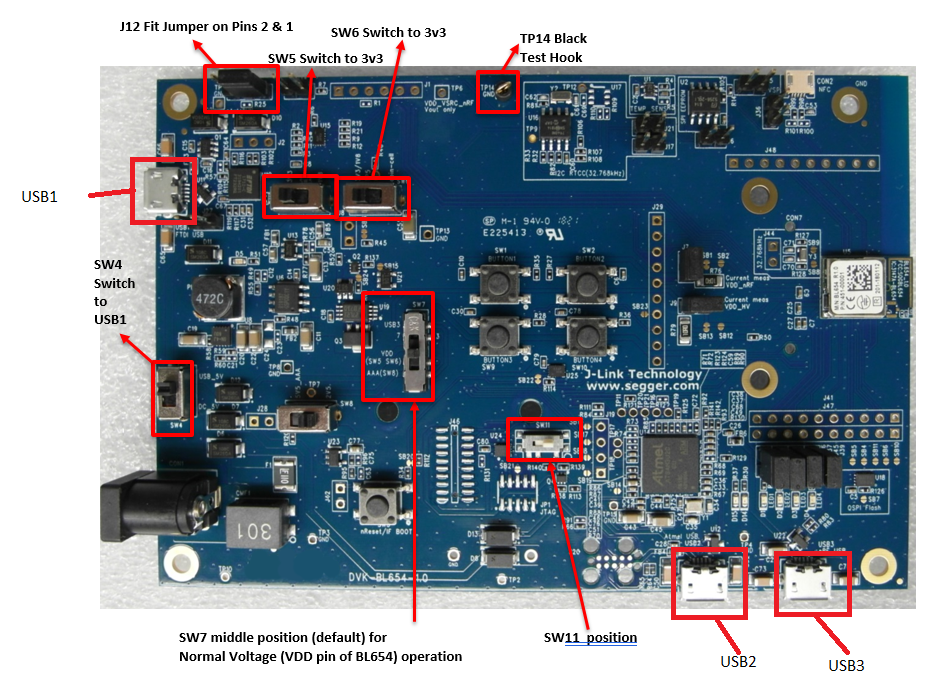
Configure the BL654 development kit to the following settings:
- DC/USB power source switch (SW4) to USB_5V
- Switches SW6 and SW5 to 3V3
- Set SW7 in the middle position – VDD (SW5 SW6) and SW11 to the right as shown on the Figure 1
- Connect USB1 on the development kit to your PC via the included USB-A to USB Micro cable.
- Install the FTDI USB to Serial driver (found at http://www.ftdichip.com/FTDrivers.htm).
- Ensure that the Windows Device Manager displays a new virtual COM port for the USB to Serial adapter.
- Launch UwTerminalX (available at https://github.com/ezurio/UwTerminalX/releases)
- From the Update tab in UwTerminalX, click Check for Updates to ensure you’re using the latest version of UwTerminalX with support for the BL654.
From the Config tab in Device drop-down menu, select BL65x to populate the baud, parity, stop bits, data bits, and handshaking settings. If BL65x is not a selectable device because you have an older version of UwTerminalX, set the following:
- Baudrate: 115200
- Parity: None
- Stop Bits: 1
- Data Bits: 8
- Handshaking: CTS/RTS
- In the Port dropdown, select the COM port associated with your DVK-BL654.
Note: If you have a cable connected to the USB2 port (at the bottom of Figure 1), it will also have installed another COM port, do not select that one.
- At the top of the screen, click OK.
Checking Firmware Version
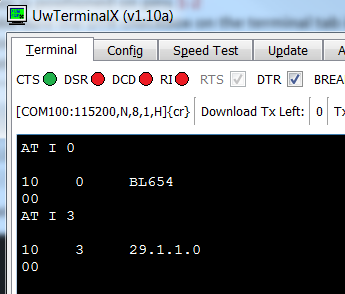
Once the module has been connected, type AT I 0 to confirm you are connected to a BL654.
Type AT I 3 to display the firmware version (Figure 2).
Note: If your development board is pre-programmed with an autorun application, you need to manually place the BL654 module into interactive mode. To do this, complete the following:
- Ensure the J12 jumper is positioned on pins 1-2
- In UwTerminalX, make sure the DTR checkbox on the terminal tab is unchecked
- Press the reset button on the module (or on UwTerminalX, check and uncheck the BREAK checkbox which results in a reset of the module). Now your module should be in interactive mode.
Now close UwTerminalX before proceeding to the next section.
Warning: Upgrading the firmware clears any programs, configuration keys or data stored on the module.
Downloading and Installing the J-Link Driver
If the J-Link driver is already installed on your PC, you may skip this section and proceed to the Firmware Upgrade Proceduresection.
To download and install the J-Link driver, follow these steps:
- Download the Windows drivers for the J-Link from:
https://www.segger.com/downloads/jlink/#J-LinkSoftwareAndDocumentationPack
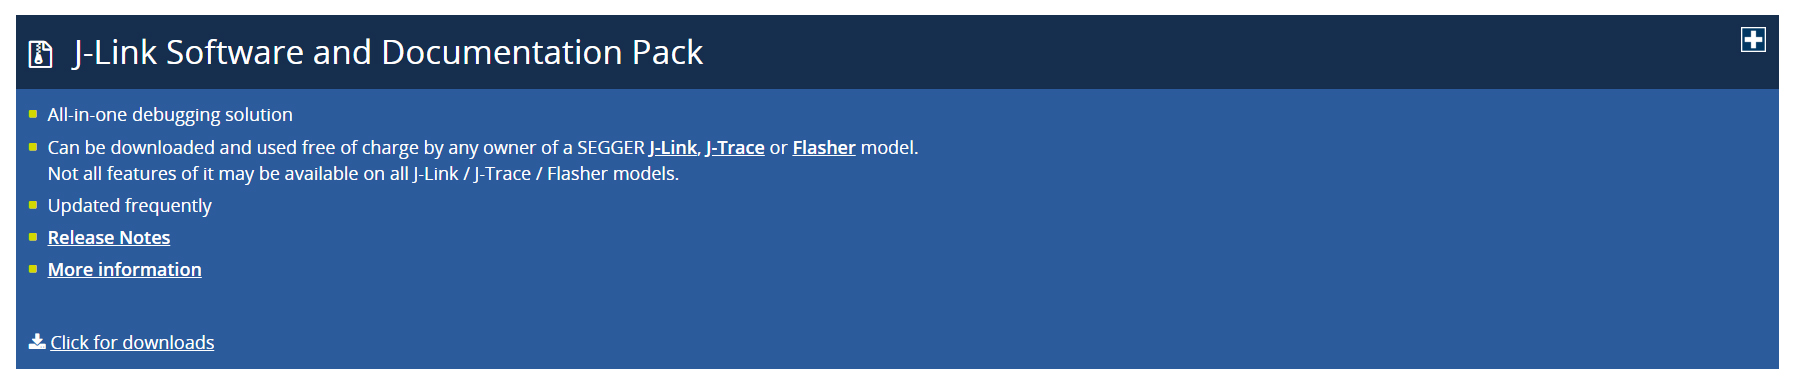
- Run the executable to install the J-Link software.
- Unplug the USB cable from USB1 port and plug it into USB2 port on the DVK-BL654 (see below). Installation proceeds automatically.

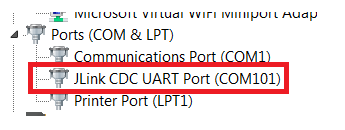
If the J-Link driver is successfully installed, JLink CDC UART Port (COMx) appears in the device manager. Do not use this port to check for BL654 version number as this virtual COM port is not connected through to the module UART.
Firmware Upgrade Procedure
The upgrade package is provided as a .zip file, so decompress into a new folder of your choice. The filename will be of the form:
- ITSE01054_01_BL654_Firmware_For_Upgrade_vW_X_Y_Z-rN.zip where W,X,Y,Z is the version number of the firmware and –rN is an optional suffix that will be present if the zip file has new content apart from the firmware image, like for example corrections in the user guide or other documentation.
Note: Do not decompress into an existing folder, as there is potential for confusion with regards to firmware upgrade files. We recommend you decompress the zip file into a folder with the same name as the zip filename.
- In the decompressed folder, inside the Firmware subdirectory, launch _DownloadFirmwareJlink .bat (either double-click it or launch it from a command prompt console window) from the Firmware sub-directory.
- If the J-Link firmware is outdated, the following dialog box displays (Figure 6):
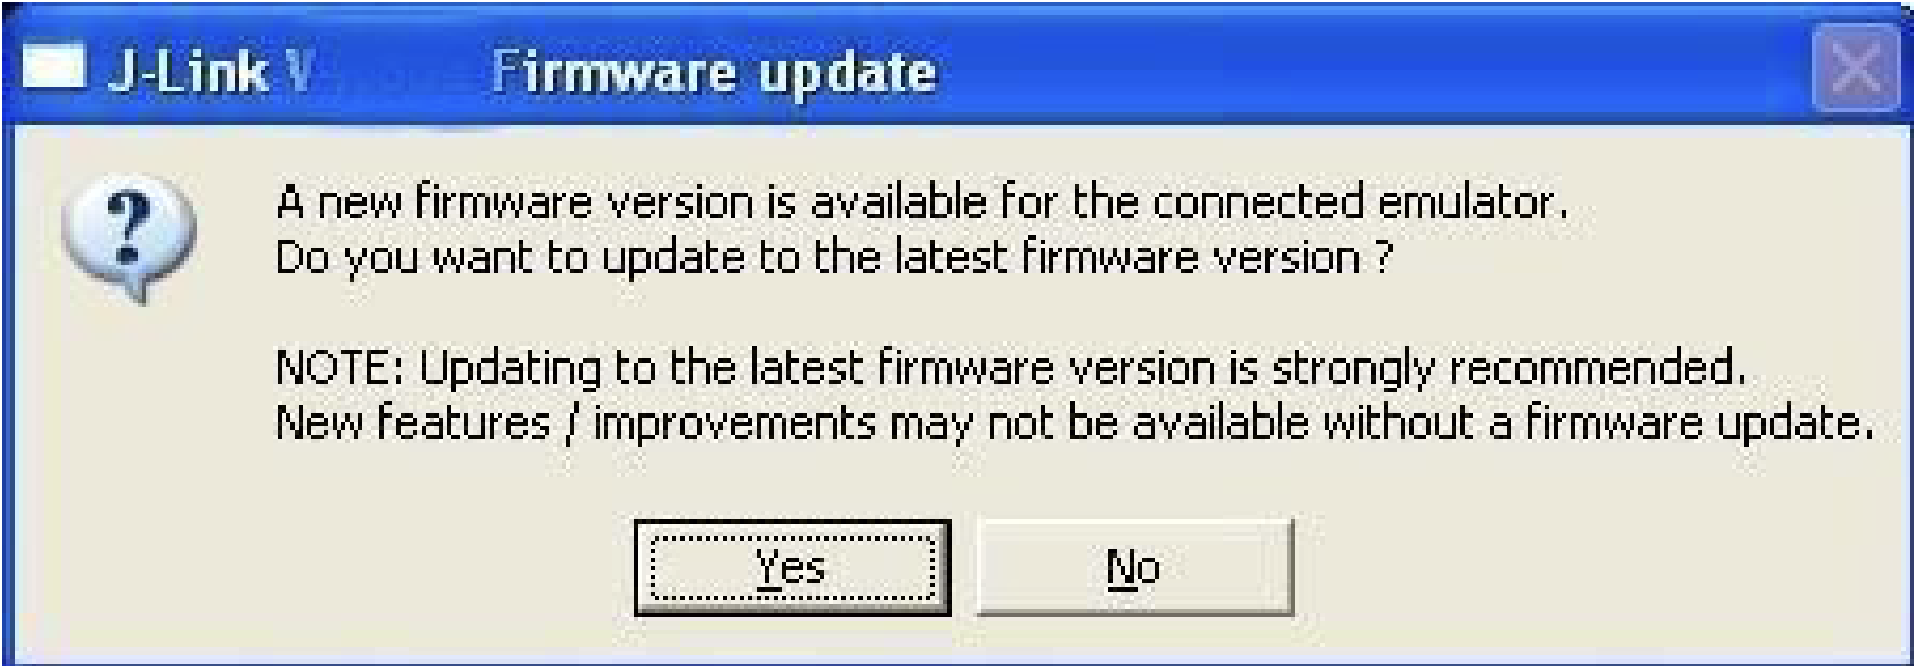
- Click Yes to update the J-Link firmware. The BL654 firmware upgrade process resumes automatically and displays a command prompt box.
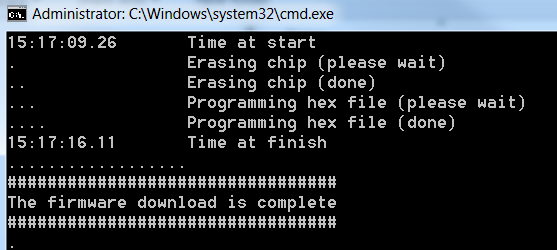
- When the BL654 firmware download completes, the console window displays the following:
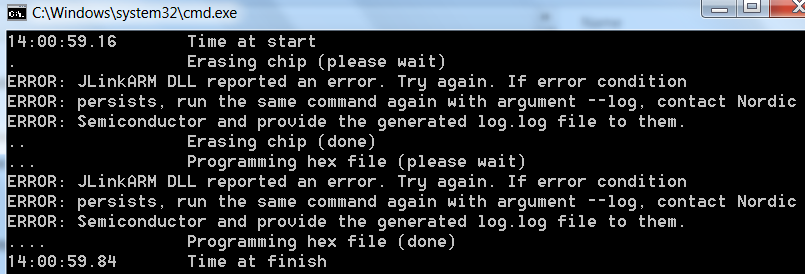
- If you see the following error (see Figure 8) when attempting to download the firmware, please check all jumpers and switches setting the BL654 development board are correct.
To check that the firmware version number matches the firmware upgrade package version, follow these steps:
- Cycle power to the module.
- Unplug the cable from USB2 port and plug it into theUSB1port.
- Open UwTerminalX (or any other terminal emulator).
- Select the COM port (associated with USB1) for the BL654 devkit at 115200,N,8,1.
- Send the following command string: AT I 3
- Use the response string to confirm the version numbers match with the version in the filename of the zip file.
Note: Please note there is at least one space between the ‘I’ and 3.
Further Information
Further information relating to the BL654 module is available from the BL654 product page of the Ezurio website: https://www.ezurio.com/products/bl654-ble-thread-nfc-modules.
| Version | Date | Notes | Contributor(s) | Approver |
|---|---|---|---|---|
| 1.0 | 13 June 2018 | Initial Release | Shewan Yitayew | Jonathan Kaye |
| 2.0 | 15 Apr 2025 | Ezurio rebranding | Sue White | Dave Drogowski |