/filters:background_color(white)/2024-10/Sona%20IF573%20-%20Family.png)
Purpose
This document provides step-by-step guidance on how to build a Linux image with Yocto release Scarthgap for the Raspberry Pi CM4 Compute Module including Ezurio's Sona IF573 PCIe Wi-Fi M2 card (Part Number 453-00120).
Scope
This document concentrates on Wi-Fi functionality. Integrating Bluetooth functionality will be addressed in subsequent revisions.
Prerequisites
This document assumes that the user has basic knowledge about Linux and Yocto software and Raspberry Pi hardware.
Required Hardware
- Ubuntu 22.04 PC with internet connection for cross-compiling the Yocto image
Raspberry Pi CM4 IO board with CM4 module
(https://www.raspberrypi.com/products/compute-module-4-io-board/)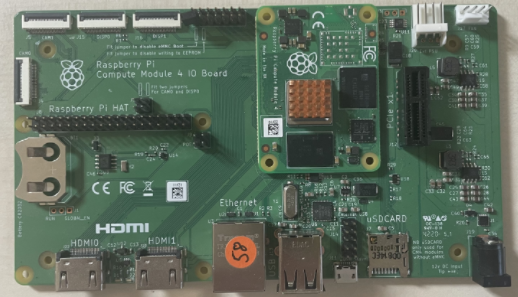
Sona IF573 DVK
(https://www.ezurio.com/part/453-00120-k1)
https://www.ezurio.com/wireless-modules/wifi-modules-bluetooth/sona-if573-wi-fi-6e-bluetooth-core-6-0-module
Note: The Sona-IF573 M2 Wi-Fi module requires a 32kHz SUSCLK signal on pin50 which is not supplied by the CM4. This DVK provides that signal to the module.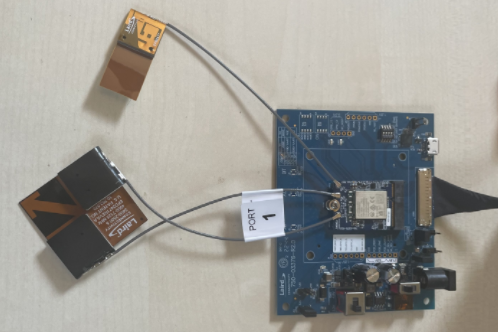
1xPCIe to miniPCIe adapter
https://www.conrad.com/en/p/renkforce-gbic-1x-mini-pci-express-1x-pci-express-408870.html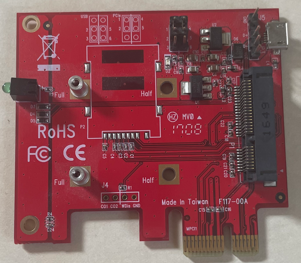
miniPCIe to M2 E-key adapter
https://www.delock.de/produkt/63909/merkmale.html?setLanguage=en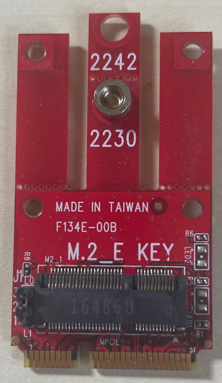
Note: both of the above adapters were used on top of each to connect the Sona-IF573 M2 card to the PCIe slot of the RPi CM4 IO board. There might be a single adapter solution in the market though.
USB to serial converter to attach to the debug UART of the Raspberry Pi
For example: https://www.berrybase.de/usb-ttl-uart-rs232-adapterkabel-mit-pl2303hx-chipsatz/
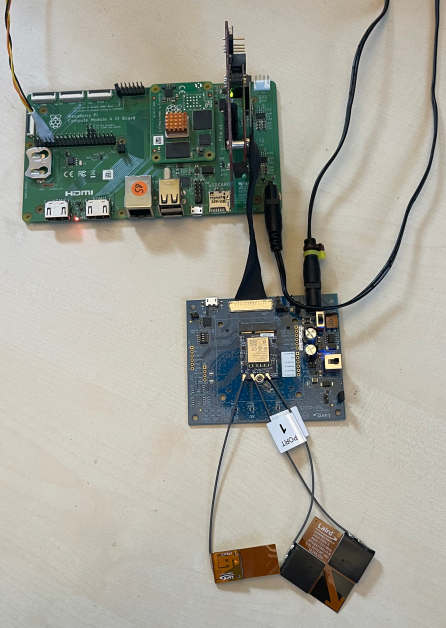
Complete hardware setup
Software Installation
Preparation of Yocto build environment and first build
Update build PC
sudo apt update
sudo apt install gawk wget git diffstat unzip texinfo gcc-multilib \
build-essential chrpath socat cpio python3 python3-pip python3-pexpect \
xz-utils debianutils iputils-ping python3-git python3-jinja2 libegl1-mesa \
libsdl1.2-dev pylint xterm
Clone Yocto environment
mkdir -p ~/yocto/cm4
cd ~/yocto/cm4
git clone -b scarthgap git://git.yoctoproject.org/poky
cd poky
git clone -b scarthgap https://github.com/agherzan/meta-raspberrypi.git
git clone -b scarthgap git://git.openembedded.org/meta-openembedded
Configuration for first boot
Enter build environment
source oe-init-build-envAdd layers to conf/bblayers.conf by executing these commands in the build directory
bitbake-layers add-layer ../meta-openembedded/meta-oe
bitbake-layers add-layer ../meta-openembedded/meta-python
bitbake-layers add-layer ../meta-openembedded/meta-networking
bitbake-layers add-layer ../meta-raspberrypi
Set machine and options by editing conf/local.conf
At the end of local.conf add:
# added for CM4 build
MACHINE = "raspberrypi4-64"
ENABLE_UART = "1"
ENABLE_SPI_BUS = "1"
ENABLE_I2C = "1"
IMAGE_INSTALL:append = " python3"
Build image
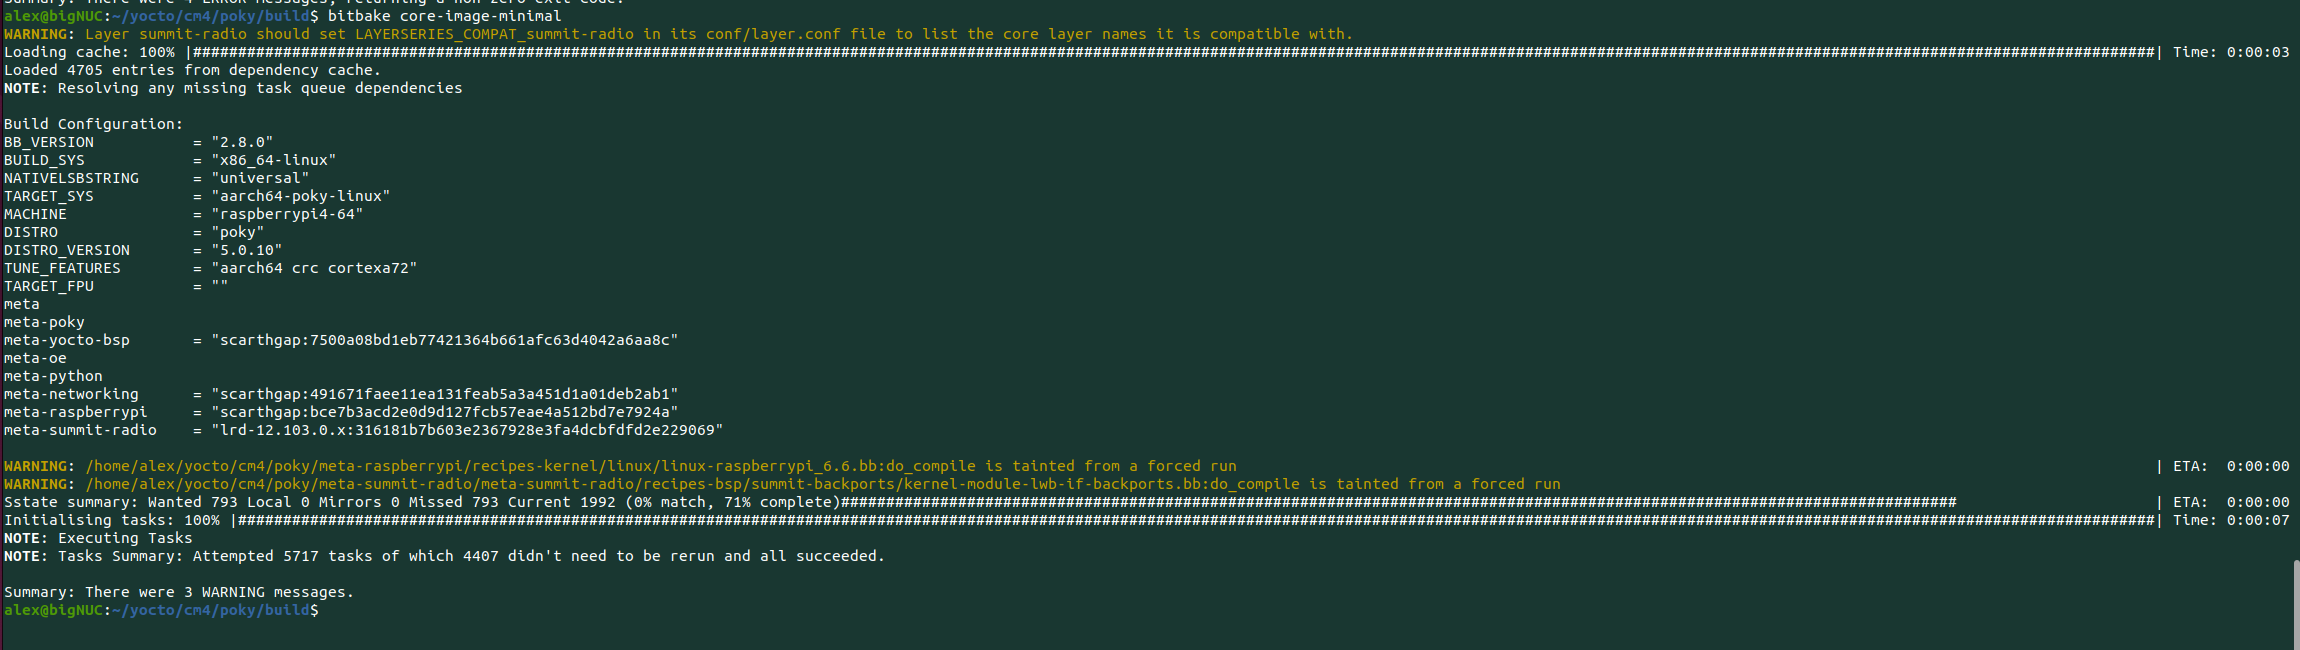
bitbake core-image-minimalNote: This will take quite a while. Fetch errors can often be overcome by simply repeating the bitbake process.
Successful build:

Integrating the Sona IF573
Placing Ezurio meta-layer
cd ..
git clone https://github.com/Ezurio/meta-summit-radio/
cd meta-summit-radio
git checkout lrd-12.103.0.x
cd ..
source oe-init-build-env
Note: at the time of using this document newer releases might be available. Feel free to use the latest: https://github.com/Ezurio/Connectivity_Stack_Release_Packages/releases
Adding Ezurio meta-layer to conf/bblayers.conf
execute this command in the build directory:
bitbake-layers add-layer ../meta-summit-radio/meta-summit-radioPatches
Two patches are required for running the Sona-IF573 on the Raspberry Pi CM4:
- 0001-PATCH-PCIe-Bring-up-for-Rpi-CM4.patch
- 0002-PATCH-brcmfmac-Set-PCI-dma-mask-to-64-bits.patch
https://www.ezurio.com/documentation/rpi-cm4-patches
Download the patches and extract them to:
../poky/meta-summit-radio/meta-summit-radio/recipes-bsp/summit-backports/filesModify to add the patches:
../poky/meta-summit-radio/meta-summit-radio/recipes-bsp/summit-backports/summit-backports.incThe following section must be modified as shown in the second code block:
SRC_URI += "\
    ${SUMMIT_URI}/summit-backports-${PV}.tar.bz2;name=summit-backports \
    file://0001-fix-genlmsg_multicast_allns.patch \
    file://0002-Fixed-UBSAN-out-of-bounds-errors.patch \
    file://0003-brcmcfmac-Demote-DPC-error-message.patch \
    file://0004-Fix-stop-shutdown-mode-entry.patch \
    "
Edit it as shown below:
SRC_URI += "\
    ${SUMMIT_URI}/summit-backports-${PV}.tar.bz2;name=summit-backports \
    file://0001-fix-genlmsg_multicast_allns.patch \
    file://0002-Fixed-UBSAN-out-of-bounds-errors.patch \
    file://0003-brcmcfmac-Demote-DPC-error-message.patch \
    file://0004-Fix-stop-shutdown-mode-entry.patch \
    file://0001-PATCH-PCIe-Bring-up-for-Rpi-CM4.patch \
    file://0002-PATCH-brcmfmac-Set-PCI-dma-mask-to-64-bits.patch \
    "
Configure Backports
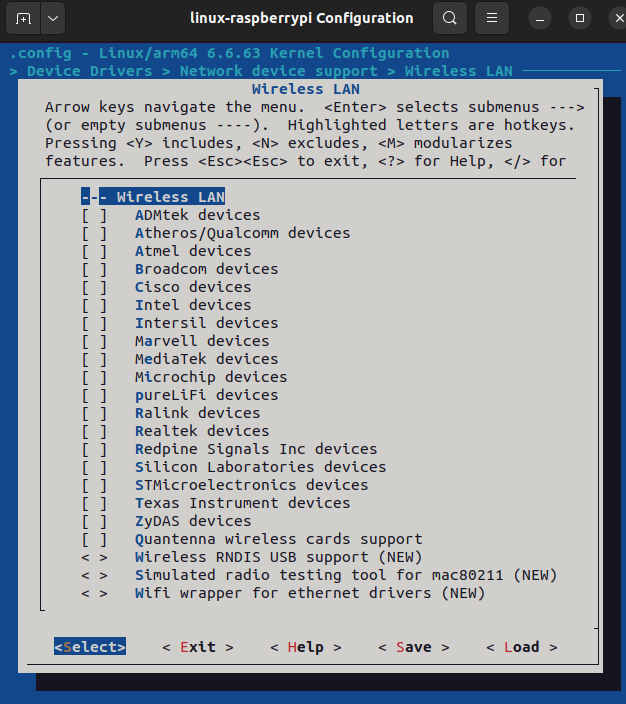
bitbake -c menuconfig kernel-module-lwb-if-backportsenableCustom PCIE BAR window size support for FullMac driver
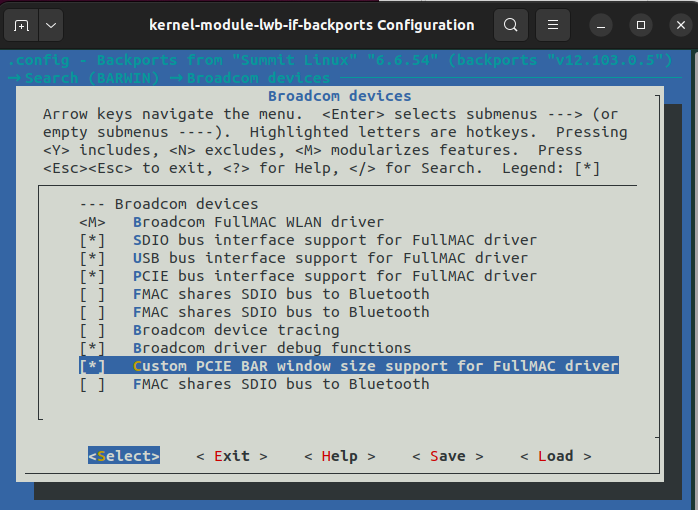
Navigate the menu as follows:
Wireless LAN --->Broadcom devices----Custom PCIE BAR window size support for FullMAC driver
Configure Linux kernel
bitbake -c menuconfig virtual/kernelChoose disable Bluetooth subsystem support as it is put into the kernel by Backports.
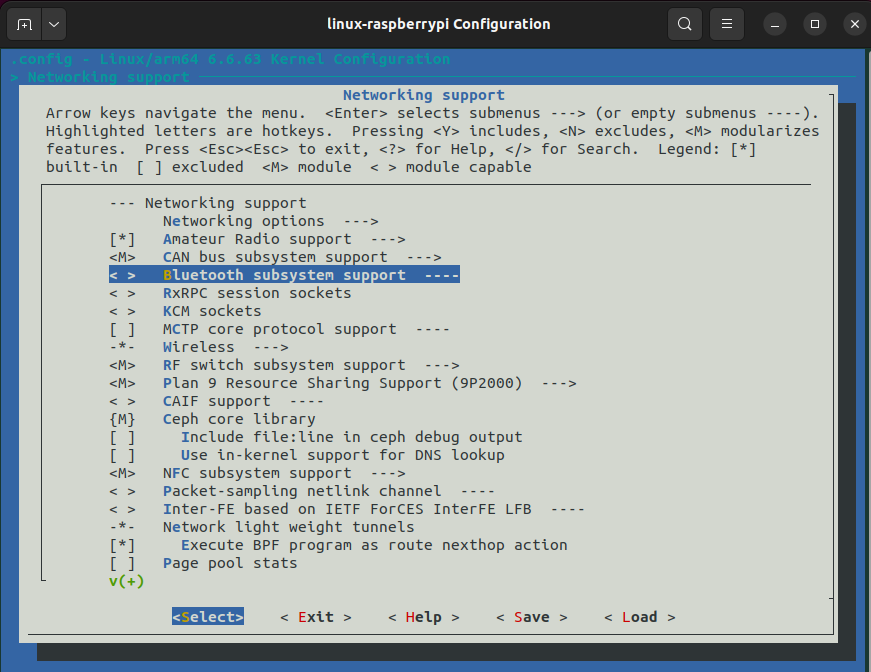
Navigate the menu as follows:
Networking support --->Bluetooth subsystem support ----
Next, set Wireless <M>
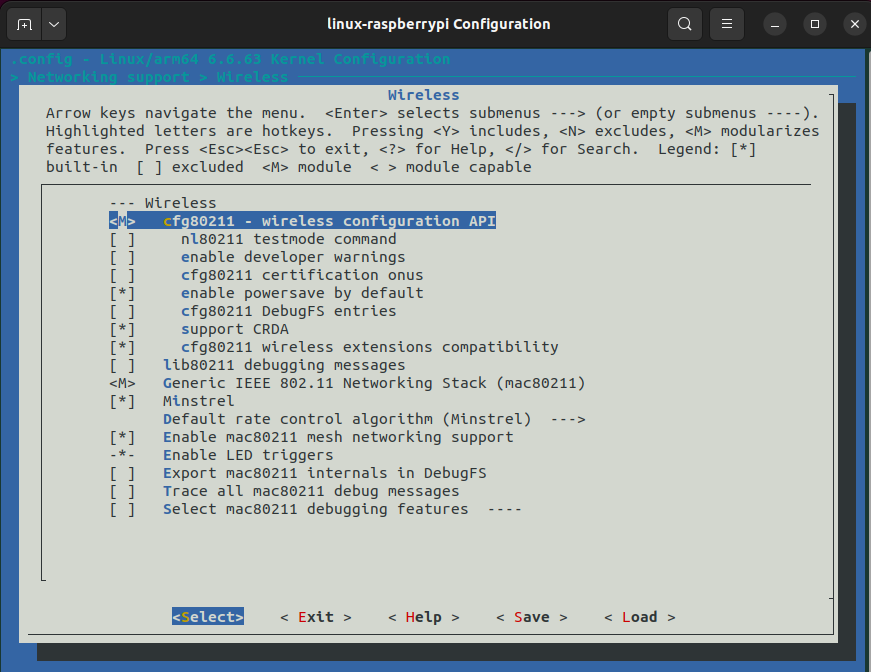
Navigate the menu as follows:
Networking support --->Wireless --->cfg80211 - wireless configuration API
remove other Wireless LAN drivers (but NOT the subsystem “Wireless LAN”)
Adding required Ezurio recipes to conf/local.conf
At the end of local.conf add:
# added for IF573
IMAGE_OVERHEAD_FACTOR = "6"

CORE_IMAGE_EXTRA_INSTALL += "\
	packagegroup-tools-bluetooth \
	pulseaudio \
	hostapd \
	iptables \
	iperf3 \
	tftp-hpa \
	htop \
	lighttpd \
	libedit \
	libnl \
	libnl-route \
	tcpdump \
	dhcpcd \
	bridge-utils \
	openssl \
	ebtables \
	iw \
	ethtool \
	pciutils \
    usbutils \
	kernel-module-lwb-if-backports \
	if573-pcie-firmware \
	summit-supplicant-lwb-if \
	summit-networkmanager-lwb-if \
"
# Note: not all of above packages are a hard requirement but they can make the life easy.

PREFERRED_RPROVIDER_wpa-supplicant = "summit-supplicant-lwb-if"
PREFERRED_RPROVIDER_wpa-supplicant-cli = "summit-supplicant-lwb-if-cli"
PREFERRED_RPROVIDER_wpa-supplicant-passphrase = "summit-supplicant-lwb-if-passphrase"

PREFERRED_PROVIDER_wireless-regdb-static = "wireless-regdb"

LWB_REGDOMAIN = "ETSI"

#not needed when using serdev for Bluetooth
BT_SERIAL_PORT = "/dev/ttyUSB0"
Please note, the summit-supplicant is named ”sdcsupp”, not “wpa_supplicant”.
Building RPi CM4 Linux image for Sona-IF573
bitbake core-image-minimalThis will take another while. Again, fetch errors can often be overcome with another try.
Successful build:
Flashing Linux image to CM4 eMMC memory
Compiling usbboot to mount eMMC memory as USB drive
Make sure you have thelibusb library installed:sudo apt install libusb-1.0-0-devDownload the Raspberry Pi usbboot repository:
$ git clone --depth=1 https://github.com/raspberrypi/usbbootusbboot directory and build rpiboot:$ cd usbboot
$ makerpiboot executable in the directory.Flashing the CM4
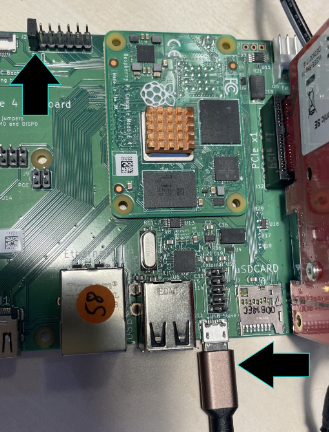
For this the CM4 must be put into USB mass storage mode.
Place a jumper on J2 across pins 1 and 2 and connect the microUSB port of the IO board to your Ubuntu development PC.
To mount the eMMC storage, run:
$ sudo ./rpiboot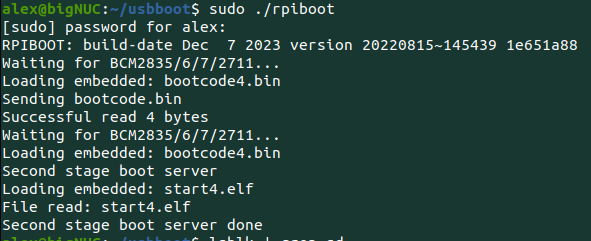
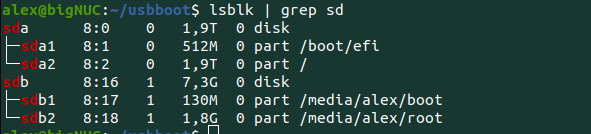
Then, with lsblk you should see that your CM4 eMMC memory is mounted as a block device (sdb in this case):
Locate the generated Linux image:
../poky/build/tmp/deploy/images/raspberrypi4-64
ls *.wic.bz2 -al
-rw-r--r-- 2 alex alex 92657639 Jun 24 17:07 core-image-minimal-raspberrypi4-64.rootfs-20250624144522.wic.bz2
lrwxrwxrwx 2 alex alex       64 Jun 24 17:07 core-image-minimal-raspberrypi4-64.rootfs.wic.bz2 -> core-image-minimal-raspberrypi4-64.rootfs-20250624144522.wic.bz2
Unpack it as follows:
bunzip2 -f core-image-minimal-raspberrypi4-64.rootfs.wic.bz2
Use dd to flash the memory.
Make sure to select the block device that was created for your Raspberry Pi!
sudo dd if=core-image-minimal-raspberrypi4-64.rootfs.wic of=/dev/sdb bs=1M conv=sync
After successful download of the image, carefully remove the jumper on J2 and the microUSB cable and remove power.
Set up hardware and apply power to both boards:
Login username is root, no password required.
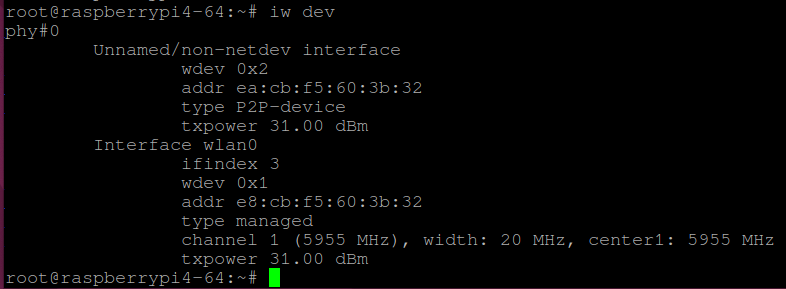
With iw dev you now should see that the Wi-Fi interface was created: