/filters:background_color(white)/2025-08/Vela%20IF310-MHF4%20%28453-00391%29%20front.584.png)
Introduction
This application note demonstrates Bluetooth audio using the Audio Headset Speaker code example running on the KIT-CYW55310-EVAL. The kit hosts the Vela IF310 Bluetooth Classic and LE Audio module populated on an M.2 pluggable card and Arduino Audio Shield board (CYW9BTAUDIO5). Using MODUSToolbox, the Headset Speaker application is built and flashed onto the kit to configure the IF310 as a Bluetooth audio sink: it pairs with a host device (such as a phone or PC), accepts a streamed A2DP audio connection, and renders the audio locally while supporting standard playback controls (AVRCP) and call handling (HFP) where applicable. Walking through this example illustrates both the MODUSToolbox development flow and the CYW55310/IF310's practical role as a drop-in Bluetooth audio front end.
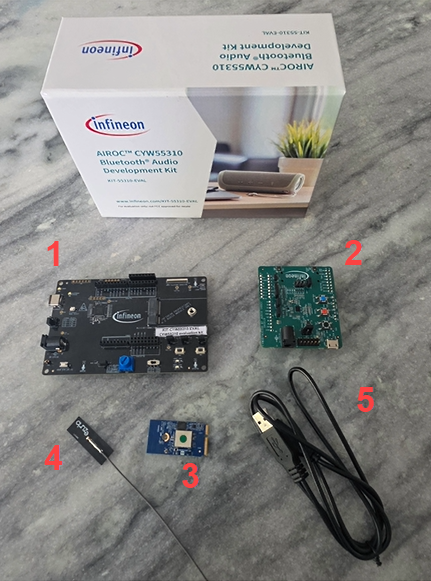
Kit Contents
- CYW55310 Baseboard
- Audio Shield Board
- Ezurio IF310 Bluetooth Classic and LE Audio module M2 Card
- Ezurio EMF2471 Antenna
- USB Type-A to Type-C Cable
Requirements
- KIT-CYW55310-EVAL - Bluetooth Audio Evaluation Kit for AIROC™ CYW55310 Bluetooth® Classic and LE Audio SoC
- MODUSToolbox Software
- Visual Studio Code (Used here but other Target IDE’s can be selected in ModusToolbox Project Creator)
Getting Started
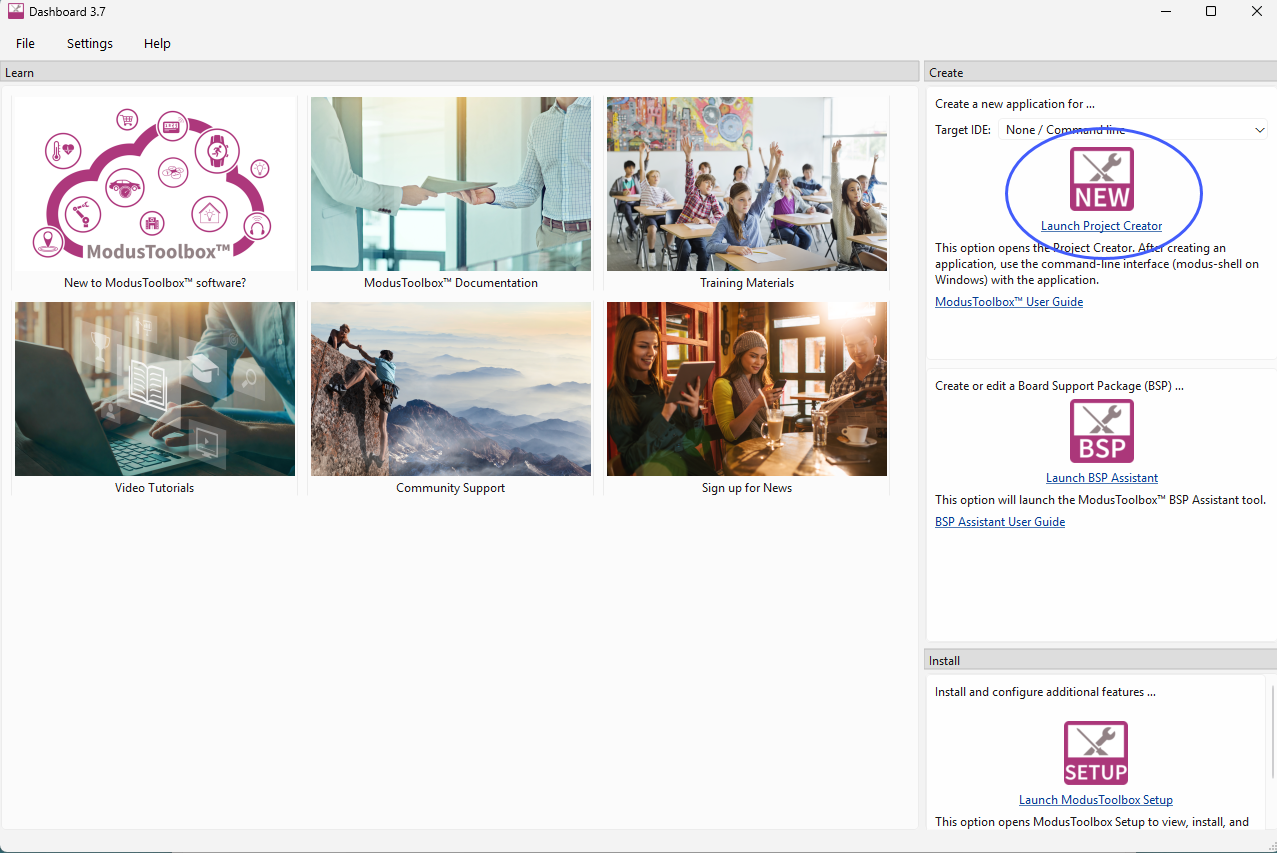
Open the ModusToolbox Dashboard and click on Launch Project Creator:
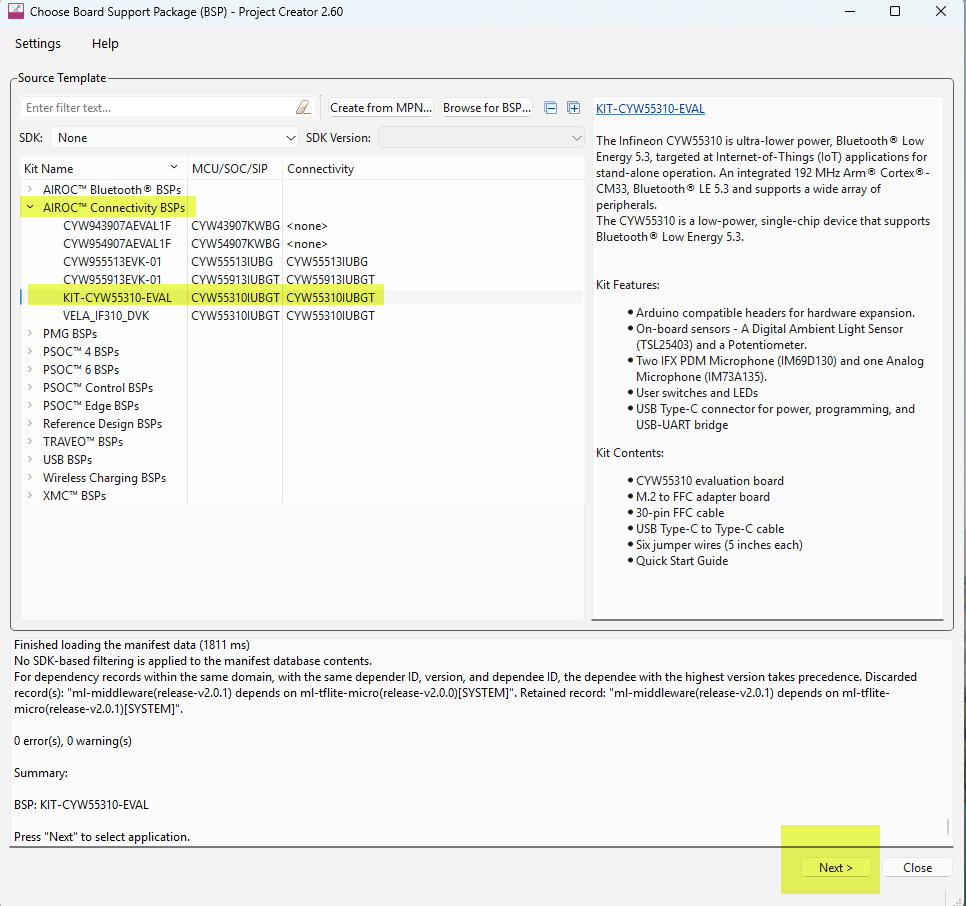
Expand AIROC Connectivity BSPs and select KIT-CYW55310-EVAL and then click Next.
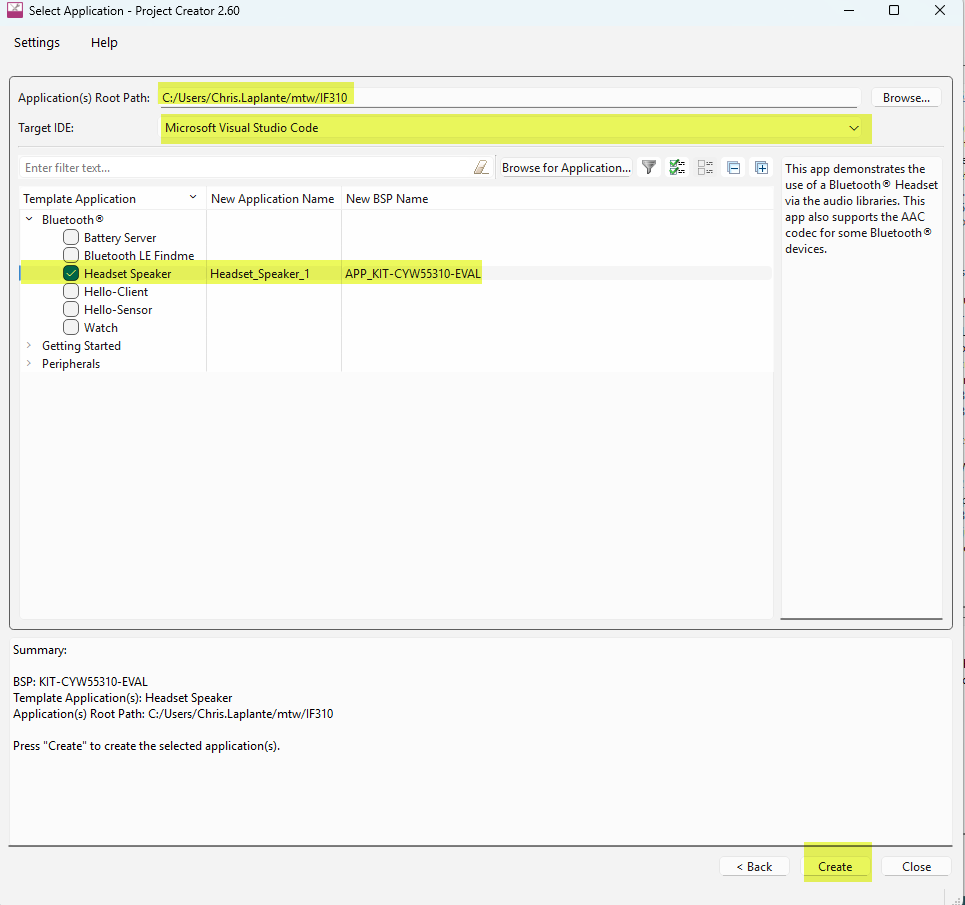
Select the Application and Create the Project:
- Expand the Bluetooth Template Application and select the Headset Speaker application
- Click on Target IDE and select Microsoft Visual Studio Code.
- Add the Application Root Path. This is where the project work space will reside and will contain the project manifest. Typically this is the
c:/Users/<User>directory. Click Create.
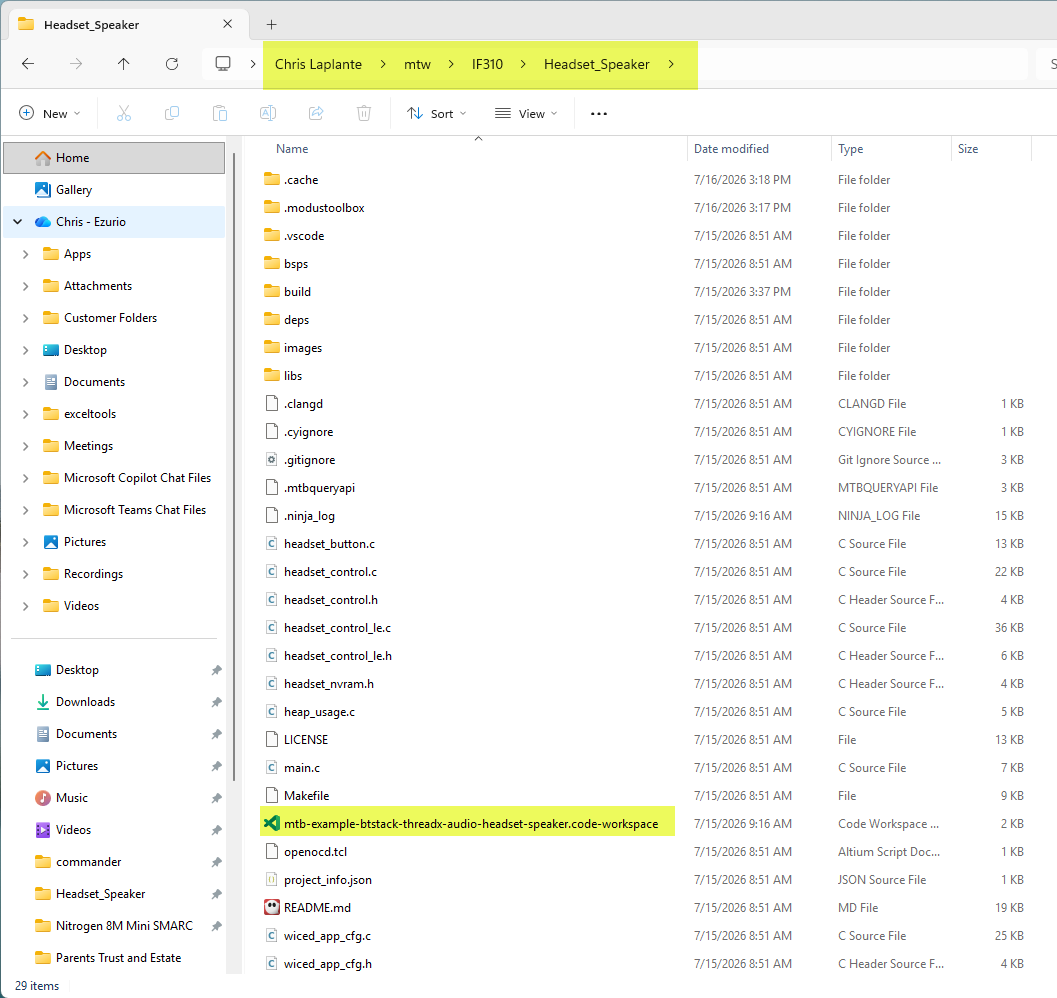
Once the application is created in ModusToolbox, go to the folder specified in the Application Root Path. Double click on mtb-example-btstack-threadx-audio-headset-speaker.code-workspace. This will open the project in VS Code automatically.
Build the Application
With the application now created you can modify, add or configure code in the application. For this application note we are using the application as is and will first build and then flash the application onto the module.
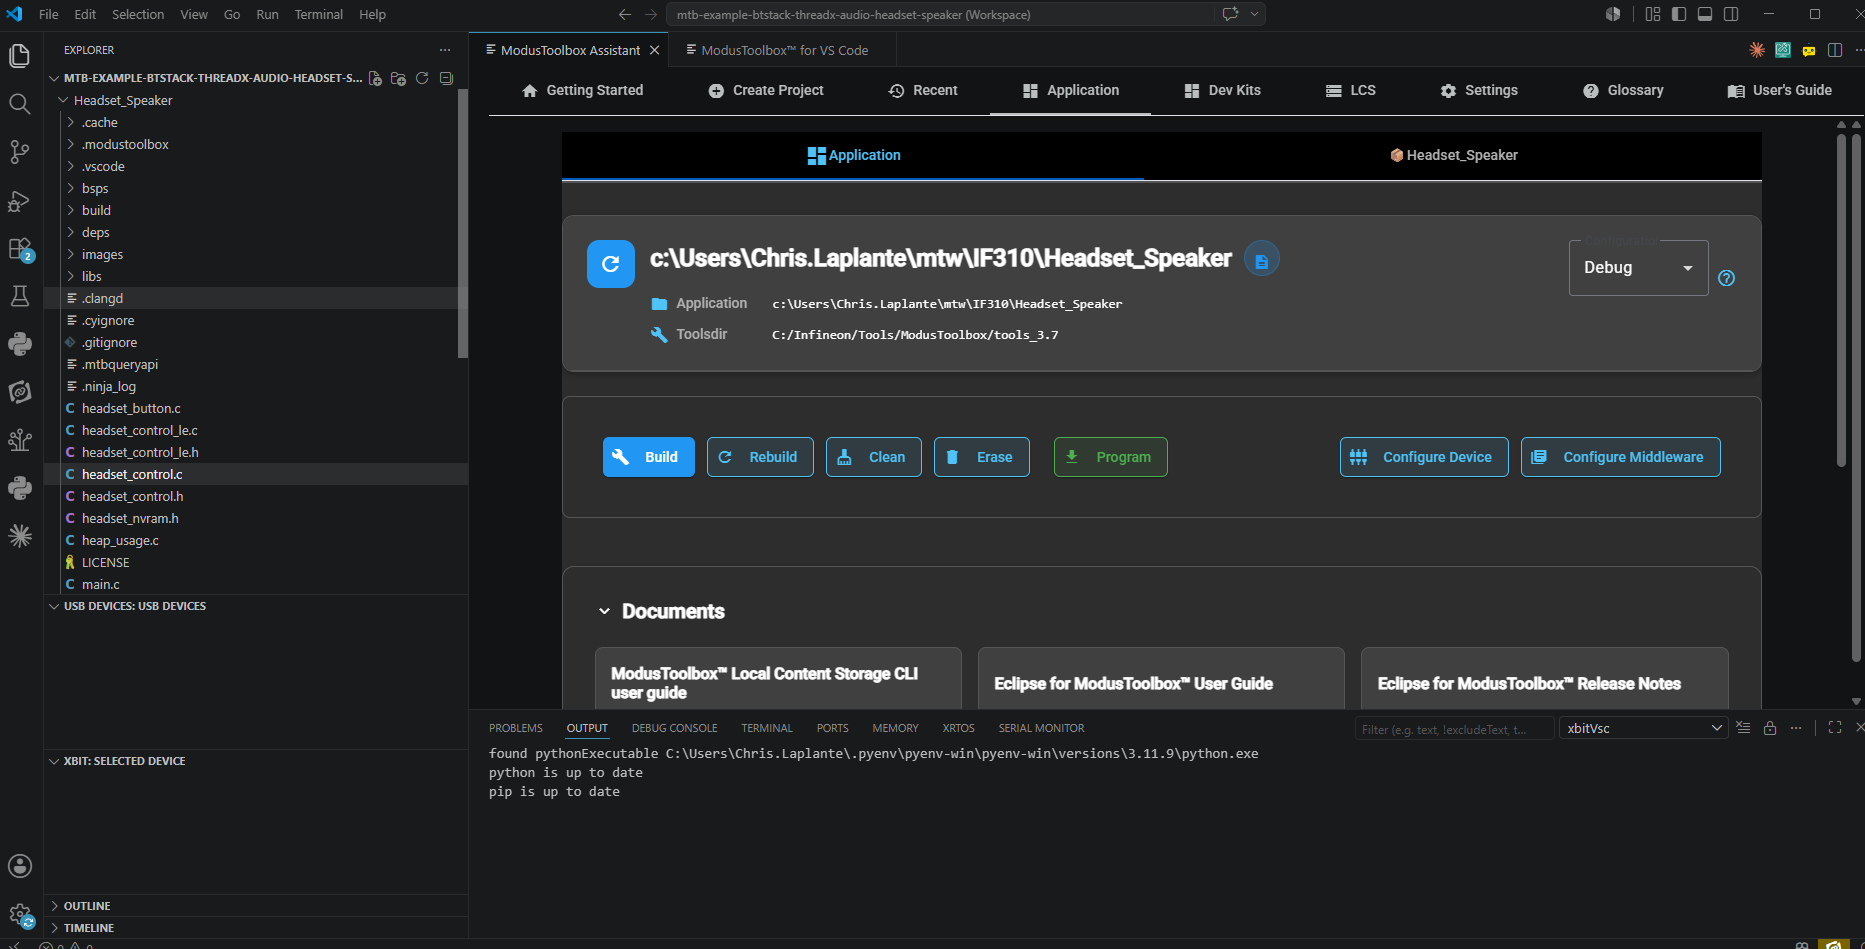
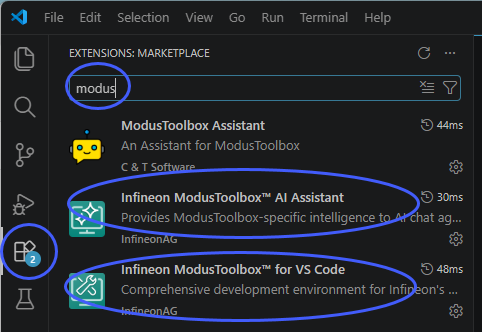
If the project doesn’t open in the ModusToolbox Assistant you will need to add the needed extensions. On the left side Toolbar click on the Extensions icon. Search for modus to see all options and install the Infineon ModusToolbox for VS Code extension as well as the Infineon ModusToolbox AI Assistant.
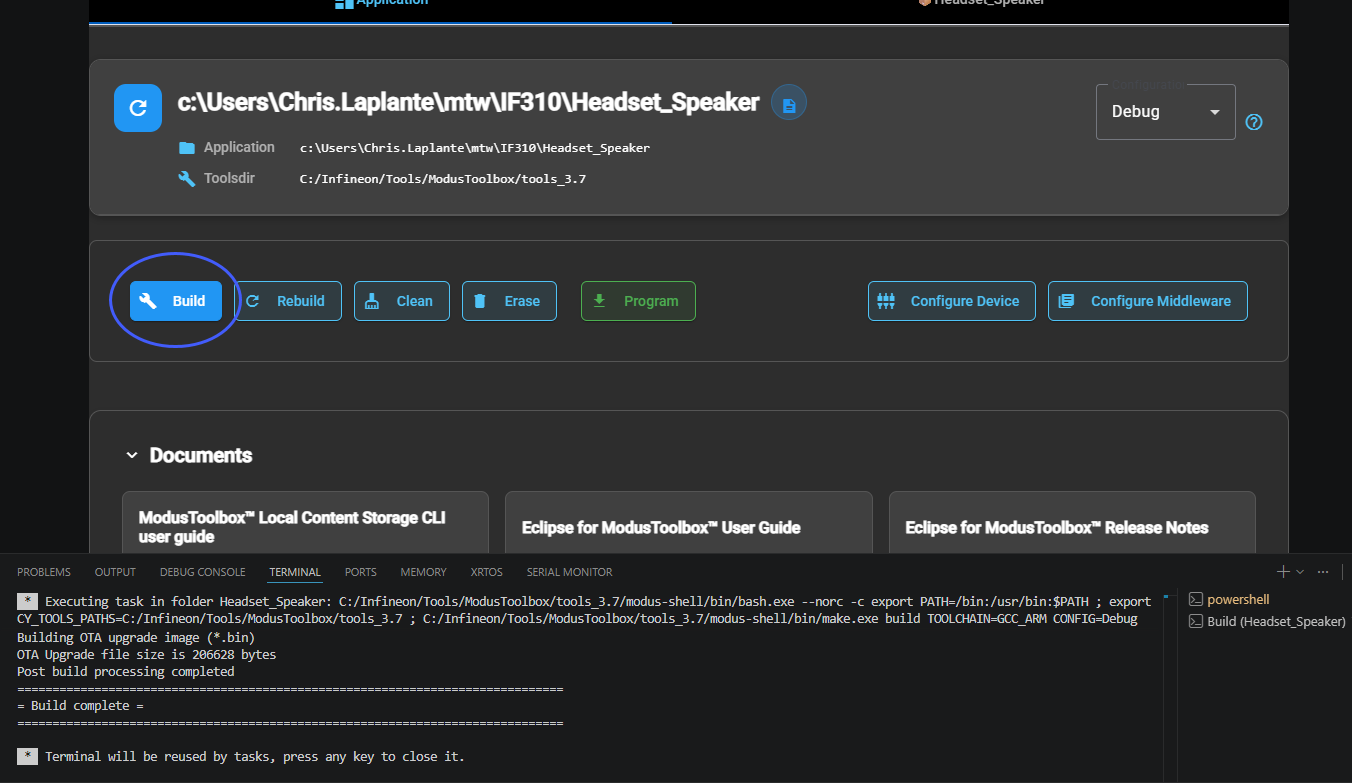
With the environment setup complete, build the application by clicking on Build.
Hardware Setup
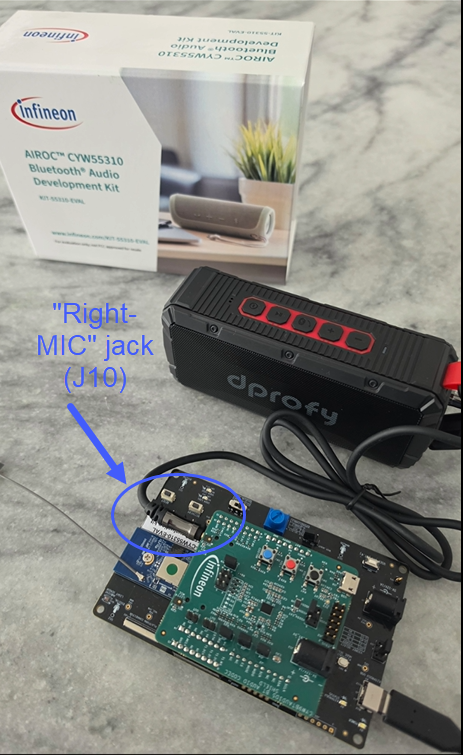
The following illustrates the setup that includes the KIT-CYW55310-EVAL and speaker. For this application the speaker/headset plugs into the "Right-MIC" jack (J10) on the codec shield board. Note that the jack (J10) is on the bottom side of the audio shield.
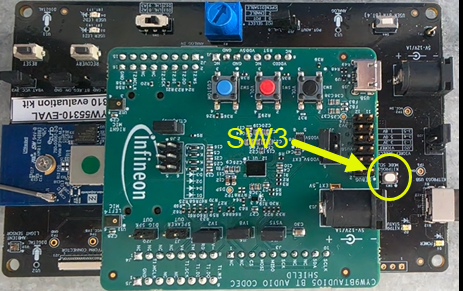
Before programming the kit, press and hold SW3 for two seconds to enable dual UART mode. This enables both the peripheral UART for COM port logging as well as the HCI UART for programming.
Flash the Application
Now with the HCI UART enabled and application built in VS Code click on the Program button in VS Code.
Audio Headset Speaker Operation
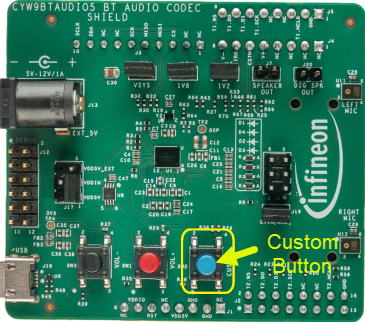
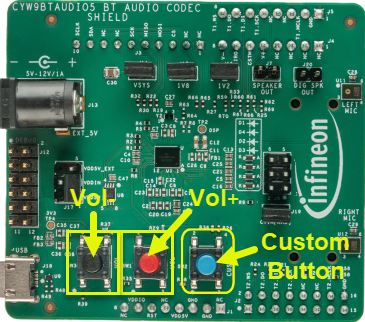
- Press and hold the Custom button for 3 seconds to start advertising and pairing mode of the headset speaker, as shown in the following figure:
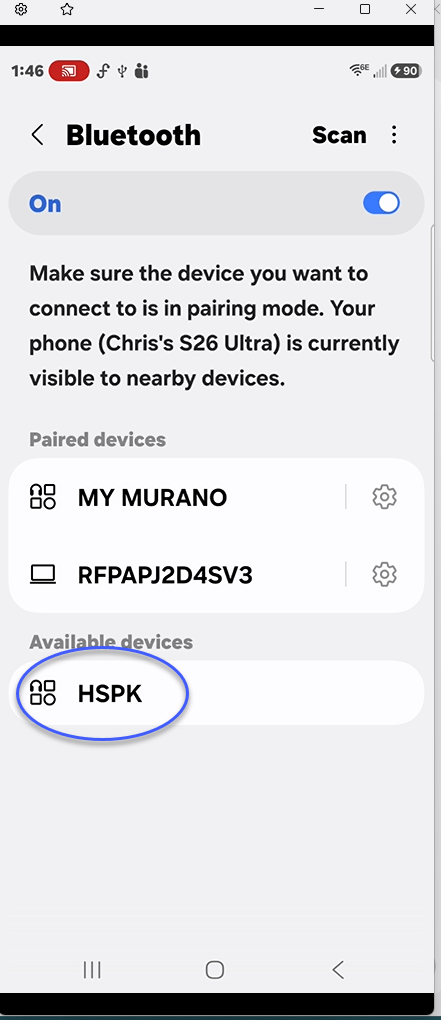
Open your mobile devices Bluetooth and scan for devices. Once HSPK is found, pair with it.
- Once paired, stream music from your phone to the headset speaker app.
Control the Volume, Start/Pause, Next Track and Last Track using the three buttons on the audio Shield.
| Button Event | Click | Long Press | Hold |
|---|---|---|---|
| Custom | Play, Pause | Accept, Reject | Discoverable |
| Vol+ | Volume up | Next Track | - |
| Vol- | Volume down | Last Track | - |
Note: For hold event, press button for more than 5 seconds.