/filters:background_color(white)/2025-07/IF9121.png)
/filters:background_color(white)/2025-07/IF913.png)
Overview
This application note demonstrates how a host processor can use the Veda IF91x SoC's AT Command interface to configure, manage, and control the device over a Serial UART connection. The guide covers everything from creating and building the AT Command application in ModusToolbox, flashing the firmware, setting up a terminal, and exercising both Wi-Fi and BLE AT commands.
Prerequisites
- Veda IF913 Development Kit (e.g., Infineon CYW95913EVK) — IF913 DVK
- ModusToolbox v3.2 or Later — ModusToolbox
- AT Command Application — AT Command
- Microsoft Visual Studio Code (or another supported IDE)
- A serial terminal application (e.g., UwTerminalX, PuTTY, Tera Term)
- USB-C cable
Step 1: Create the AT Command Application Project
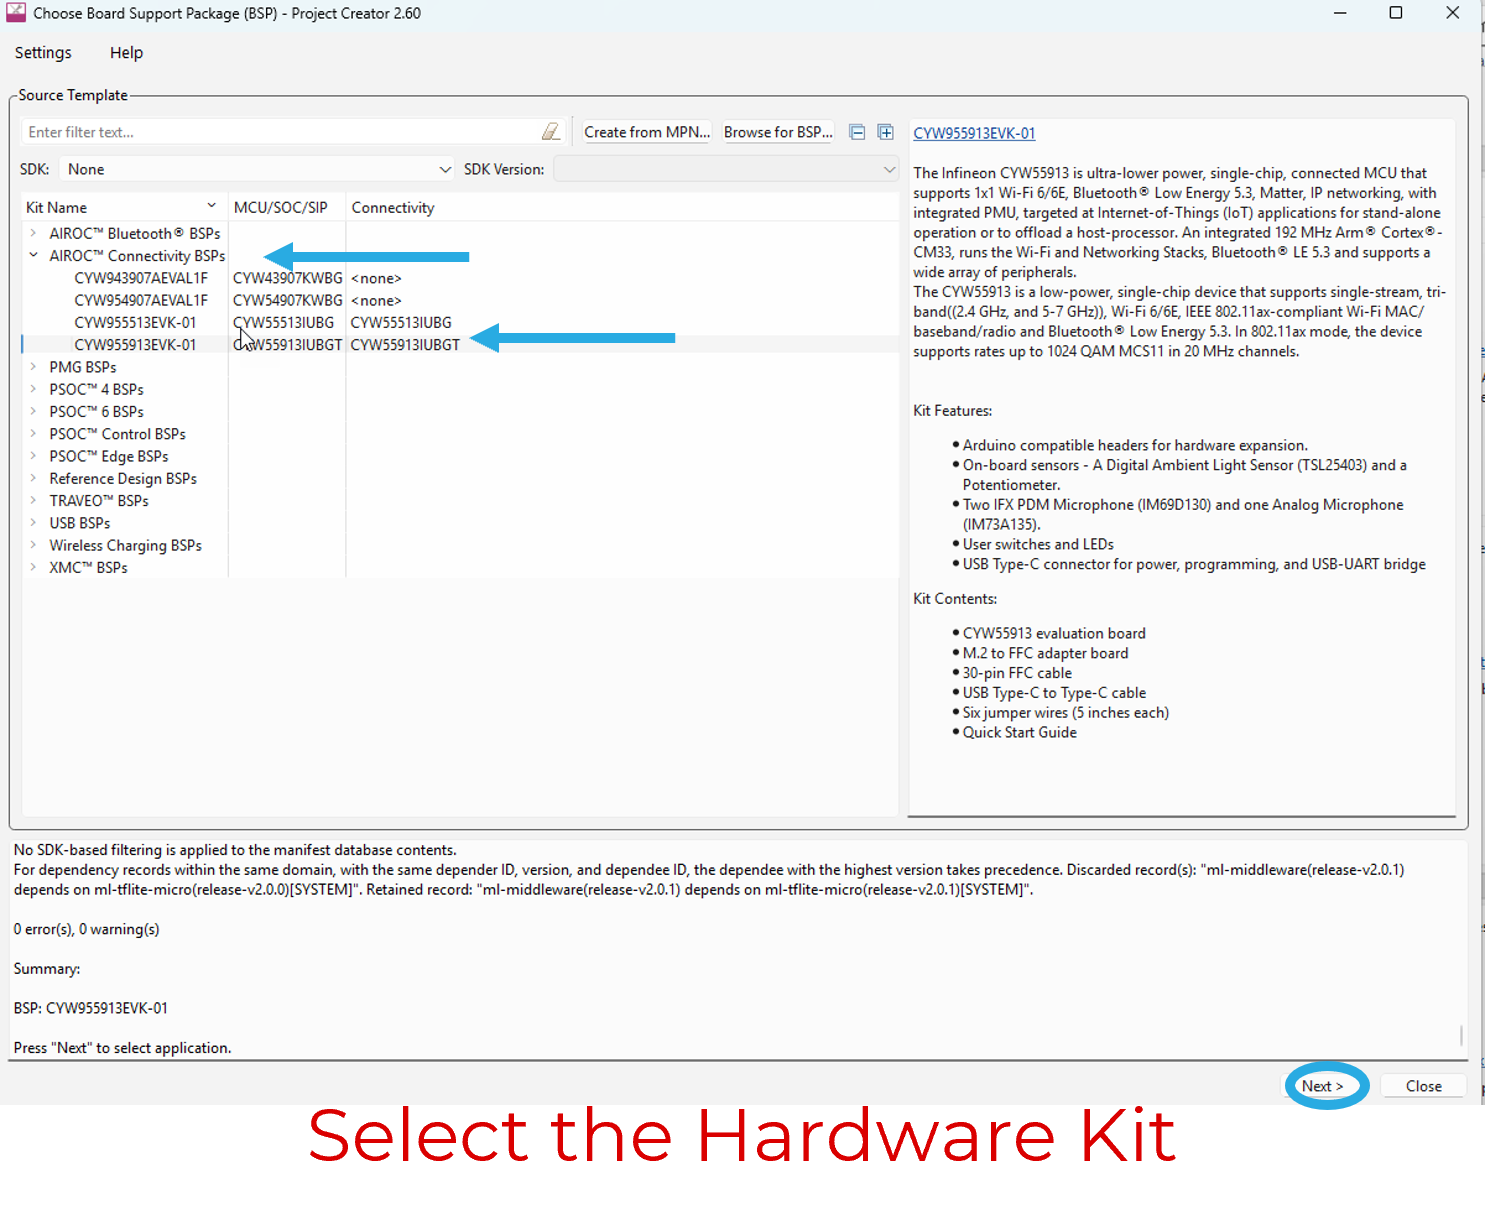
Launch Project Creator and Select Hardware Kit
Open the ModusToolbox Dashboard and launch the Project Creator.

From the AIROC Connectivity BSPs, select the BSP for the IF91x Development Kit (e.g., the Infineon CYW95913EVK) and click Next.
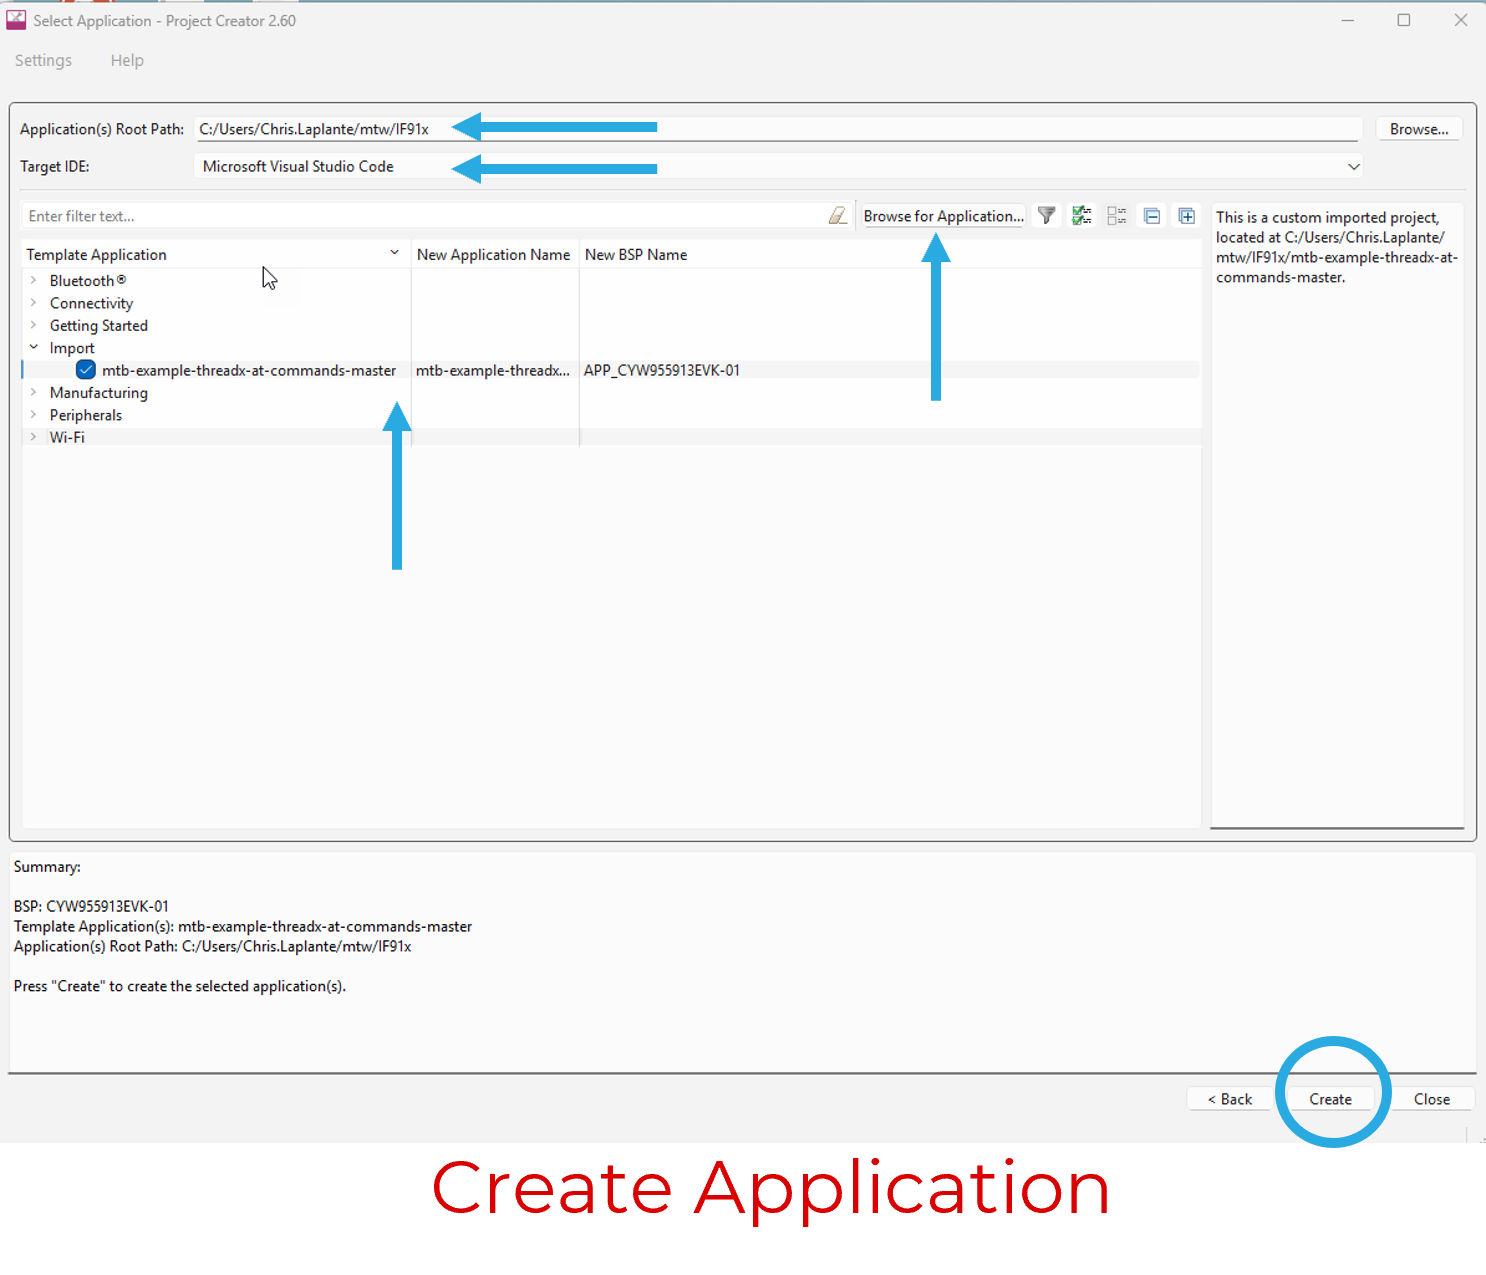
Configure the Project
- Enter the path to your project workspace (typically
Users/mtw). Select the Target IDE. Supported options include:
- Eclipse for ModusToolbox
- Microsoft Visual Studio Code
- IAR Embedded Workbench
- ARM Keil MDK
For this guide, select Microsoft Visual Studio Code.
- Browse to the location of the at-commands application and check it to import.
- Click Create.
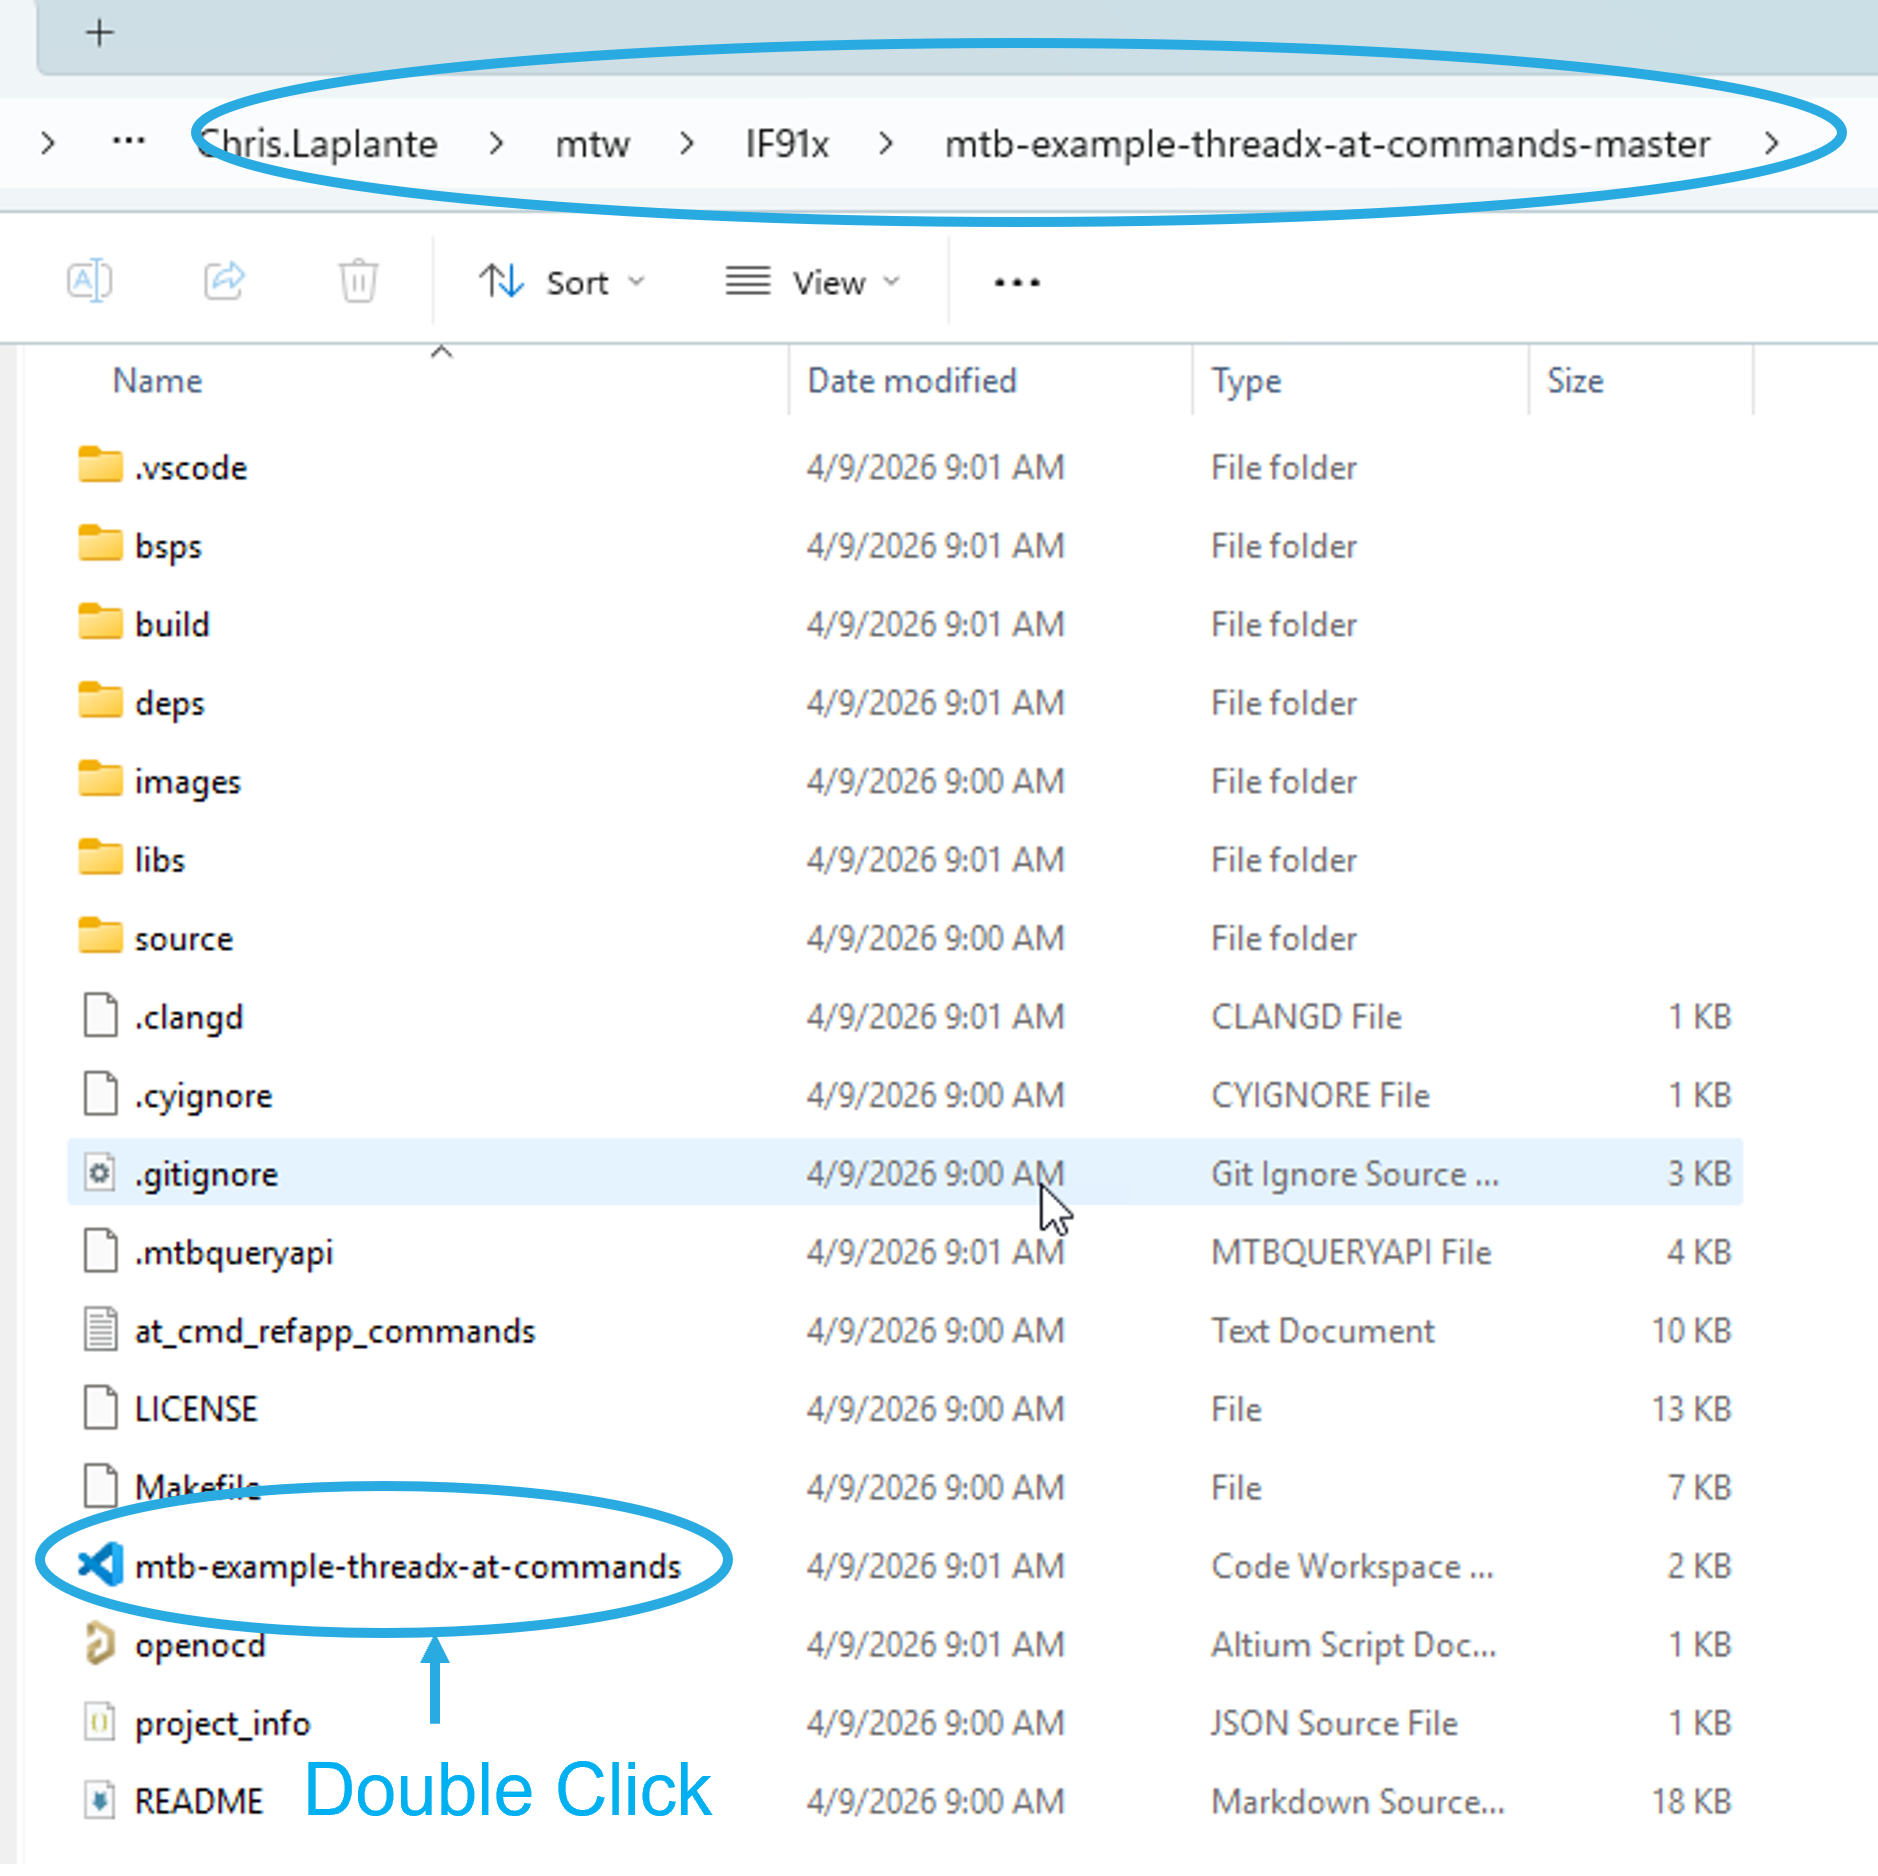
Step 2: Verify the Project
Once the project is created, navigate to the workspace location specified creating the board support package and confirm the project files are present. You will see a Code Workspace file for Visual Studio Code — double-click it to open the project directly in VS Code.
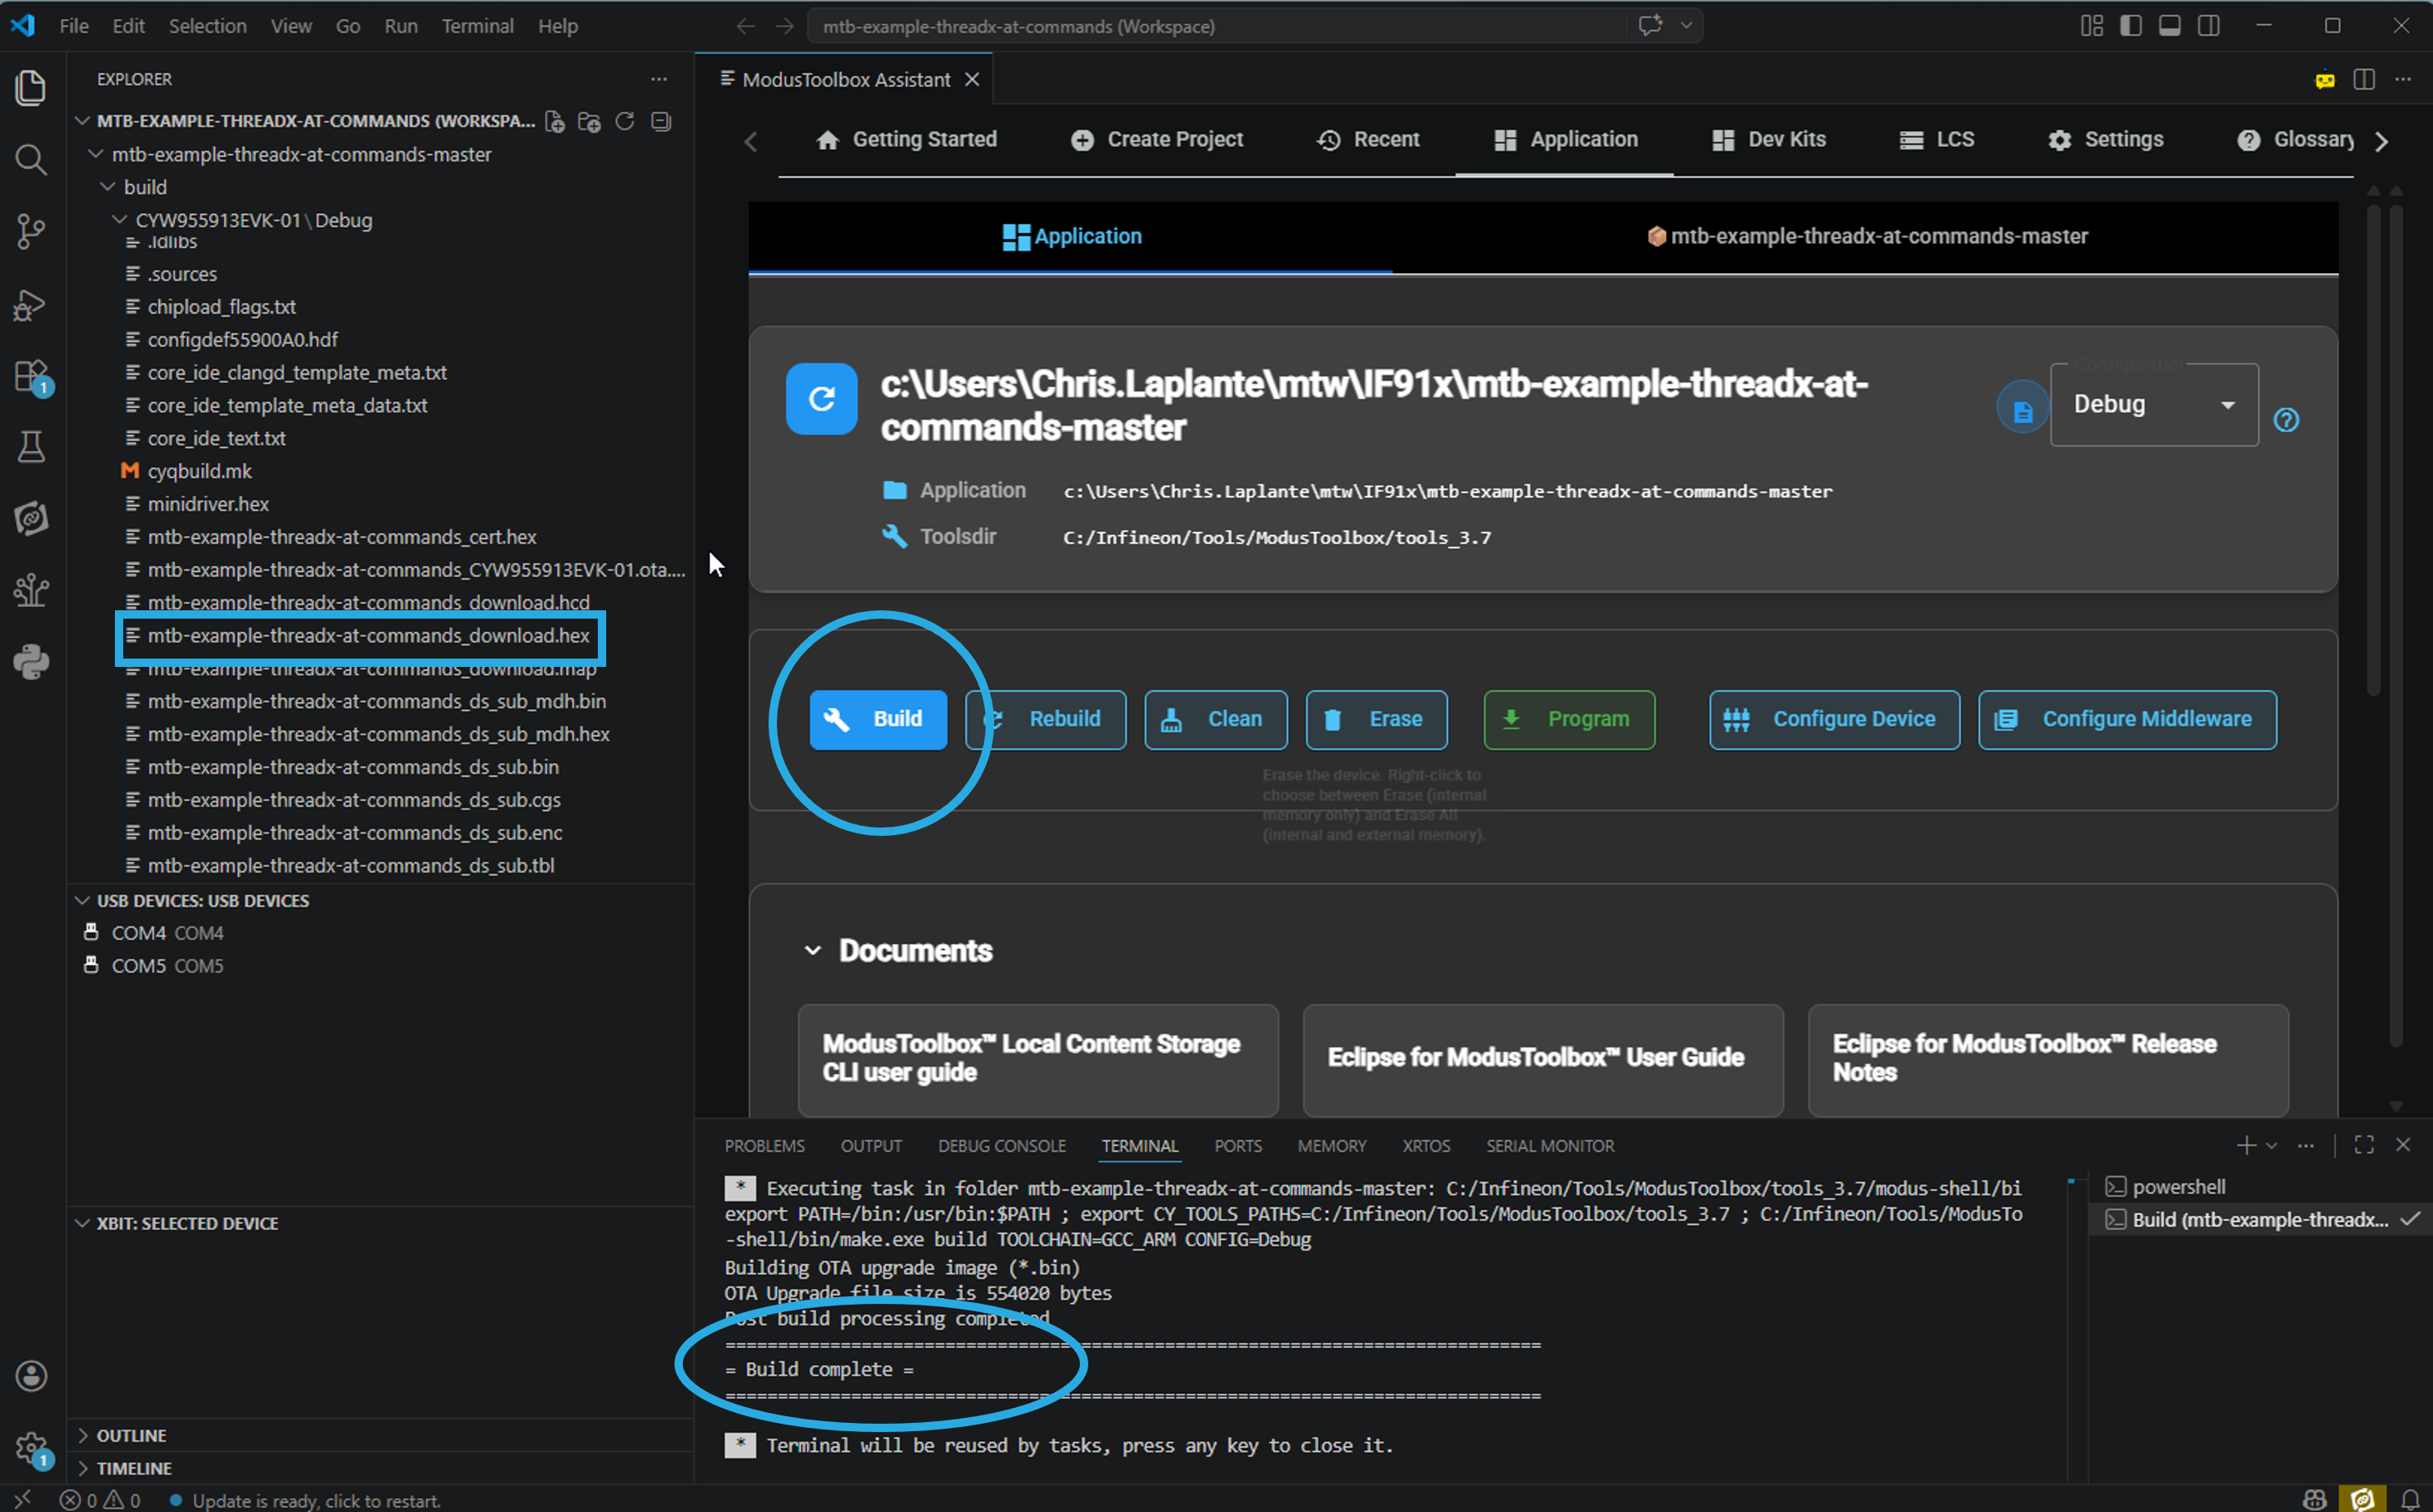
Step 3: Build the AT Command Application
With the project open in Visual Studio Code, click Build.
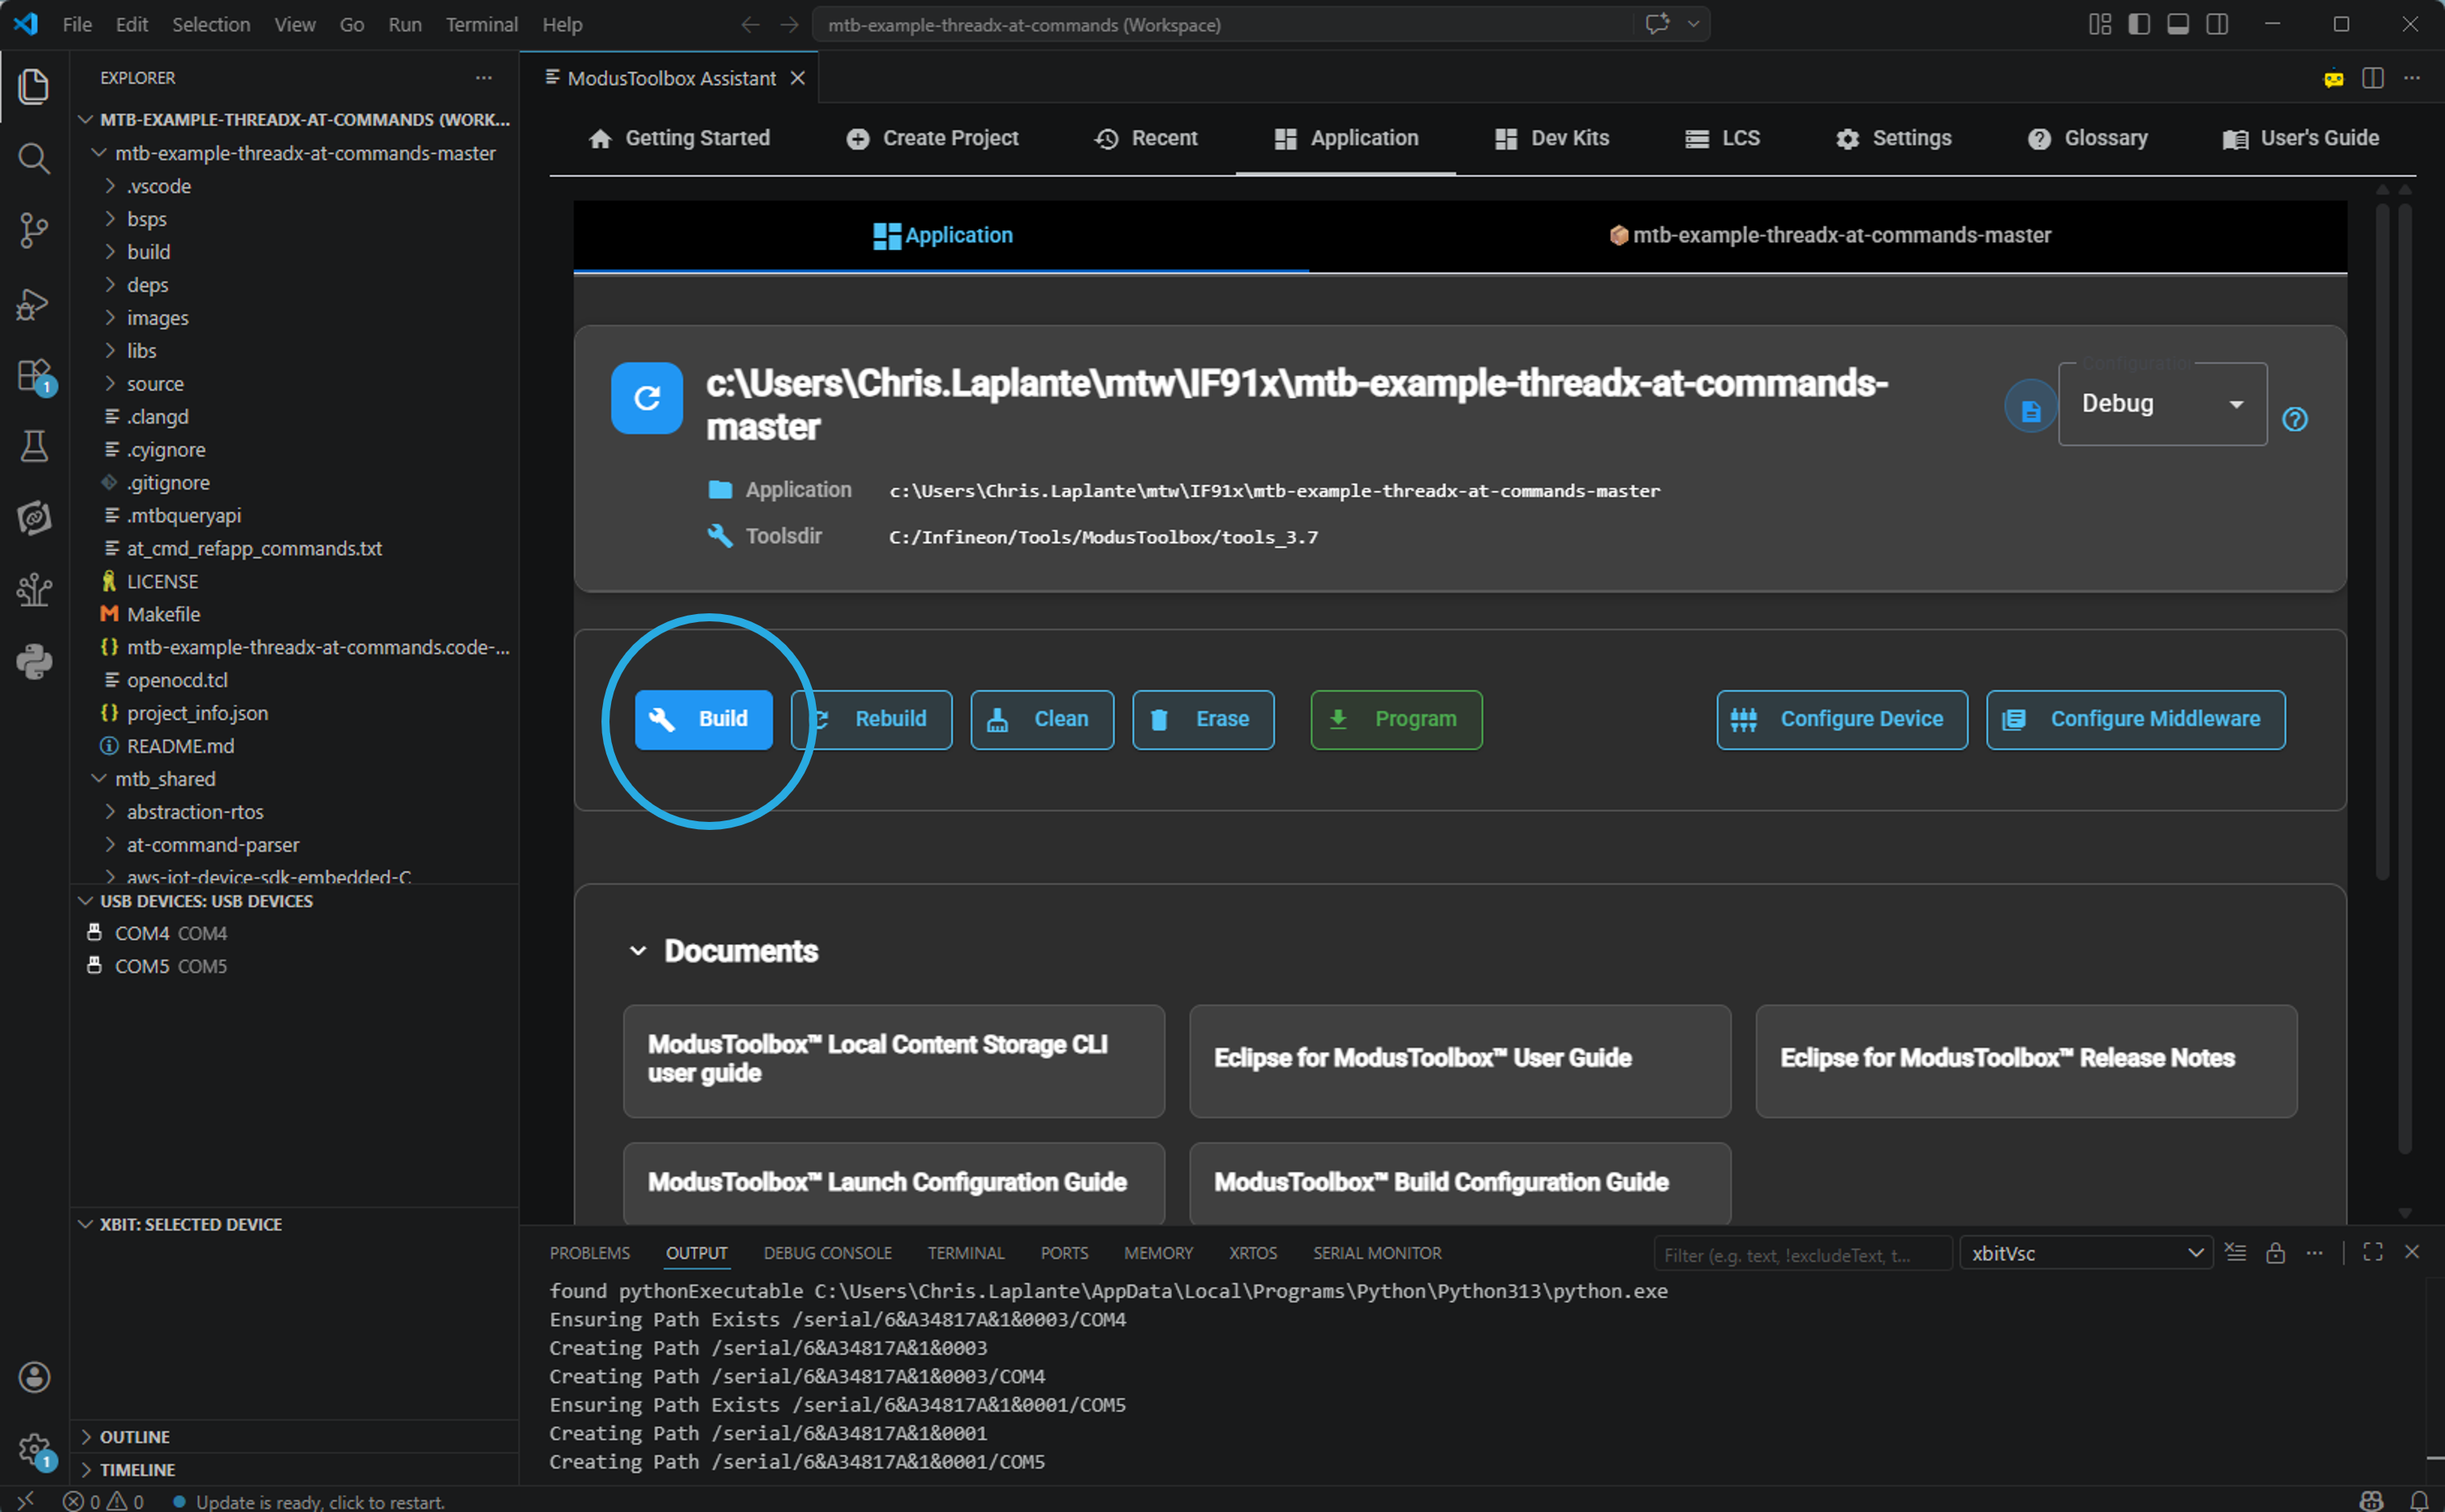
When the build completes successfully, the project's build directory will contain the binary files needed to program the AT Interface application onto the Veda IF91x.
Step 4: Place the DVK in Boot Recovery Mode
Before flashing, the Veda IF91x must be placed into Boot Recovery mode.

- Green box (left) — Boot Recovery button
- Green box (right) — Reset button
- Blue box (bottom) — USB-C port
Procedure:
- Connect the IF913 Development Kit to your computer via the USB-C port.
- Press and hold the Boot Recovery button.
- While holding Boot Recovery, press and release the Reset button.
- Release the Boot Recovery button — the device is now in bootloader mode.
Step 5: Flash the AT Command Application
With the device in boot recovery mode, click Program in Visual Studio Code.
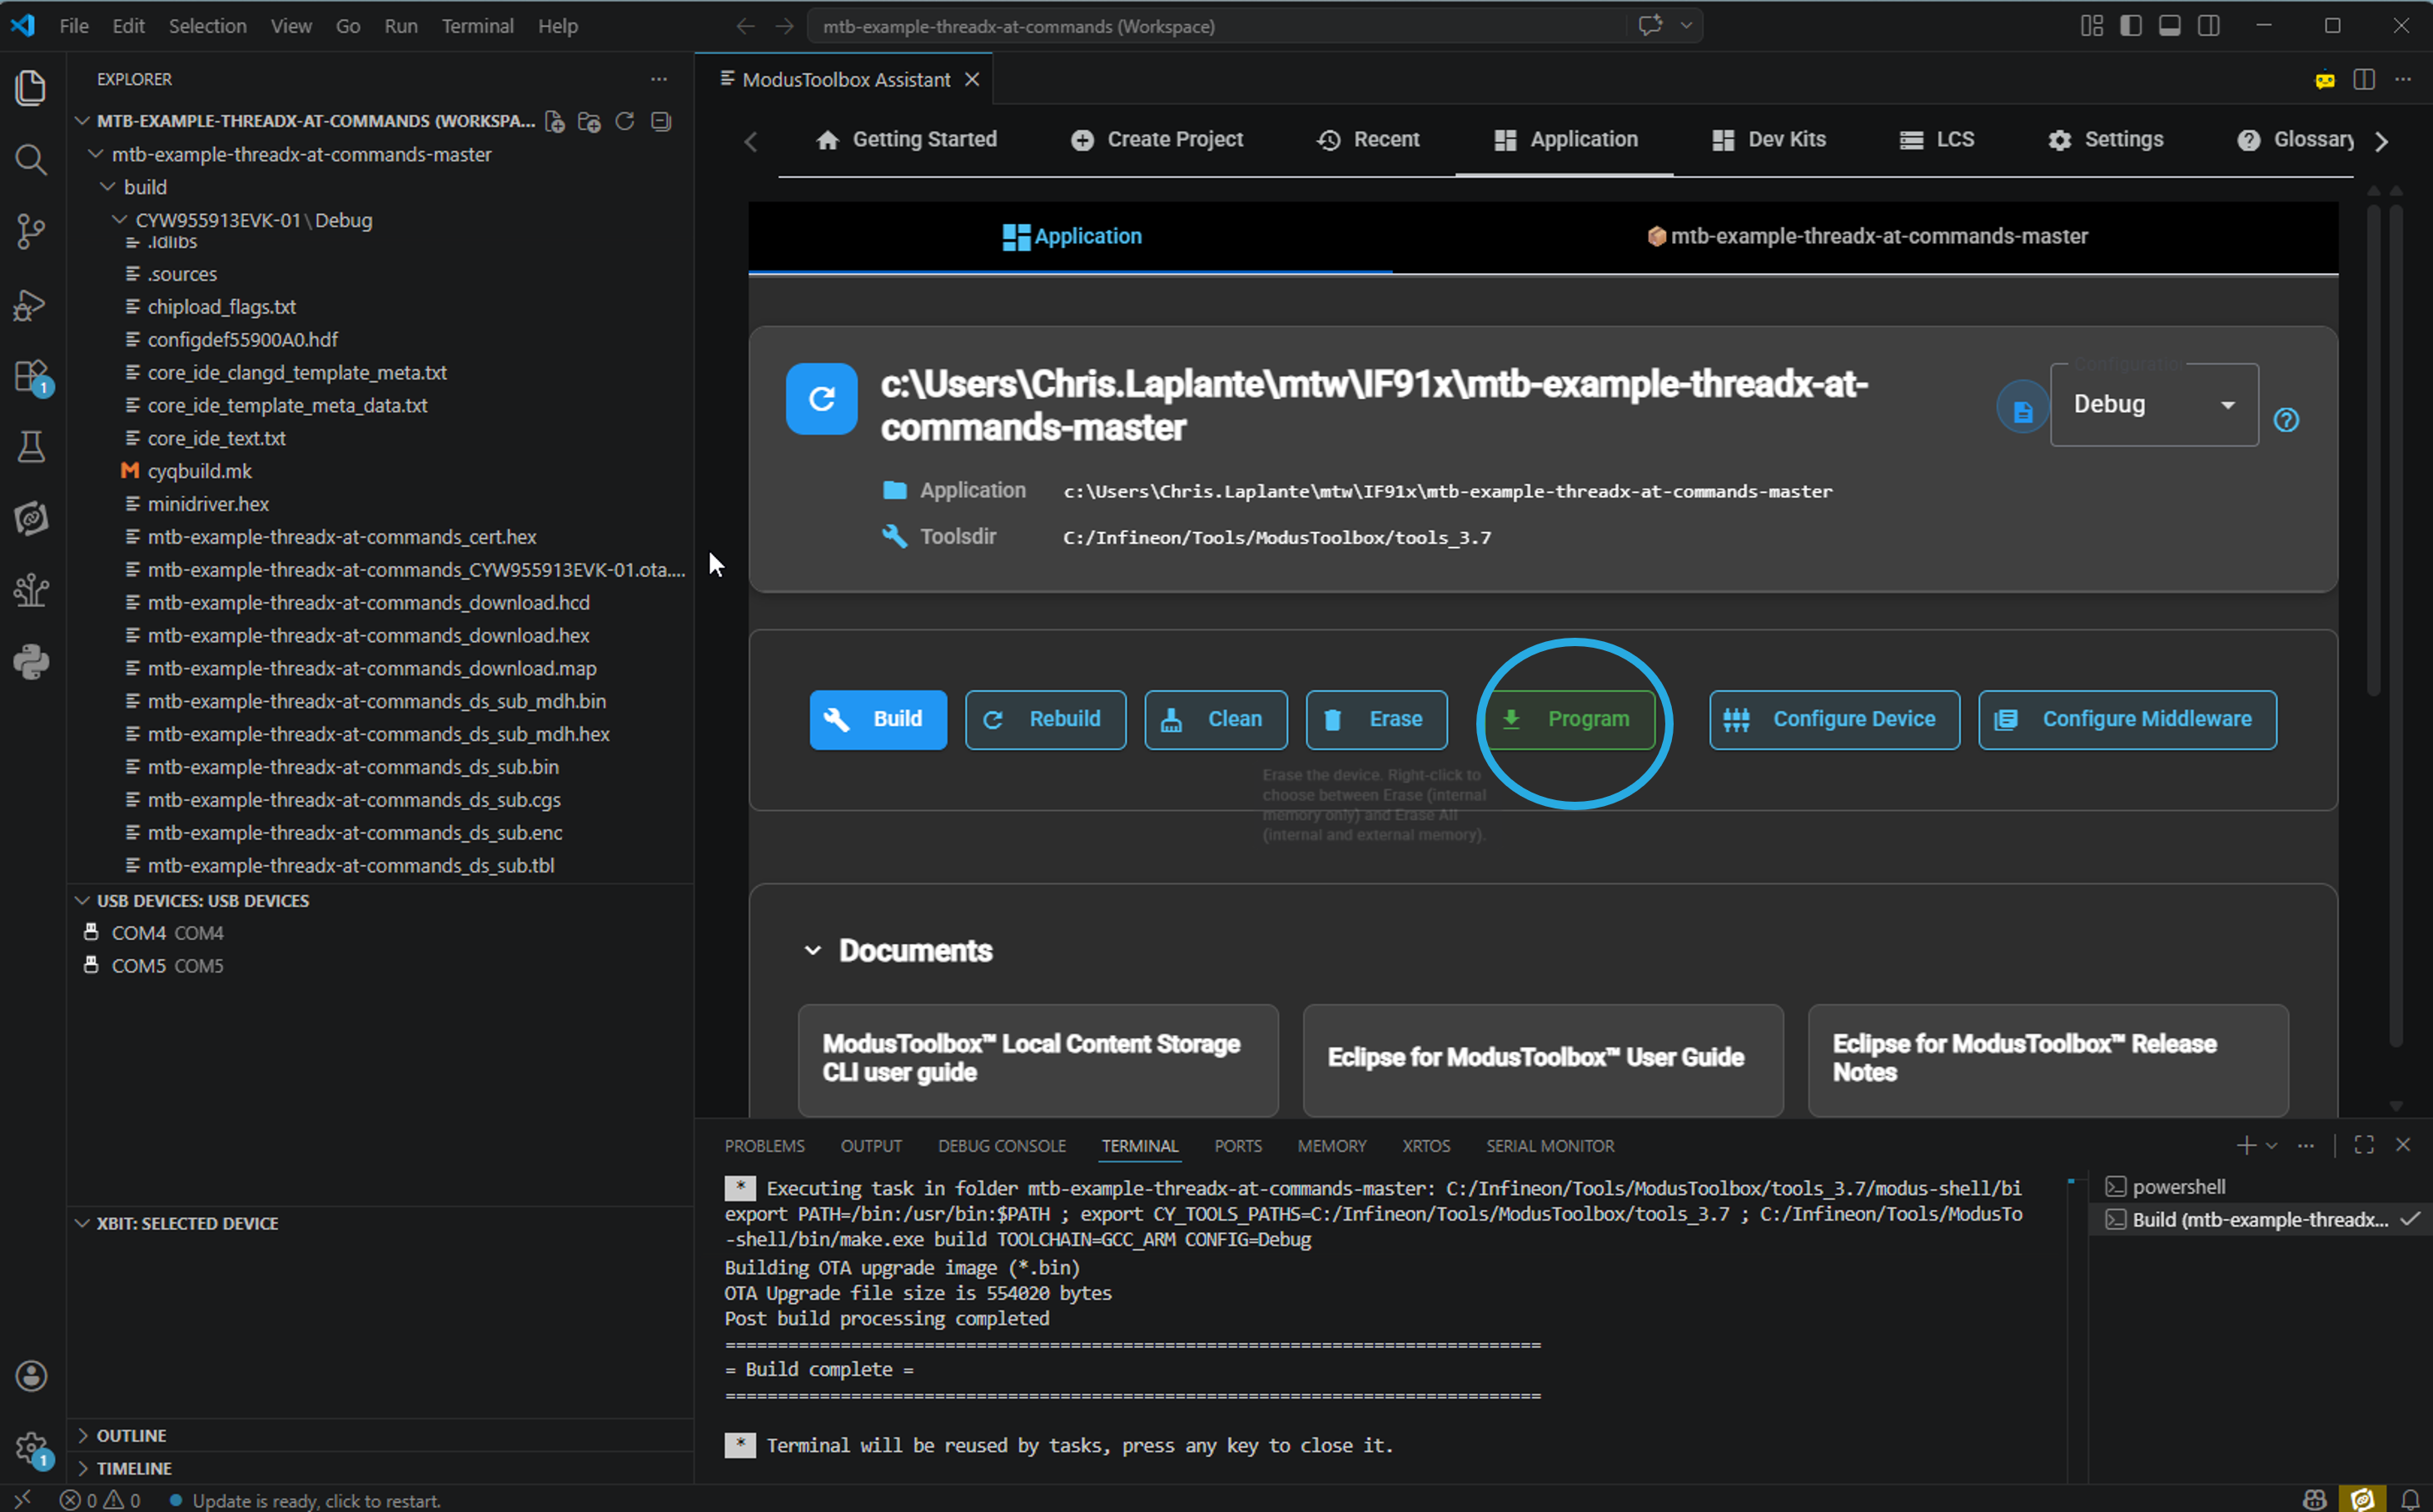
Your board is now programmed and ready to use.
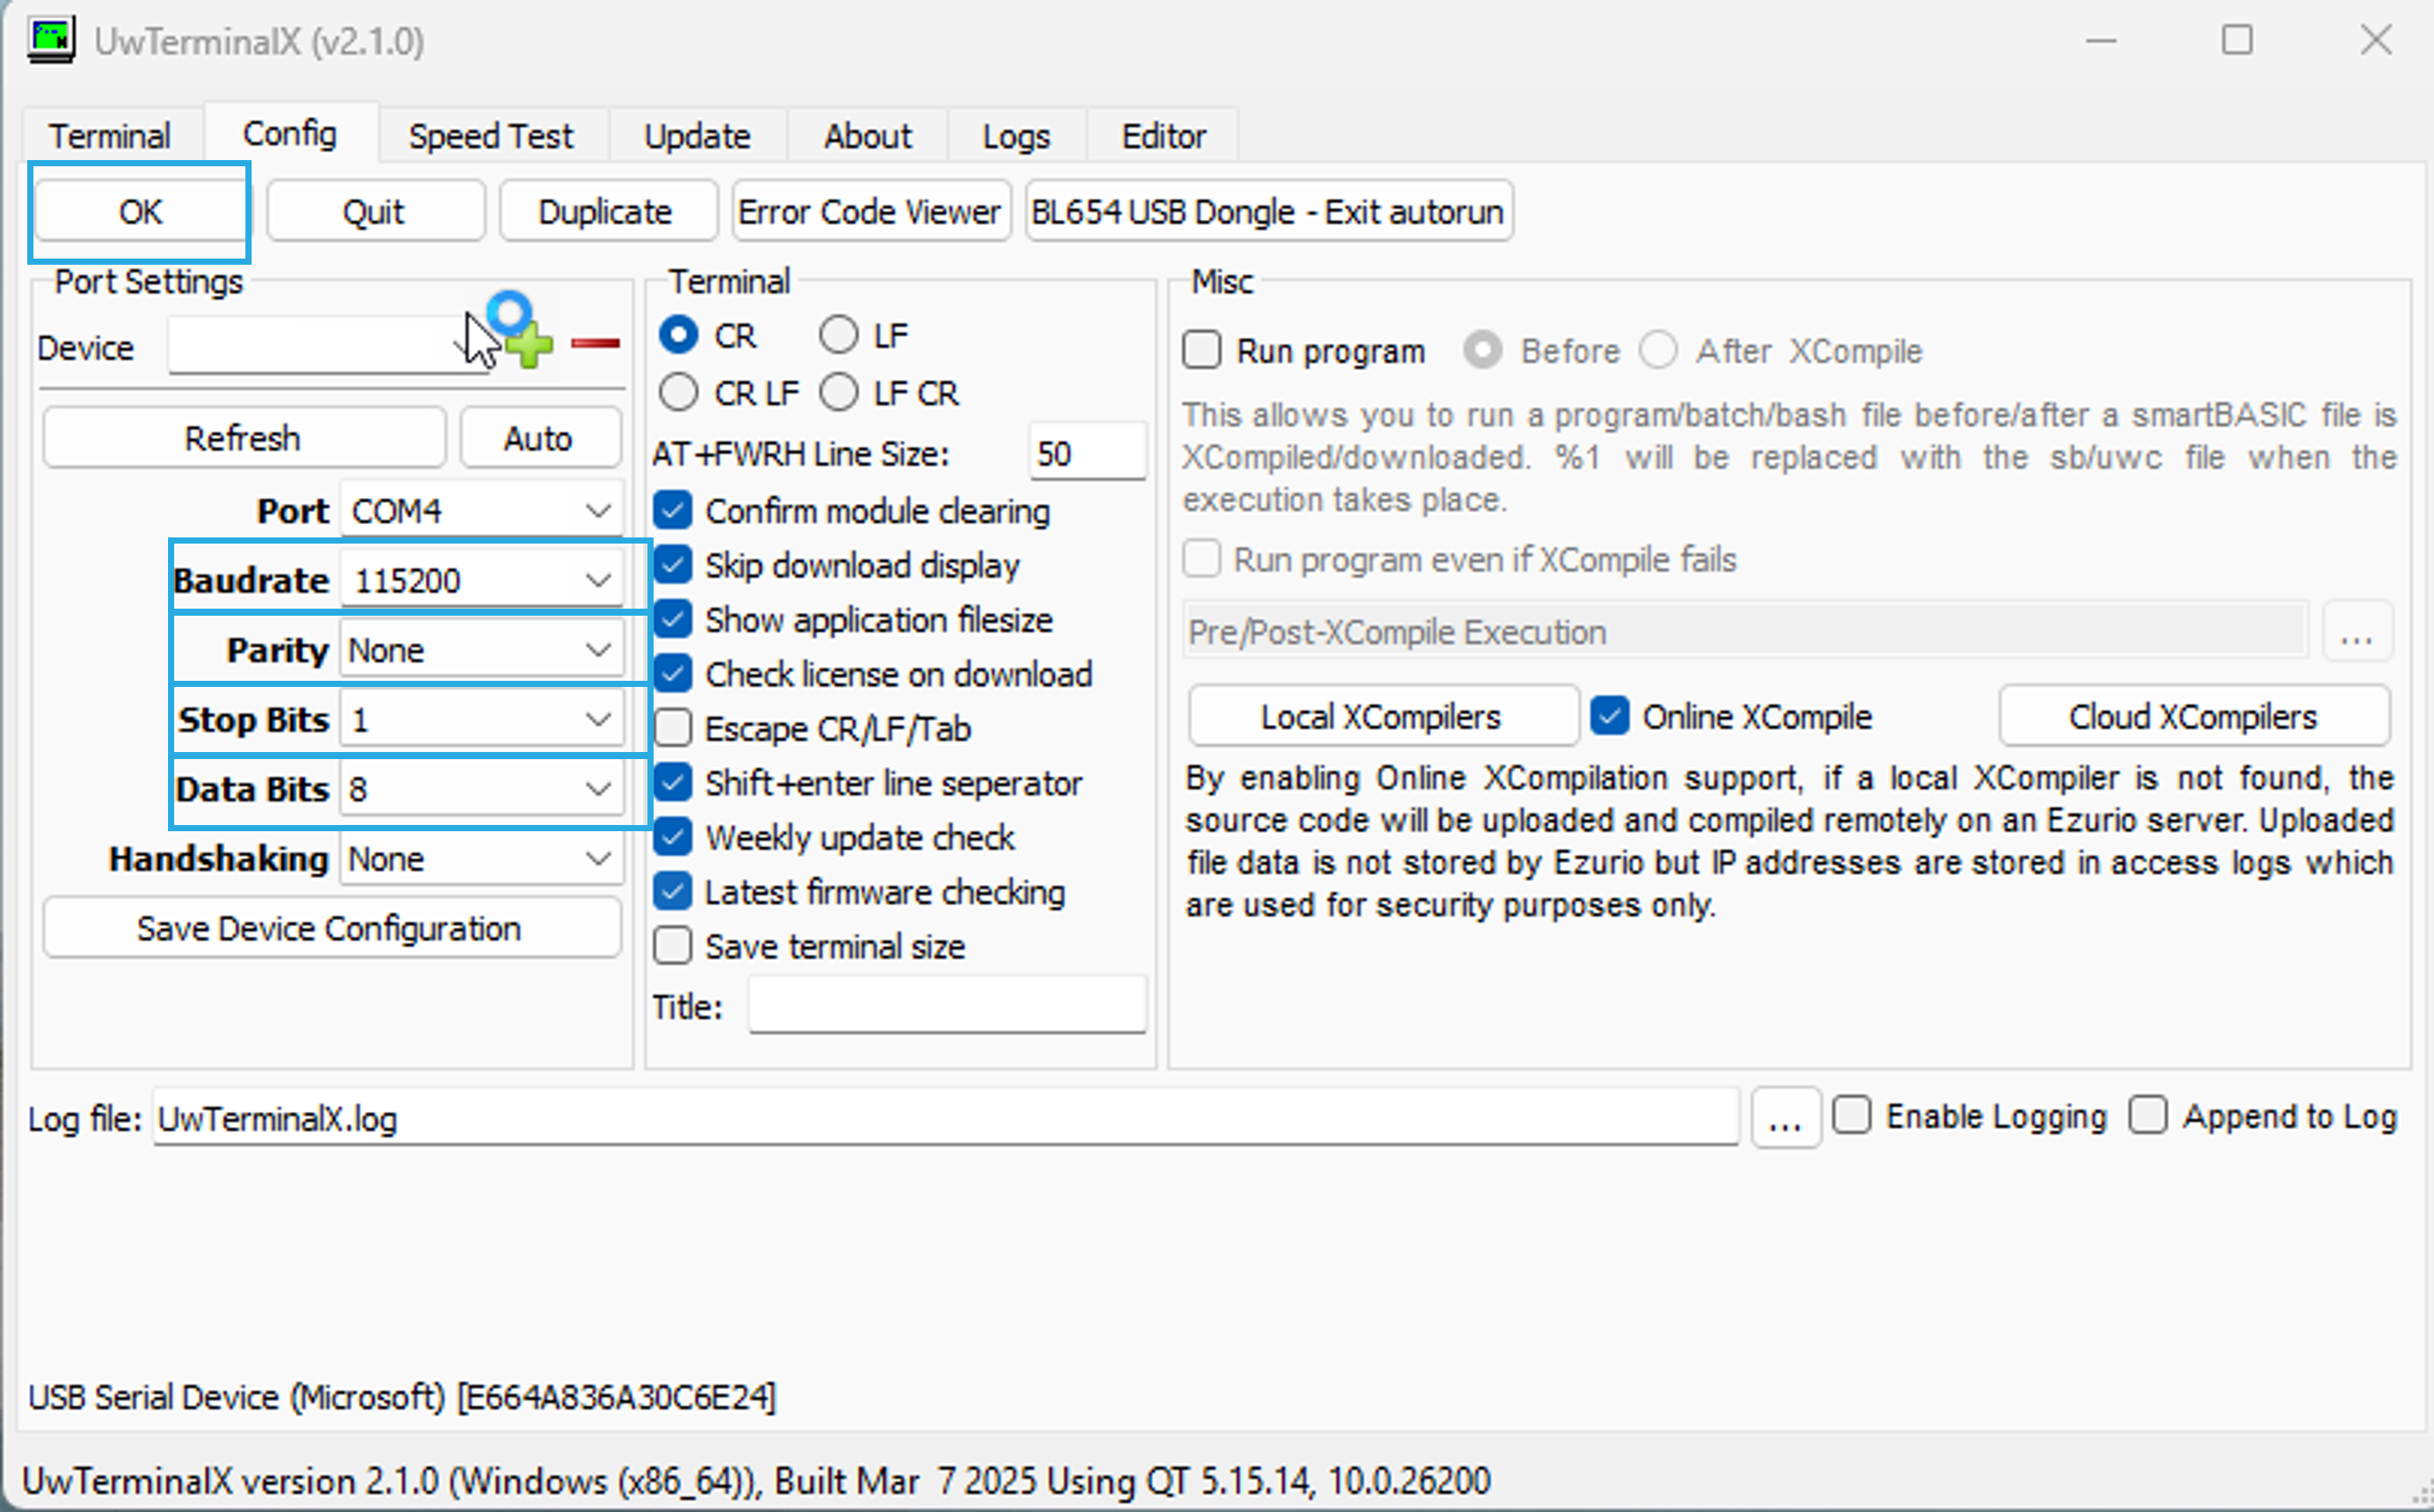
Step 6: Configure the Terminal Application
Open your preferred serial terminal application (UwTerminalX is shown here) and configure the port with the following settings:
| Parameter | Value |
|---|---|
| Data Bits | 8 |
| Parity | None |
| Stop Bits | 1 |
| Baud Rate | 115200 |
Step 7: Reset and Start the AT Interface Application
With the terminal application open and connected:
- Press and release the Reset button on the DVK.
- The AT Interface application will start running.
- Observe the startup messages on the serial terminal.
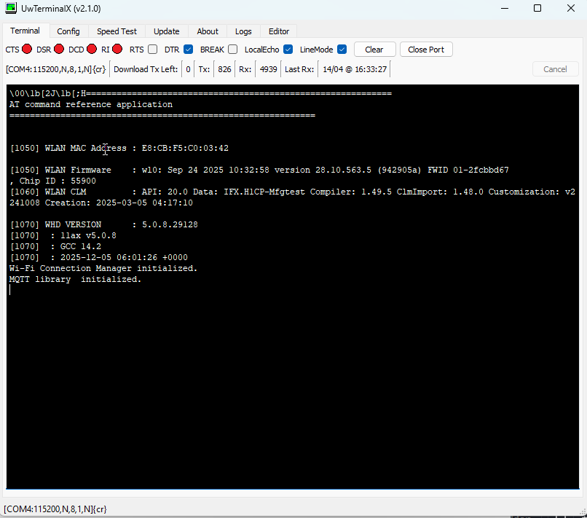
Step 8: Enter AT Commands
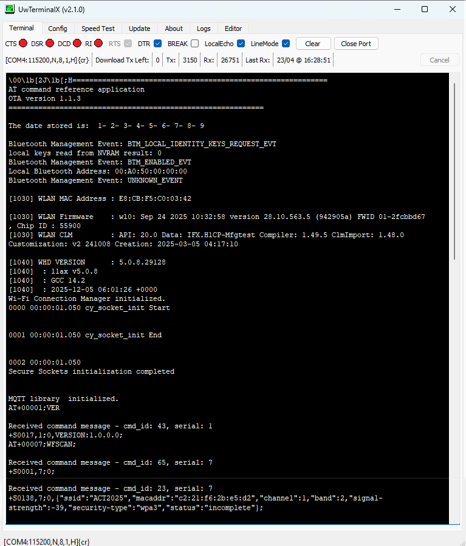
Once the application is running, the terminal will display the full startup log including Bluetooth and WLAN subsystem initialization. This confirms the AT command interface is active and ready.
See what firmware version is programmed on the module:
AT+00001;VERScan for nearby Wi-Fi networks:
AT+00007;WFSCAN;The terminal will display a list of discovered access points with their SSID, MAC address, channel, band, signal strength, and security type.
Step 9: AT Commands — Wi-Fi
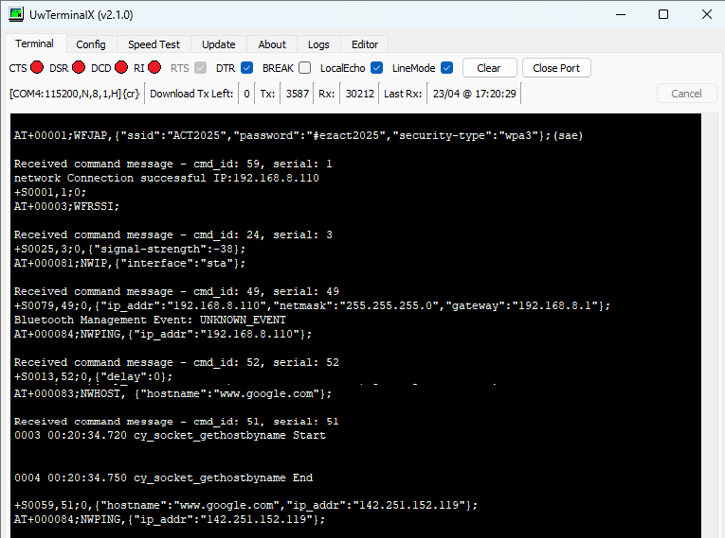
Issue the following sequence of AT commands to connect to an access point, verify the connection, and test network reachability:
Connect to an access point:
AT+00001;WFJAP,{"ssid":"<SSID>","password":"<password>","security-type":"wpa3"};(sae)Check signal strength (RSSI):
AT+00003;WFRSSI;Set network interface to station mode:
AT+000081;NWIP,{"interface":"sta"};Get a host IP Address by name:
AT+000083;NWHOST,{"hostname":"www.google.com"};Ping by IP address:
AT+000084;NWPING,{"ip_addr":"142.251.152.119"};The terminal will confirm a successful connection, report the assigned IP address, and show the ping round-trip results.
Step 10: Enter AT Commands — BLE
Get the BLE name of the Veda IF913, start advertisements, and monitor events:
AT+0000131;BLENAME;
AT+0000132;ADVSTART;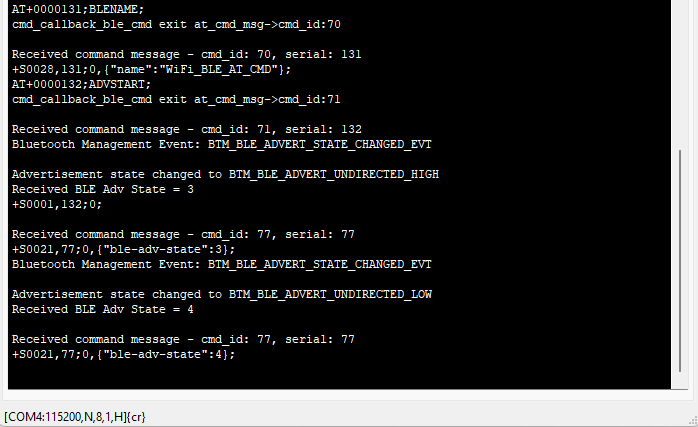
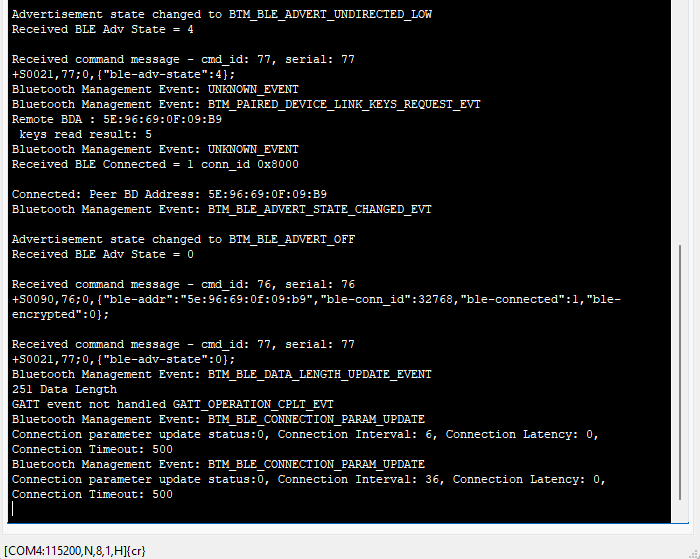
After a BLE connection is established from an external Central device, observe the connection parameters (interval, latency, timeout) reported in the terminal.
Additional commands:
Get BLE device info:
AT+0000135;BLEINFO;Get BLE RSSI:
AT+0000136;BLEGRSSI;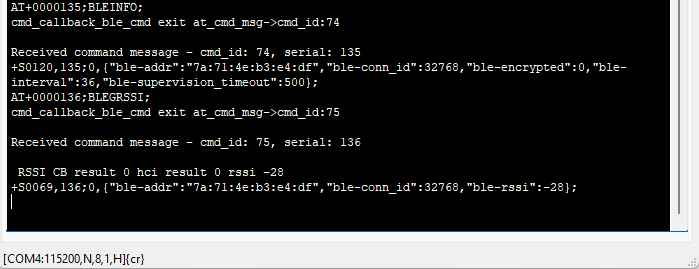
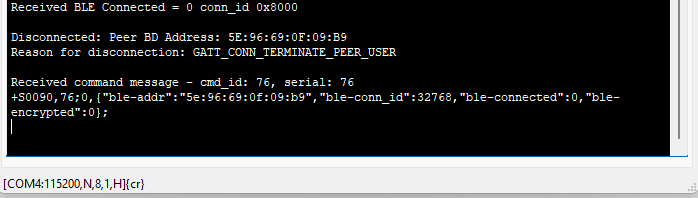
Step 11: BLE Disconnect
When the BLE Central device disconnects from the Veda IF913, note the messages and reason for the disconnection.
Step 12: Disconnect from the Wi-Fi Access Point When Finished
To terminate the connection with the Wi-Fi Access Point enter the following AT Command:
AT+00002;WFQAP;
Summary
This application note has walked through the full workflow for using the Veda IF913's AT Command interface:
| Step | Action |
|---|---|
| 1 | Create the AT Command application in ModusToolbox Project Creator |
| 2 | Verify the project workspace in the file system |
| 3 | Build the application in Visual Studio Code |
| 4 | Place the DVK in Boot Recovery mode |
| 5 | Flash the binary via the Program button |
| 6 | Connect a serial terminal at 115200 baud, 8N1, with Local Echo enabled |
| 7 | Reset the DVK and observe startup messages |
| 8–9 | Use AT commands to scan for Wi-Fi APs, connect, and test network reachability |
| 10 | Use AT commands to exercise BLE advertisement and connection |
| 11 | BLE Central device Disconnect |
| 12 | Use AT commands to disconnect from the WiFi Access Point |
The AT Command interface provides a simple, well-defined mechanism for a host MCU or development system to drive all major wireless functions of the IF913 without requiring direct access to the wireless stack.
For further information, refer to the official Infineon AIROC CYW5591x AT Command Application User Manual.